| ID |
Date |
Author |
Category |
Type |
Subject |
|
73
|
Thursday, November 28, 2024, 09:04 |
Adam Newsome | Hot Cell 1 | Repair | Hot Cell turntables not rotating, access hatch not moving | It was reported that the hot cell turntables would not rotate and the access hatch could not be operated. The turntables' elevation motion was working normally, and other cell functions were working.
Upon investigation, after going online with the PLC and checking the interlocks for the turntable, it was determined that motion was being prevented because the turntables were in the "critical position" in which they could interfere with the access hatch raising/lowering. However, the access hatch was fully closed, so this logic should not have been actively preventing motion. After inspecting the target access hatch limit switches, it was determined that the upper limit switch's Normally Open contacts were behaving normally, but the Normally Closed ones were not. When the switch was toggled, the NO contacts did not switch over. Thus, the sensor was in an unknown state causing conflicting logic in the PLC (the program thought the access hatch was in an intermediate state between opened and closed, thus preventing motion... and the access hatch could not move because the turntables were in the "critical position"). After testing the switch multiple times, jiggling the wiring/contacts, and rewiring one of the screw terminals, the NO contacts started working normally again. It is suspected that a wire was loose.
The issue has been resolved and tested - the access hatch logic is functioning regularly and both turntables can fully rotate and elevate. |
|
74
|
Friday, November 29, 2024, 15:23 |
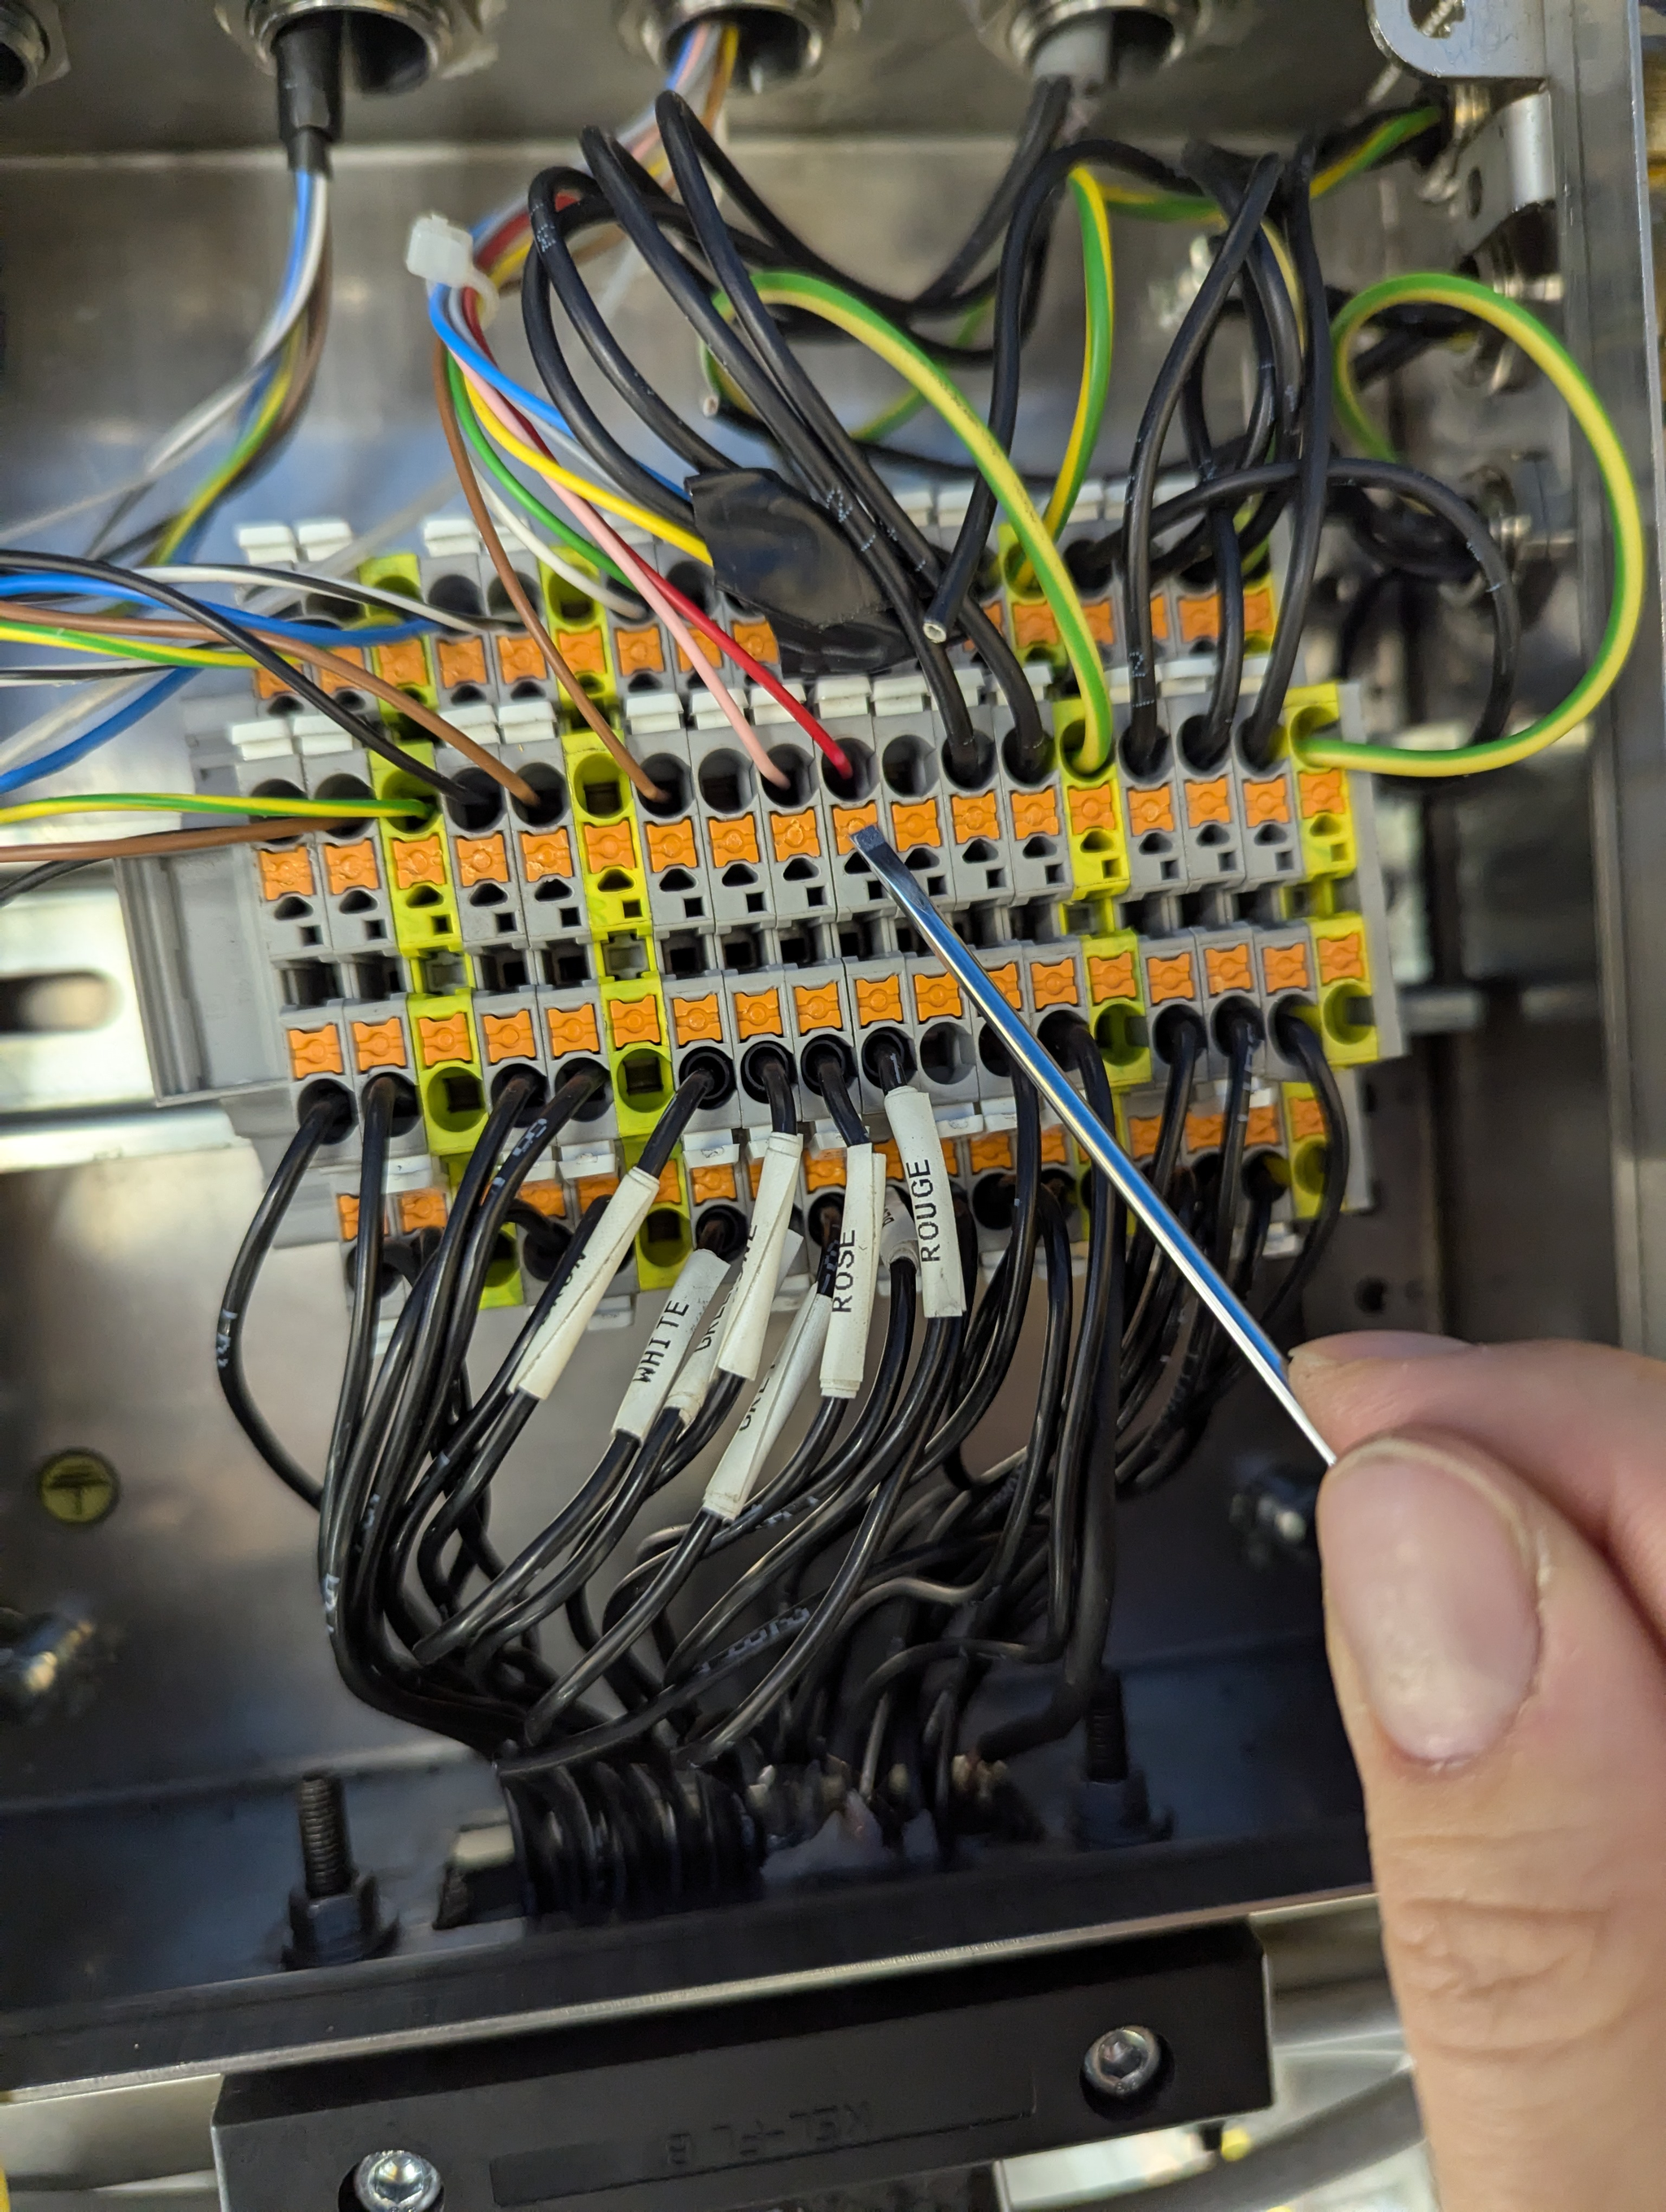
Adam Newsome | Hot Cell 1 | Maintenance | 1000 kg crane: y axis position display not functioning | After a recent power cycle, the y-axis referencing was lost for the 1000 kg crane. The position readout was also incorrect, somewhere on the order of > 30,000 mm. On 2024-11-29, A. Newsome re-referenced the y-axis. The position readout correctly reset to zero, and both +y and -y motion is functioning correctly, but the y-axis position readout on the HMI constantly displays 0 and does not change. To be investigated.
Update 2024-12-02:
After going online with the PLC, it was determined that the reason for the display of 0 as the position is that the two values used for calibration of the +y and -y limits were actually the same, meaning the scaling factor (the difference between these two values) was 0, which resulted in the displayed value being 0. The root cause of this is that the encoder was not functioning correctly so its value was not changing when the crane moved and it was stuck at one value. Upon investigation of the encoder input card, the red "ERR" light was on. This indicates the encoder signals are not properly reaching the input card. Once this was discovered, it was remembered that this happened in July 2024 as well (no e-log was written). In July, the root cause was identified as being a loose encoder signal wire in a junction box. Junction box CJB1-BC, located on the bridge crane near its disconnects, was opened and investigated. Upon checking each wire, it was determined that the red wire seemed not to be making full contact. The wire was removed and re-inserted, and the "ERR" indicator on the encoder card turned off. The crane's +y and -y limits were re-referenced. The crane is functioning normally after re-referencing. (Note: if something like this happens again, during the re-referencing process, the displayed value on the HMI will be incorrect.. this is because the PLC's scaling factor is not fully adjusted until both +y and -y limits are reached. The actual encoder measurement taken at those limits is used for the scaling factor. This is not an ideal way to program the system, but this is how it works with all ARIEL hot cell subsystems. So incorrectly displayed values can be ignored, in general, until full referencing is completed). |
| Attachment 1: PXL_20241202_204356508.jpg
|
|
|
75
|
Wednesday, December 11, 2024, 11:45 |
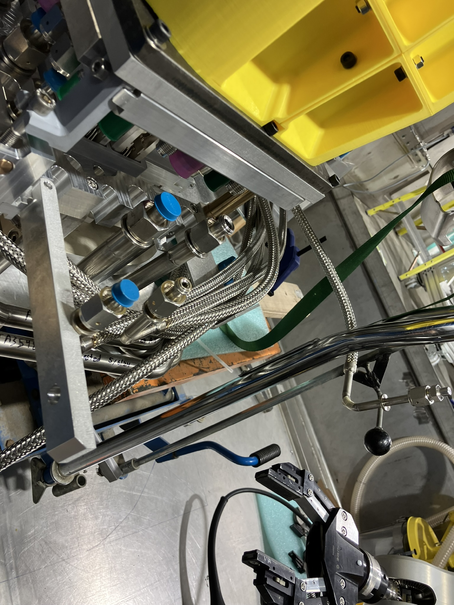
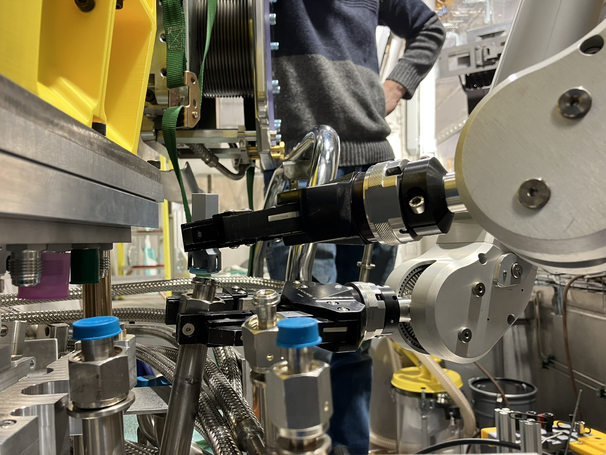
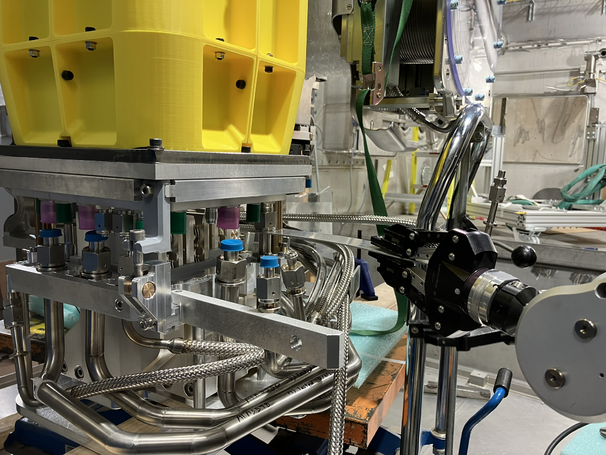
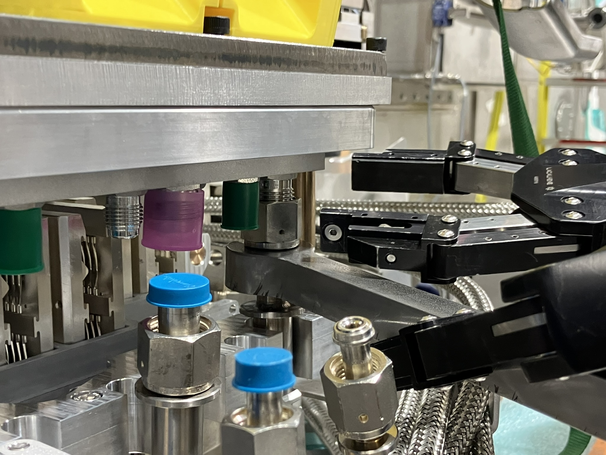
Albert Kong | Hot Cell 1 | Development | APTW Front End Service Tray and Associated Component Testing | Dec 10, 2024
Testing completed:
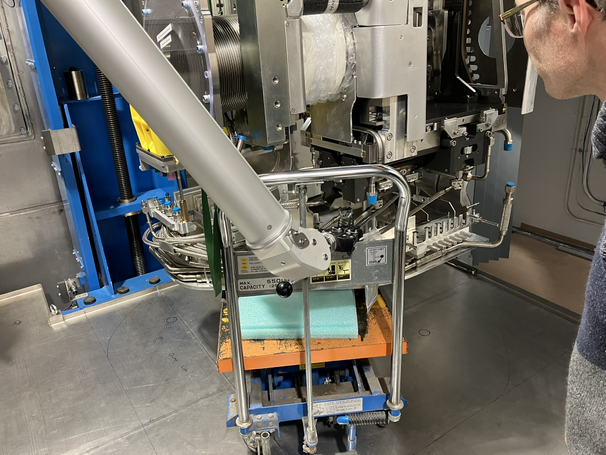
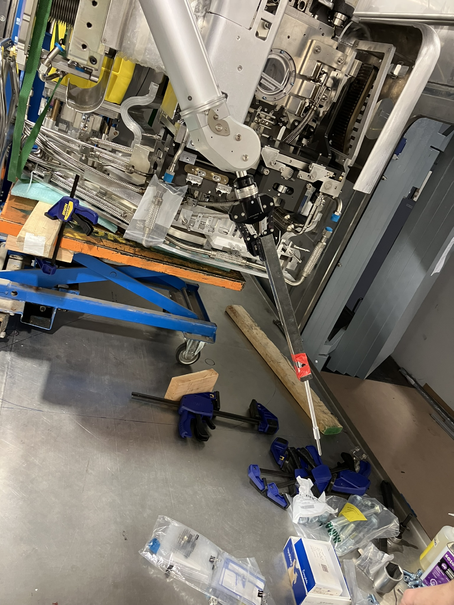
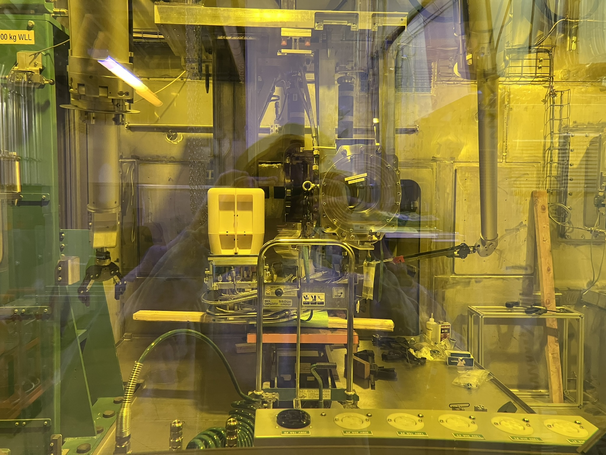
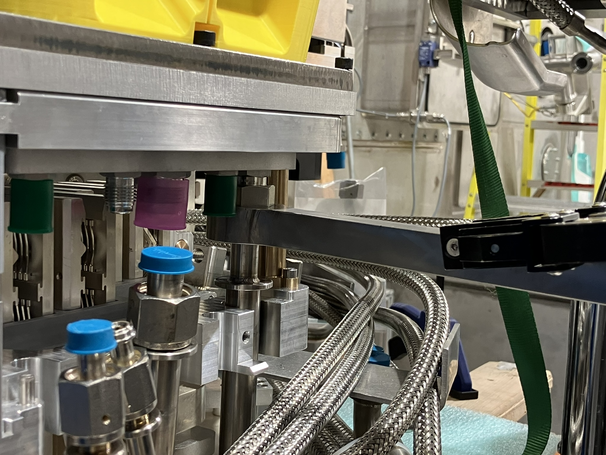
- Used hydraulic scissor jack cart to test raising/lowering service tray onto front-end, with only manipulators, placement of jack table done by hand because it isn't freely moving on the plane of the lift table.
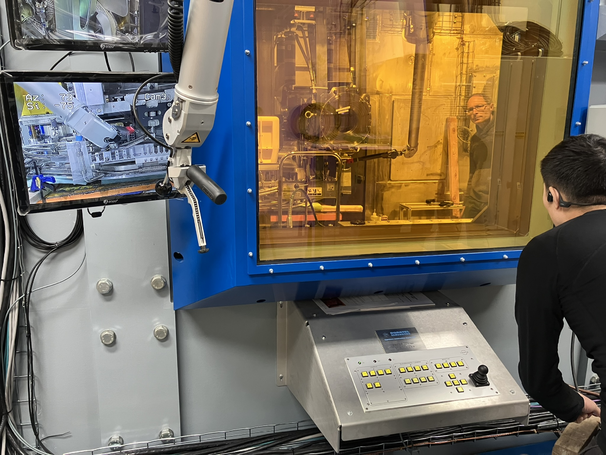
- Removal and insertion of the center post pin with indirect view to FE.
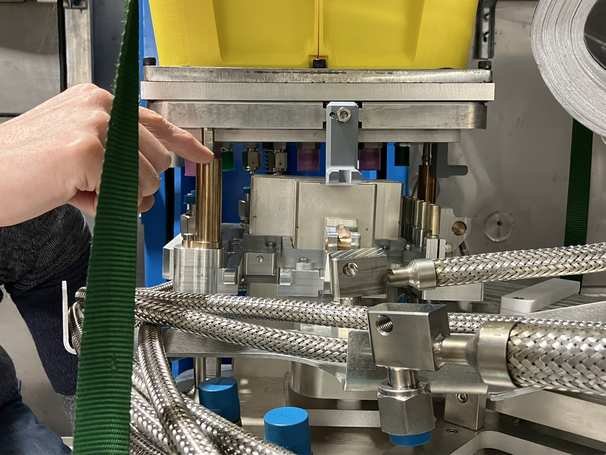
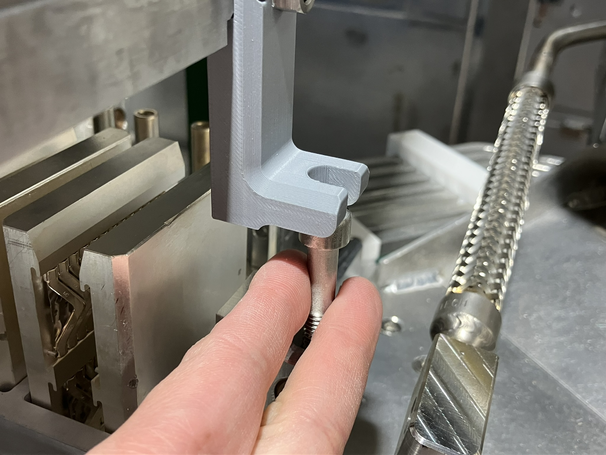
- Application and removal of VCR gaskets on HVFT water connection array with 3D printed tool, only for 1/2" size (service tray side of VCR joints).
- Checking whether the VCR joints can be done up with the service tray 'lifted' (not fully connected but the screws on the HVFT bracket are slid onto their slots)
Observation/notes:
- Lift table slope creates some difficulty bringing the service tray up.
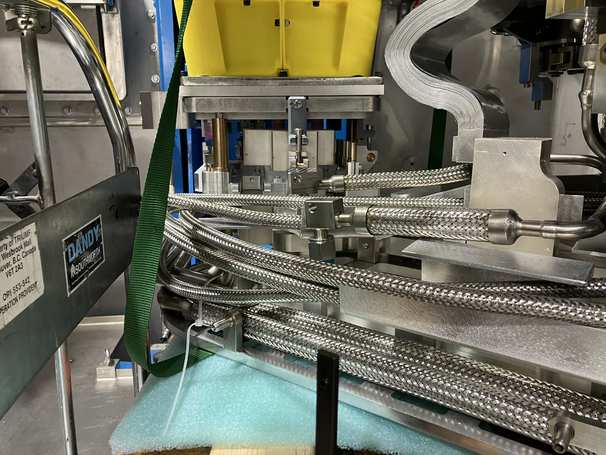
- Effective misalignment of service tray changes with the degree in which it is 'brought up' because the ribbon connectors start to compress and exert load, tipping the service tray. There isn't a 'CG' that we can place the table under which will balance the service tray throughout the attachment operation.
- Service tray is large and will not be fully supported by the base jig without custom jig on top.
- Using a clamped piece of 2x4 wood on the jack cart worked to increase the supported region during testing, something similar with the base jig may work.
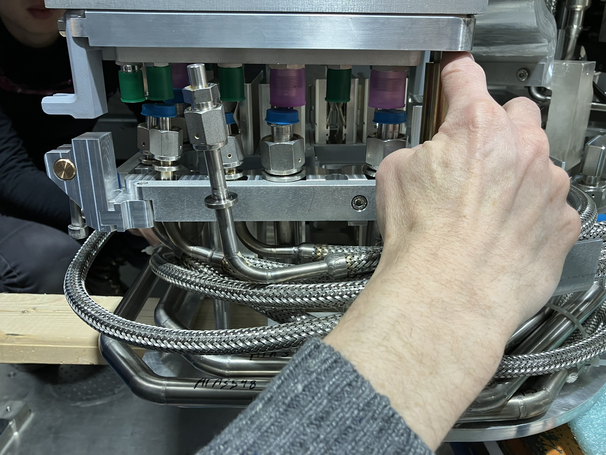
- The service tray needs to be brought up such that the HVFT is ~1" from being fully engaged before the screws on the bracket can be upturned and start to engage. Likely the bus bar connectors will have started engaging before this is achieved (bus bar connectors roughly 2" in depth), this can create complications because the loading on the base jig will be really uneven at that point.
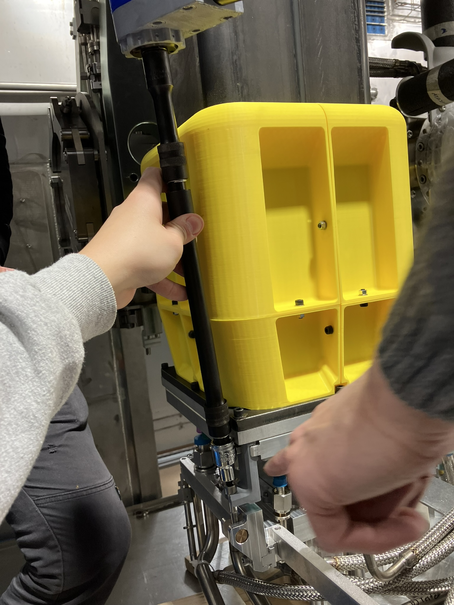
- The pin for the center post can be easier to handle if we added a handle or an extender. A makeshift handle was made using tape and scrap U-channel nearby.
- We managed to remove and attach the pin with the HTV table facing East using a remote camera view, but in practice it would be ideal if we could rotate the front end with service tray supported by some jig between orientations where the HVFT and center post are more easily accessed. This will require the ribbons and the alignment cylinders on the HVFT to transmit some force onto the lift table to overcome any friction the base jig may have on the lift table during rotation.
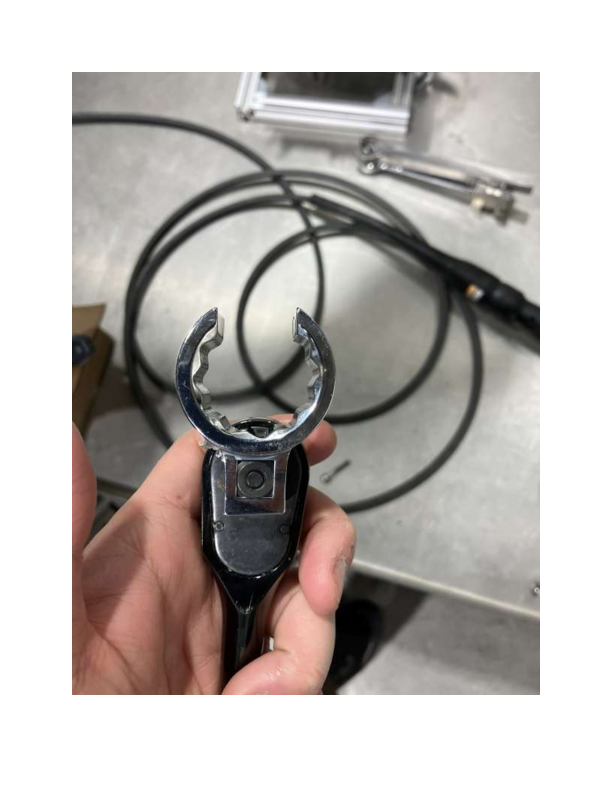
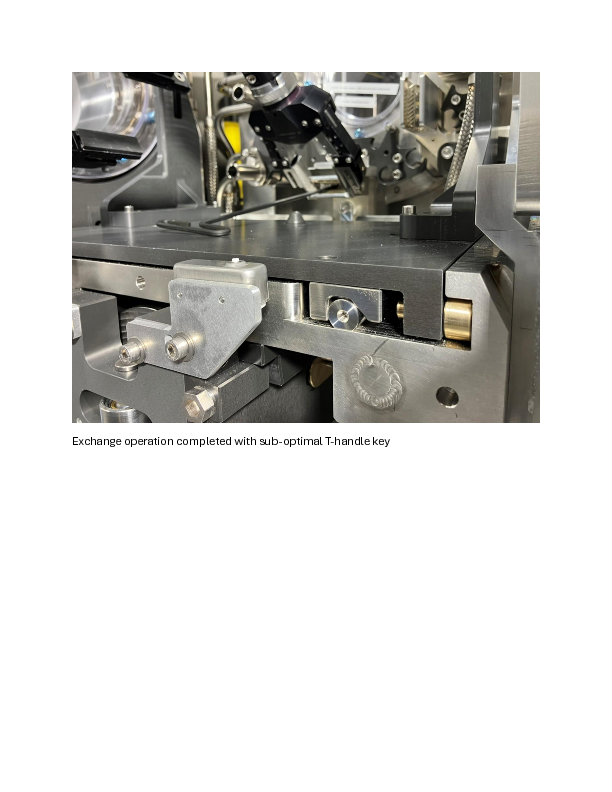
- With the brackets on the HVFT on, we were able to start and even tighten the VCR joint closest to the corner bracket (using low clearance wrench, no photo).
- Difficult to get at all brackets on HVFT and do up, will need cameras irrespective of the orientation, did not do up the bracket yet so we don't know how careful we need to be when inching each up and establishing the HVFT connection.
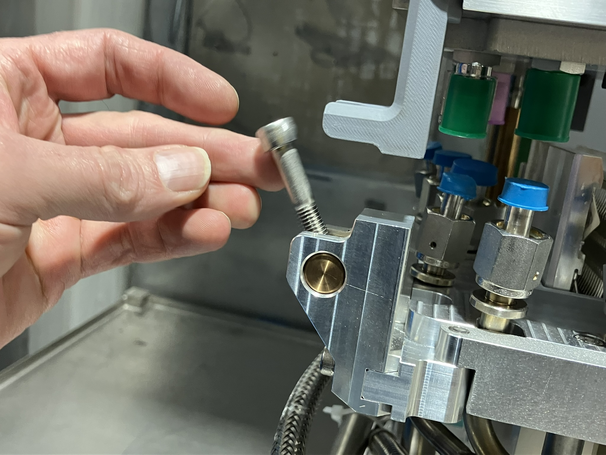
- Difficult to get at and rotate screws on HVFT bracket, with torque tool due to proximity with HVFT structure, a longer bit on the torque tool will be beneficial. Note, using an Allen key with the manipulator gripper is difficult because of the same issue.
- VCR wrenches slippery without catching features, will add pin for better grip
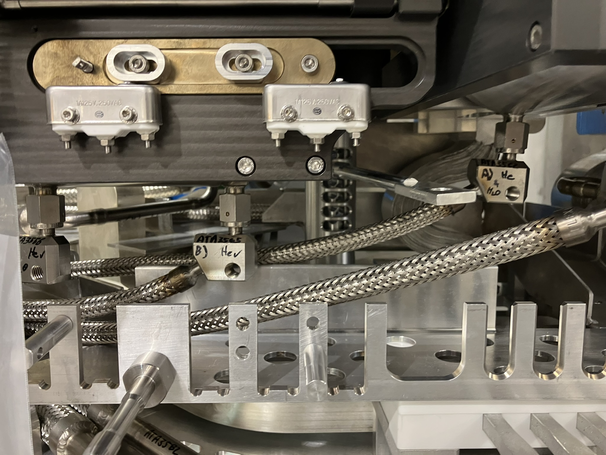
- If 'fence' on HVFT for water lines is taken off it is quite easy to loose track of where the lines are supposed to return to, should have markings/labels for where the water lines need to return.
- HTV side ribbons bend inward instead of outward.
Recommendations/follow up items/questions + answers as appropriate:
- Consider adding grabbing features and an extender attachment for the center post pin: (Dec 16, 2024) Michael agreed to cut the tab and cross-pin the center post pin to match the HTV water connector pins.
- Can we change the screws used on the HVFT bracket to be longer so it can engaging before the bus bars? (Dec 16, 2024) Michael will look into.
- Can we add a lip to the HVFT top brackets to keep the screws in place and not fall out during tightening? (Dec 16, 2024) Michael will look into.
- Consider more items that may help simplify the brackets on the HVFT
- Is it possible to re-orient the center post holes to be toward the HVFT instead of aligned with the HTV platform axis, this may avoid the need for re-orienting the FE when raising/lowering the service tray. (Dec 16, 2024) Michael will look into.
- Need to capture effect of bus bars connection in future testing. (Dec 16, 2024) Albert will design and send something to the shop to work with Phoenix's mock up.
- Need to repeat service tray testing with base jig.
- Check if ribbons are bending in the right direction. (Dec 16, 2024) Yes.
- Perform full service tray coupling with actual machined brackets to inform coupling operation (3D printed brackets currently not strong enough and deflect unrealistically).(Dec 16, 2024) received spares from Michael.
- Need modification to wrench to prevent slippage. (Dec 16, 2024) Albert and Aaron working on this (will simply add cross-pin)
- VCR gasket tool for smaller size VCR's to be made.(Dec 16, 2024) Chad to do.
- Real deal VCR gasket tools to be made out of soft metal to prevent scratching sealing surfaces in operation
- If not possible to do with base jig, possibly a suspended plate with turnbuckles instead will be sufficient to support the service tray during attachment/removal operations. (Dec 16, 2024) Discussed with Michael the possibility of changing the HVFT 'cables' to threaded rod to also facilitate ejection of the service tray on the HVFT side (necessary to disconnect bus bar connections).
|
| Attachment 1: IMG_0748.JPEG
|
|
| Attachment 2: IMG_0754.JPEG
|
|
| Attachment 3: IMG_0755.JPEG
|
|
| Attachment 4: IMG_0756.JPEG
|
|
| Attachment 5: IMG_0759.JPEG
|
|
| Attachment 6: IMG_0760.JPEG
|
|
| Attachment 7: IMG_0761.JPEG
|
|
| Attachment 8: IMG_0762.JPEG
|
|
| Attachment 9: IMG_0763.JPEG
|
|
| Attachment 10: IMG_0764.JPEG
|
|
| Attachment 11: IMG_0767.JPEG
|
|
| Attachment 12: IMG_0769.JPEG
|
|
| Attachment 13: IMG_0772.JPEG
|
|
| Attachment 14: IMG_0774.JPEG
|
|
| Attachment 15: IMG_0776.JPEG
|
|
| Attachment 16: IMG_0781.JPEG
|
|
|
76
|
Thursday, December 12, 2024, 15:57 |
Aaron Tam | Hot Cell 1 | Development | APTW Pistons Gas lines exchange testing | December 12, 2024 - Chad Fisher, Albert Kong, Aaron Tam
Tests:
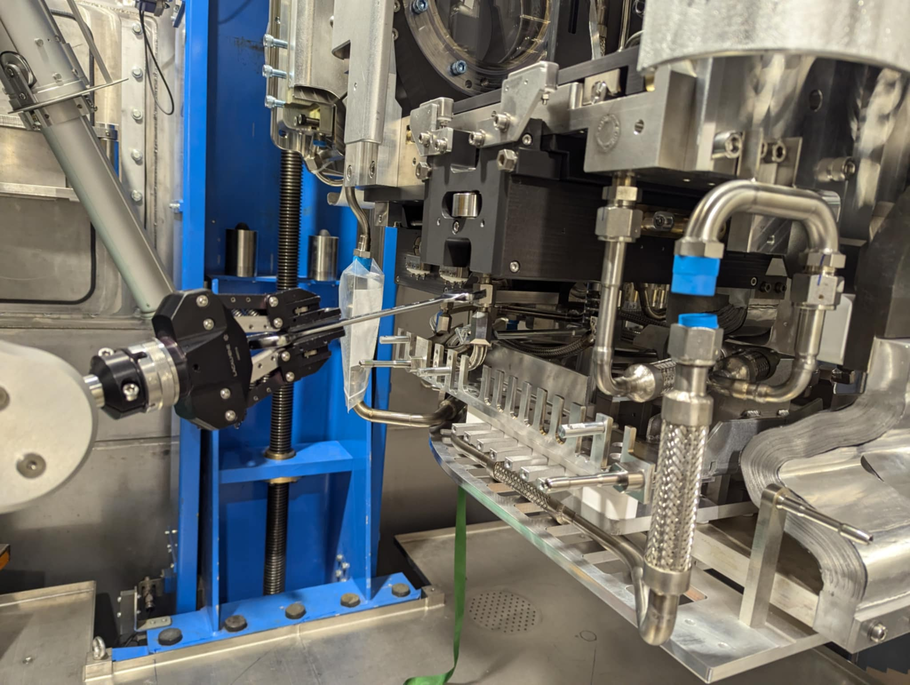
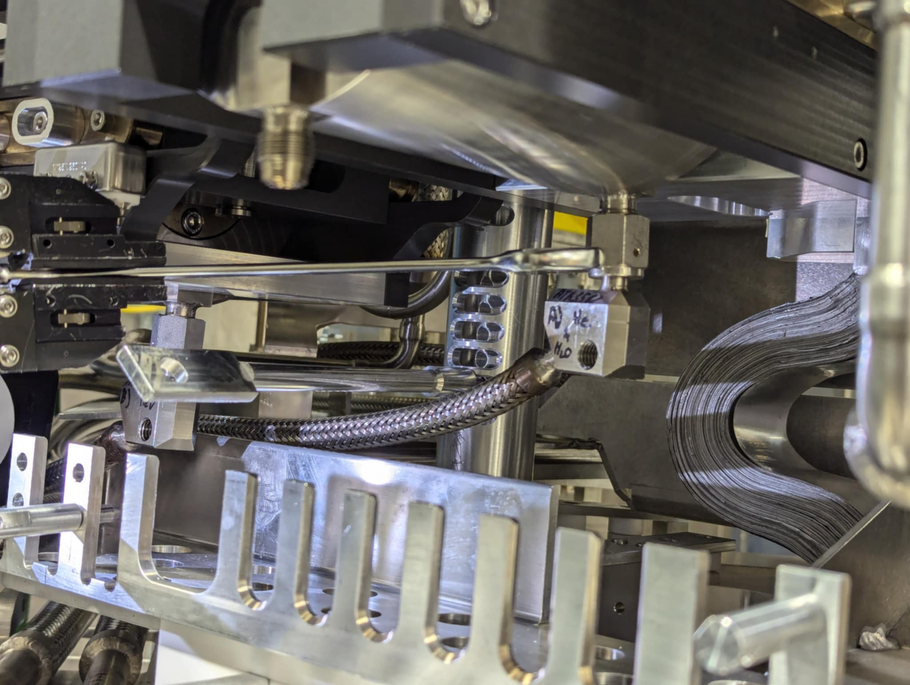
Gas lines removal:
- Starting with the most exterior connection, VCR connection loosened off with open ended conventional wrench
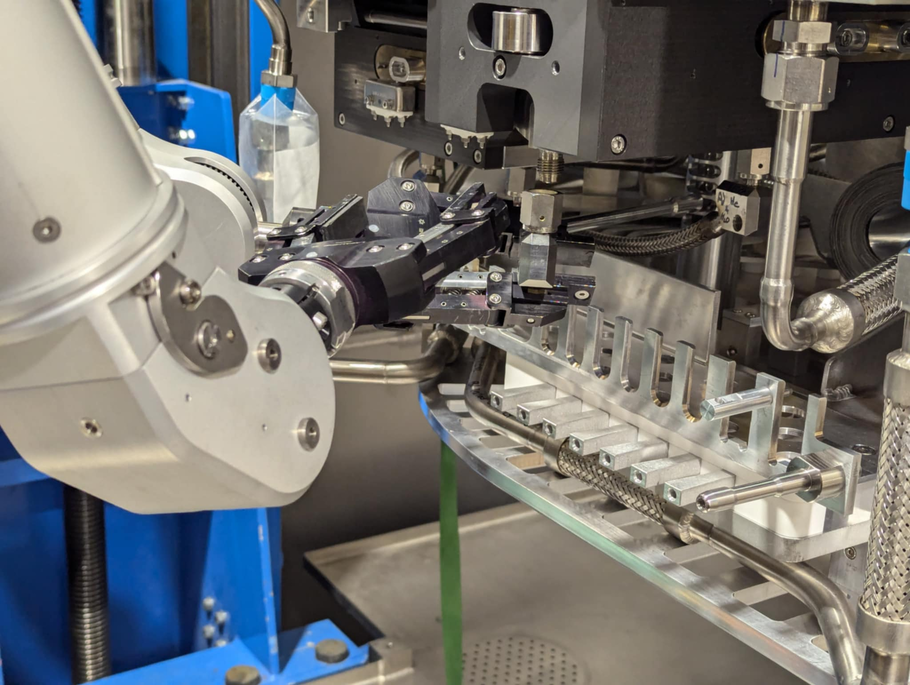
- Once loose, the nut can be un threaded with manipulator finger (rolling nut technique)
- Once gas line unhooked, gasket removed by bringing female end outside the service tray footprint and jiggling until the gasket was removed
- Also possible to use a pick if needed
- The same procedure was conducted for the interior VCR connection
Gas lines installation:
- Starting with the inner most connection
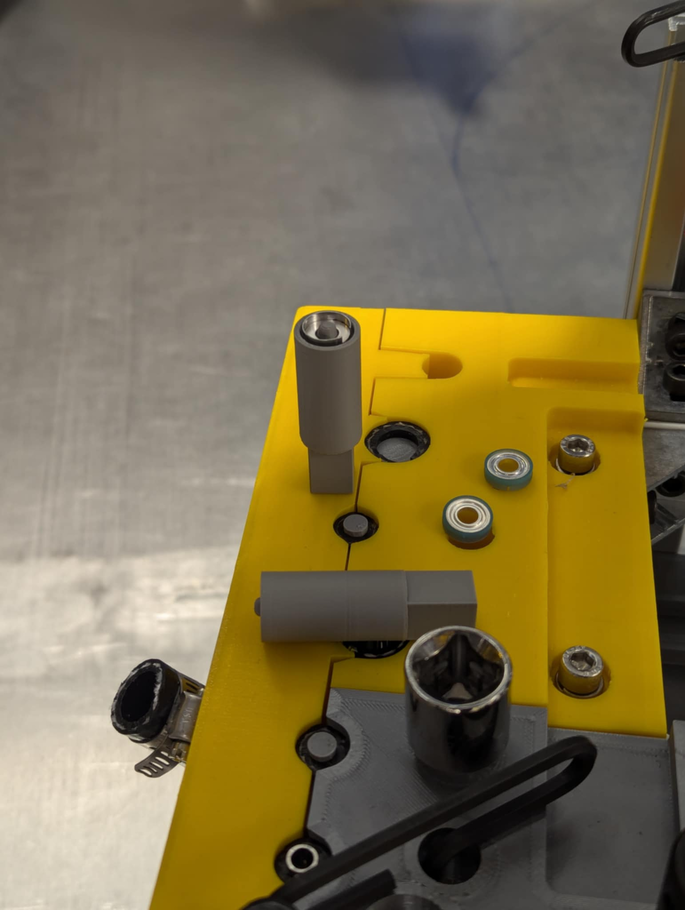
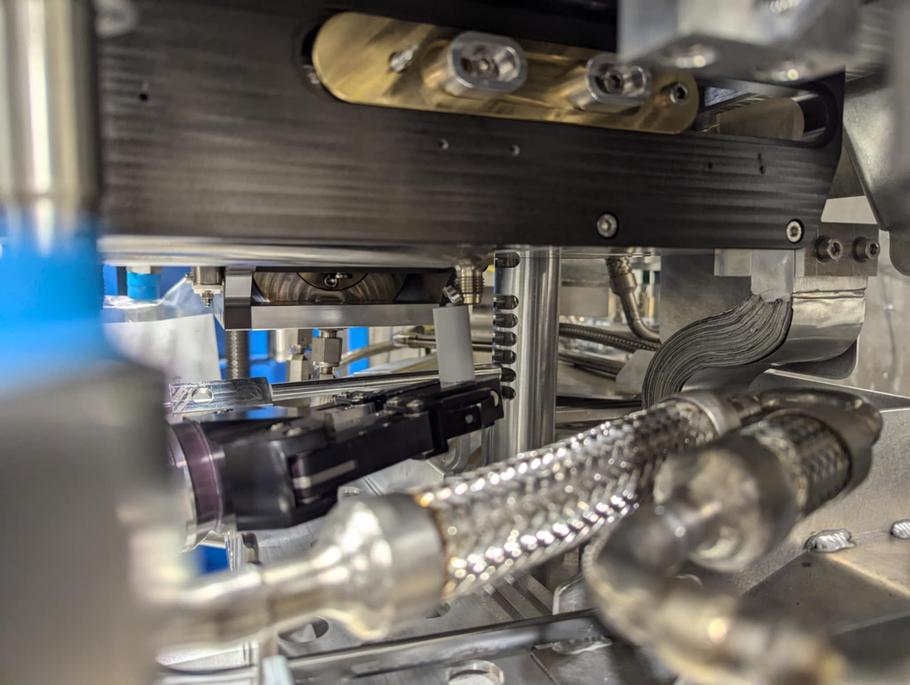
- Gasket placed on 3D printed tool and clipped into position on VCR male end
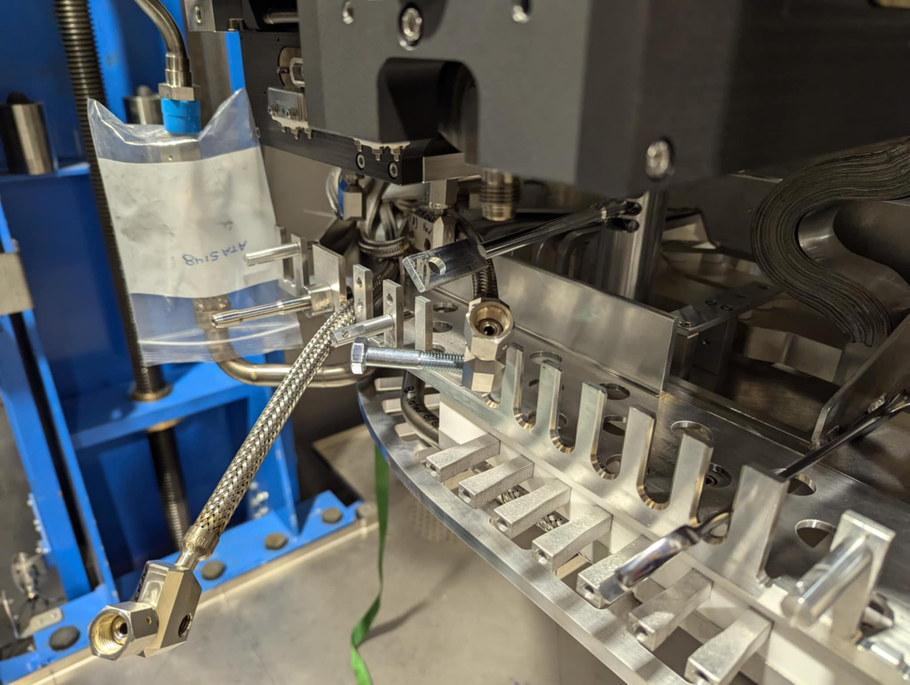
- At first an M10 bolt was inserted into the elbow below VCR connection, but without rotational authority, the makeshift handle is not worth using
- Griping the elbow with one manipulator and rolling the nut onto the threads with the other proved successful
- Nut was tightened using conventional open ended 19mm wrench
Observations/Notes:
- Service Tray was not in a fully connected position, so even less space will be afforded.
- This may affect the ability to get 2 manipulators on the same connection
- Piston modules were missing some limit wires on the side. These constrain movement horizontally and will either need to be removed as part of the procedure or, make the procedure more difficult
- Mass markers and various other connectors not installed, and these could slightly restrict movement as well
- Service tray pin was restricting the movement of the left manipulator during install
- Lighting was inadequate under the piston
Recommendations/follow up items/questions:
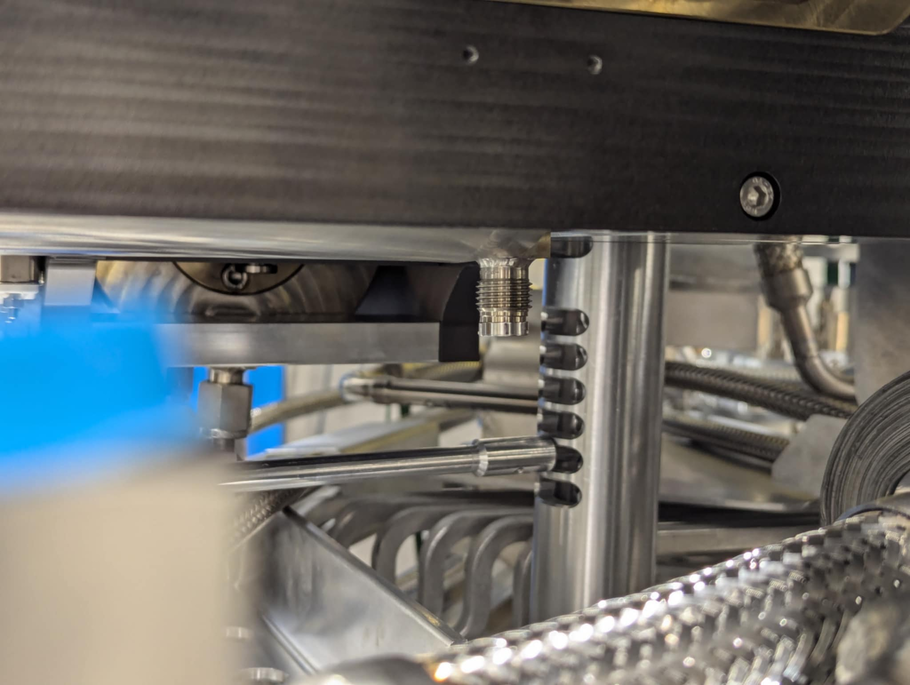
- All metal Parker VGR style gaskets to replace plastic retainer versions
- This is so that the degraded plastic doesn't break off and end up in the gas lines (upside down connections)
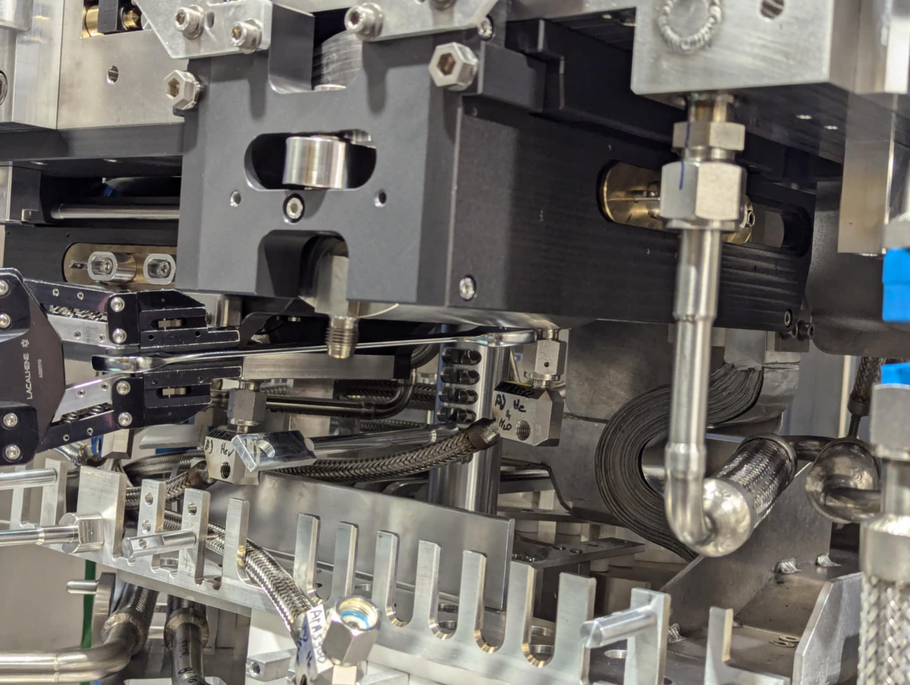
- A modified wrench with flats for handles and with more length would make the above procedures easier
- Along with raising and lower the service tray, the service tray pin being oriented towards the beam entry direction, would make life easier
- Still need to test gasket install on "other" Piston gas line connection
- Chad will redesign some new gasket tools to be tested
- side load and axial load gaskets, low and high clearance, aluminum construction
- Lighting positioned to flood the service tray area will be needed
- labeling the gas lines with a more permanent solution will be needed
- Once the high voltage feed-through parts have come in, we can re-test and see if the piston module can be lowered to aid in target removal situations
- Aaron will test Parker style seals to see if they can be removed as easily once brought up to specified torque
------------------------------------------------------------------------------------------------------------------------------------------------------------------
December 16, 2024
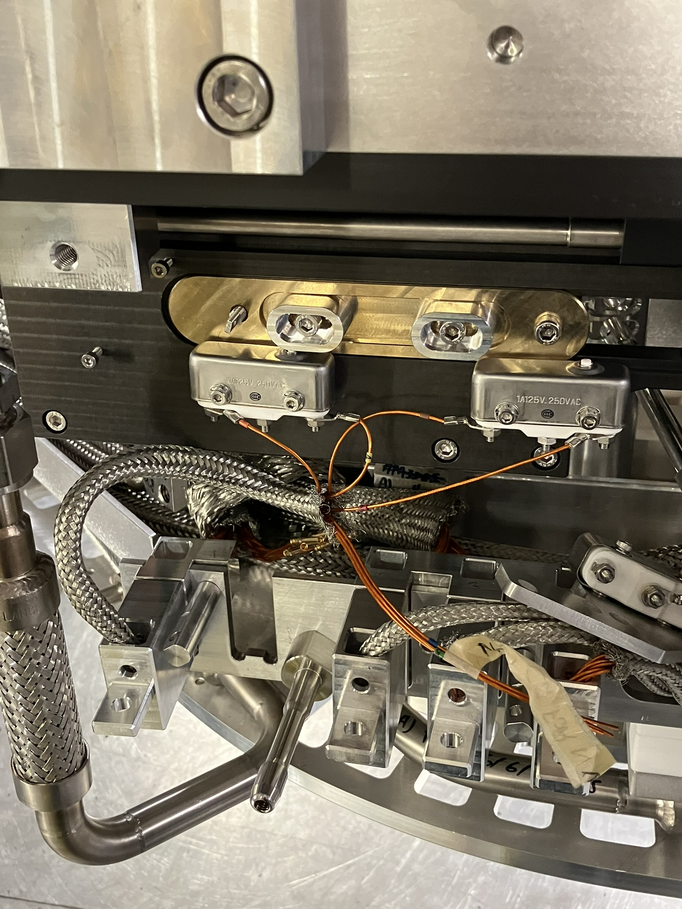
- Upon inspecting the piston modules on AETE in TISA, we became aware of how the wires are arranged for the limit switches, it may be a good idea to look into how these wires are handled when using the piston module jig.
|
| Attachment 1: exteriror_gas_line_removal.jpg
|
|
| Attachment 2: Finger_rolling_off_nut.jpg
|
|
| Attachment 3: gasket_sitting_on_current_tool.jpg
|
|
| Attachment 4: Gasket_part_number.jpg
|
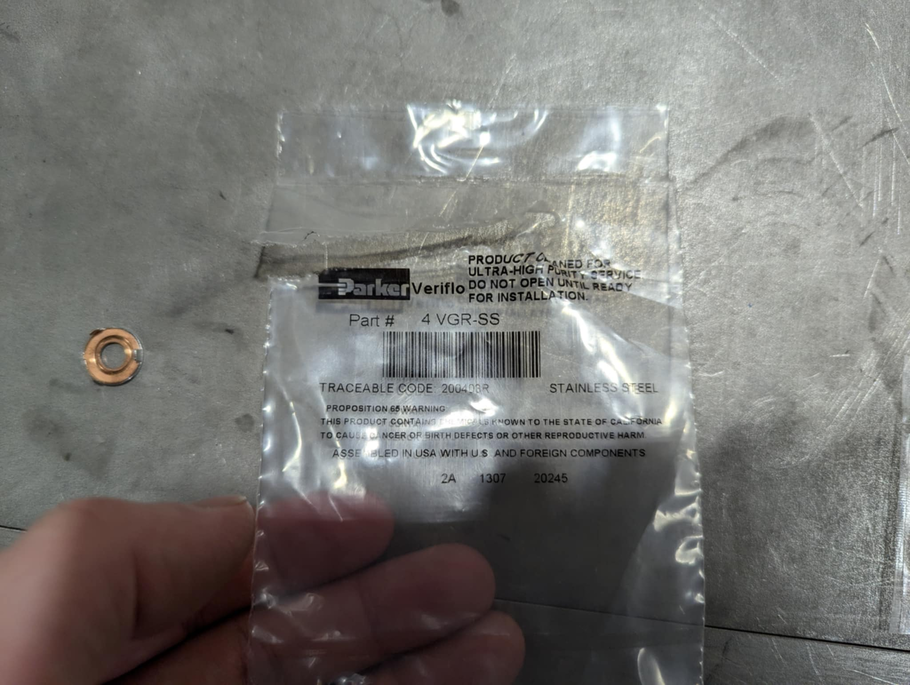
|
| Attachment 5: Clearance_for_two_manipulator_grippers.jpg
|
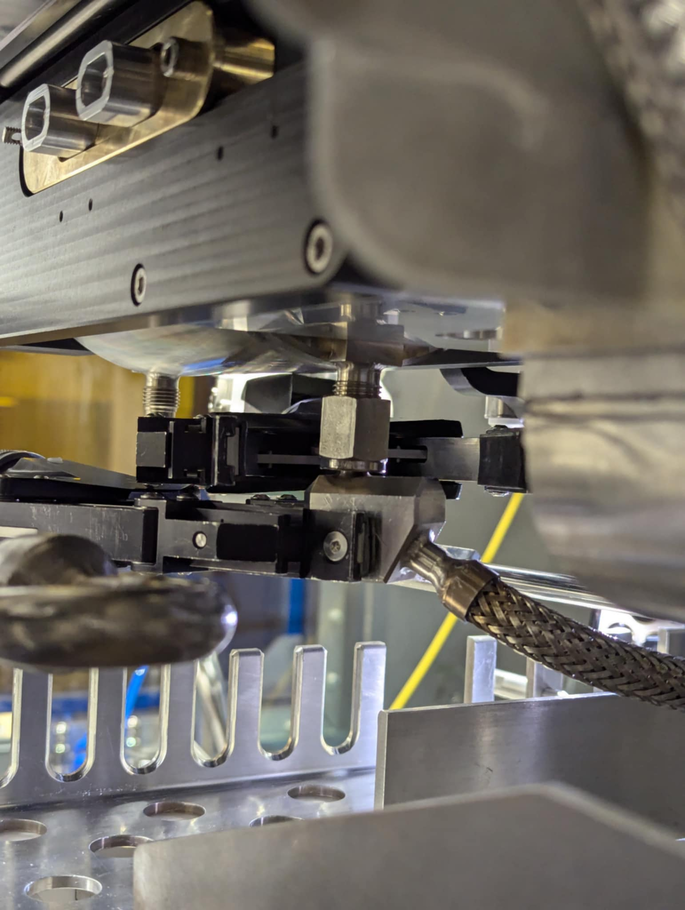
|
| Attachment 6: Clearance_for_two_manipulator_grippers2.jpg
|
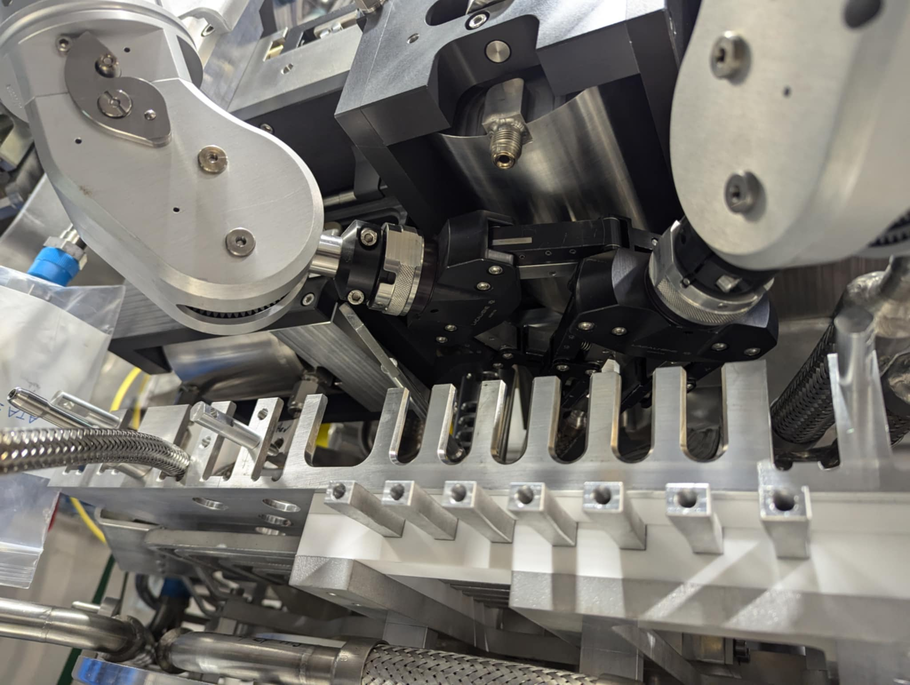
|
| Attachment 7: Clearance_for_two_manipulator_grippers3.jpg
|
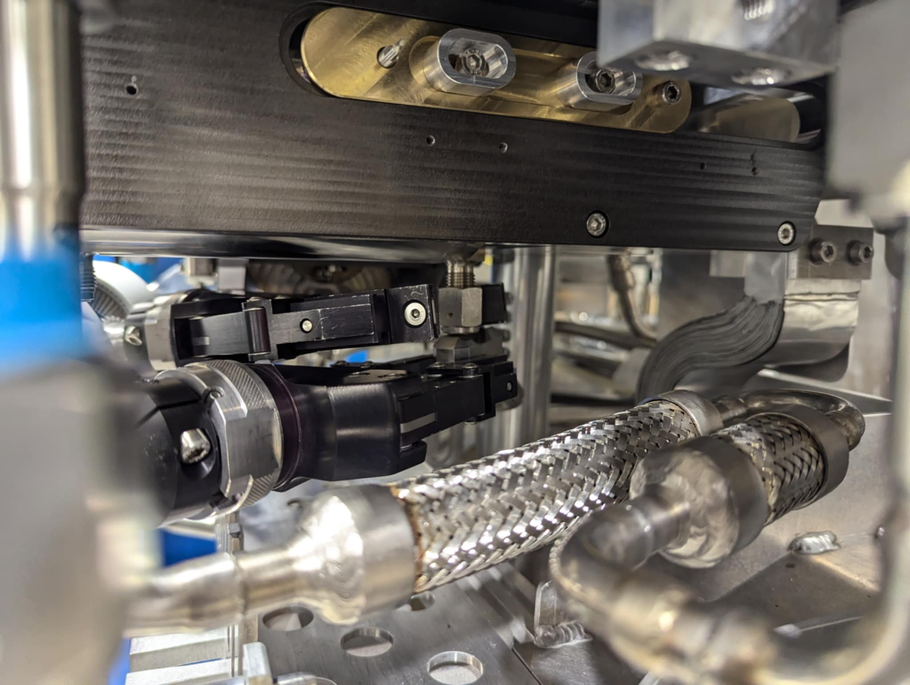
|
| Attachment 8: M10_Bolt_used_in_elbow.jpg
|
|
| Attachment 9: Parker_VGR_Gasket_installed.jpg
|
|
| Attachment 10: Some_trouble_with_gasket_tool.jpg
|
|
| Attachment 11: trouble_with_conventional_wrench.jpg
|
|
| Attachment 12: Interior_gas_line_torquing.jpg
|
|
| Attachment 13: IMG_0845.JPEG
|
|
|
77
|
Thursday, December 12, 2024, 16:20 |
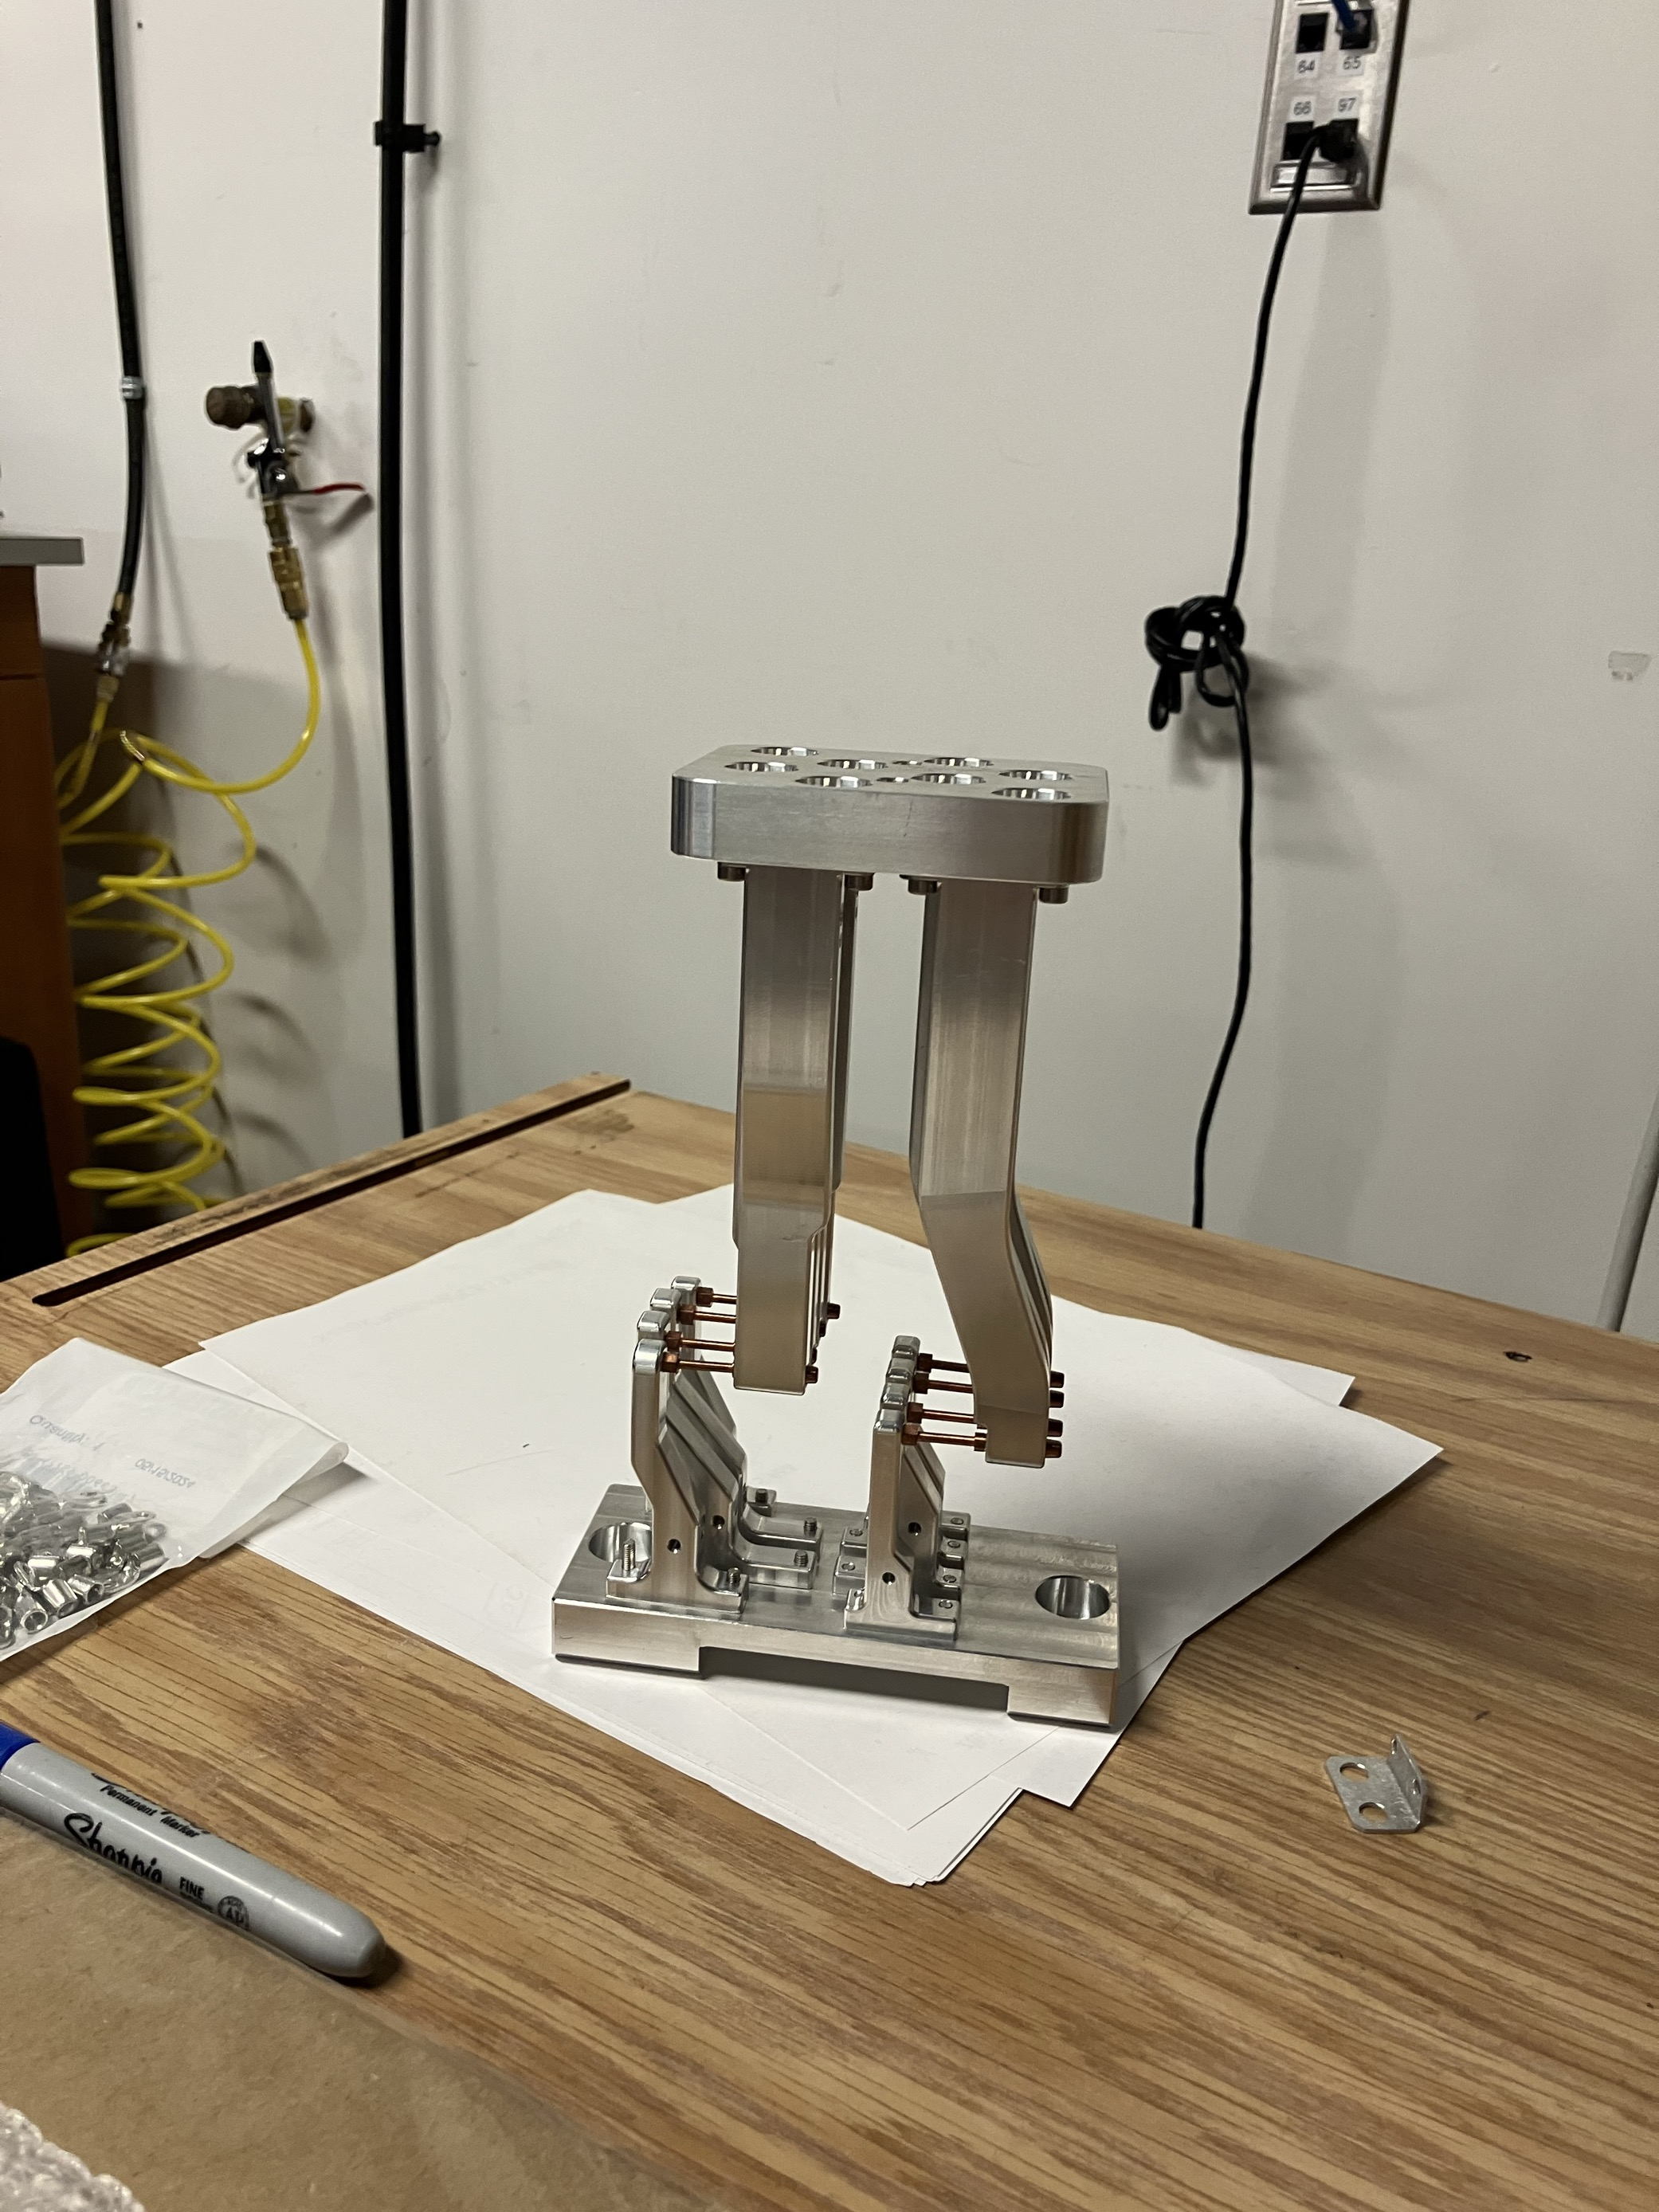
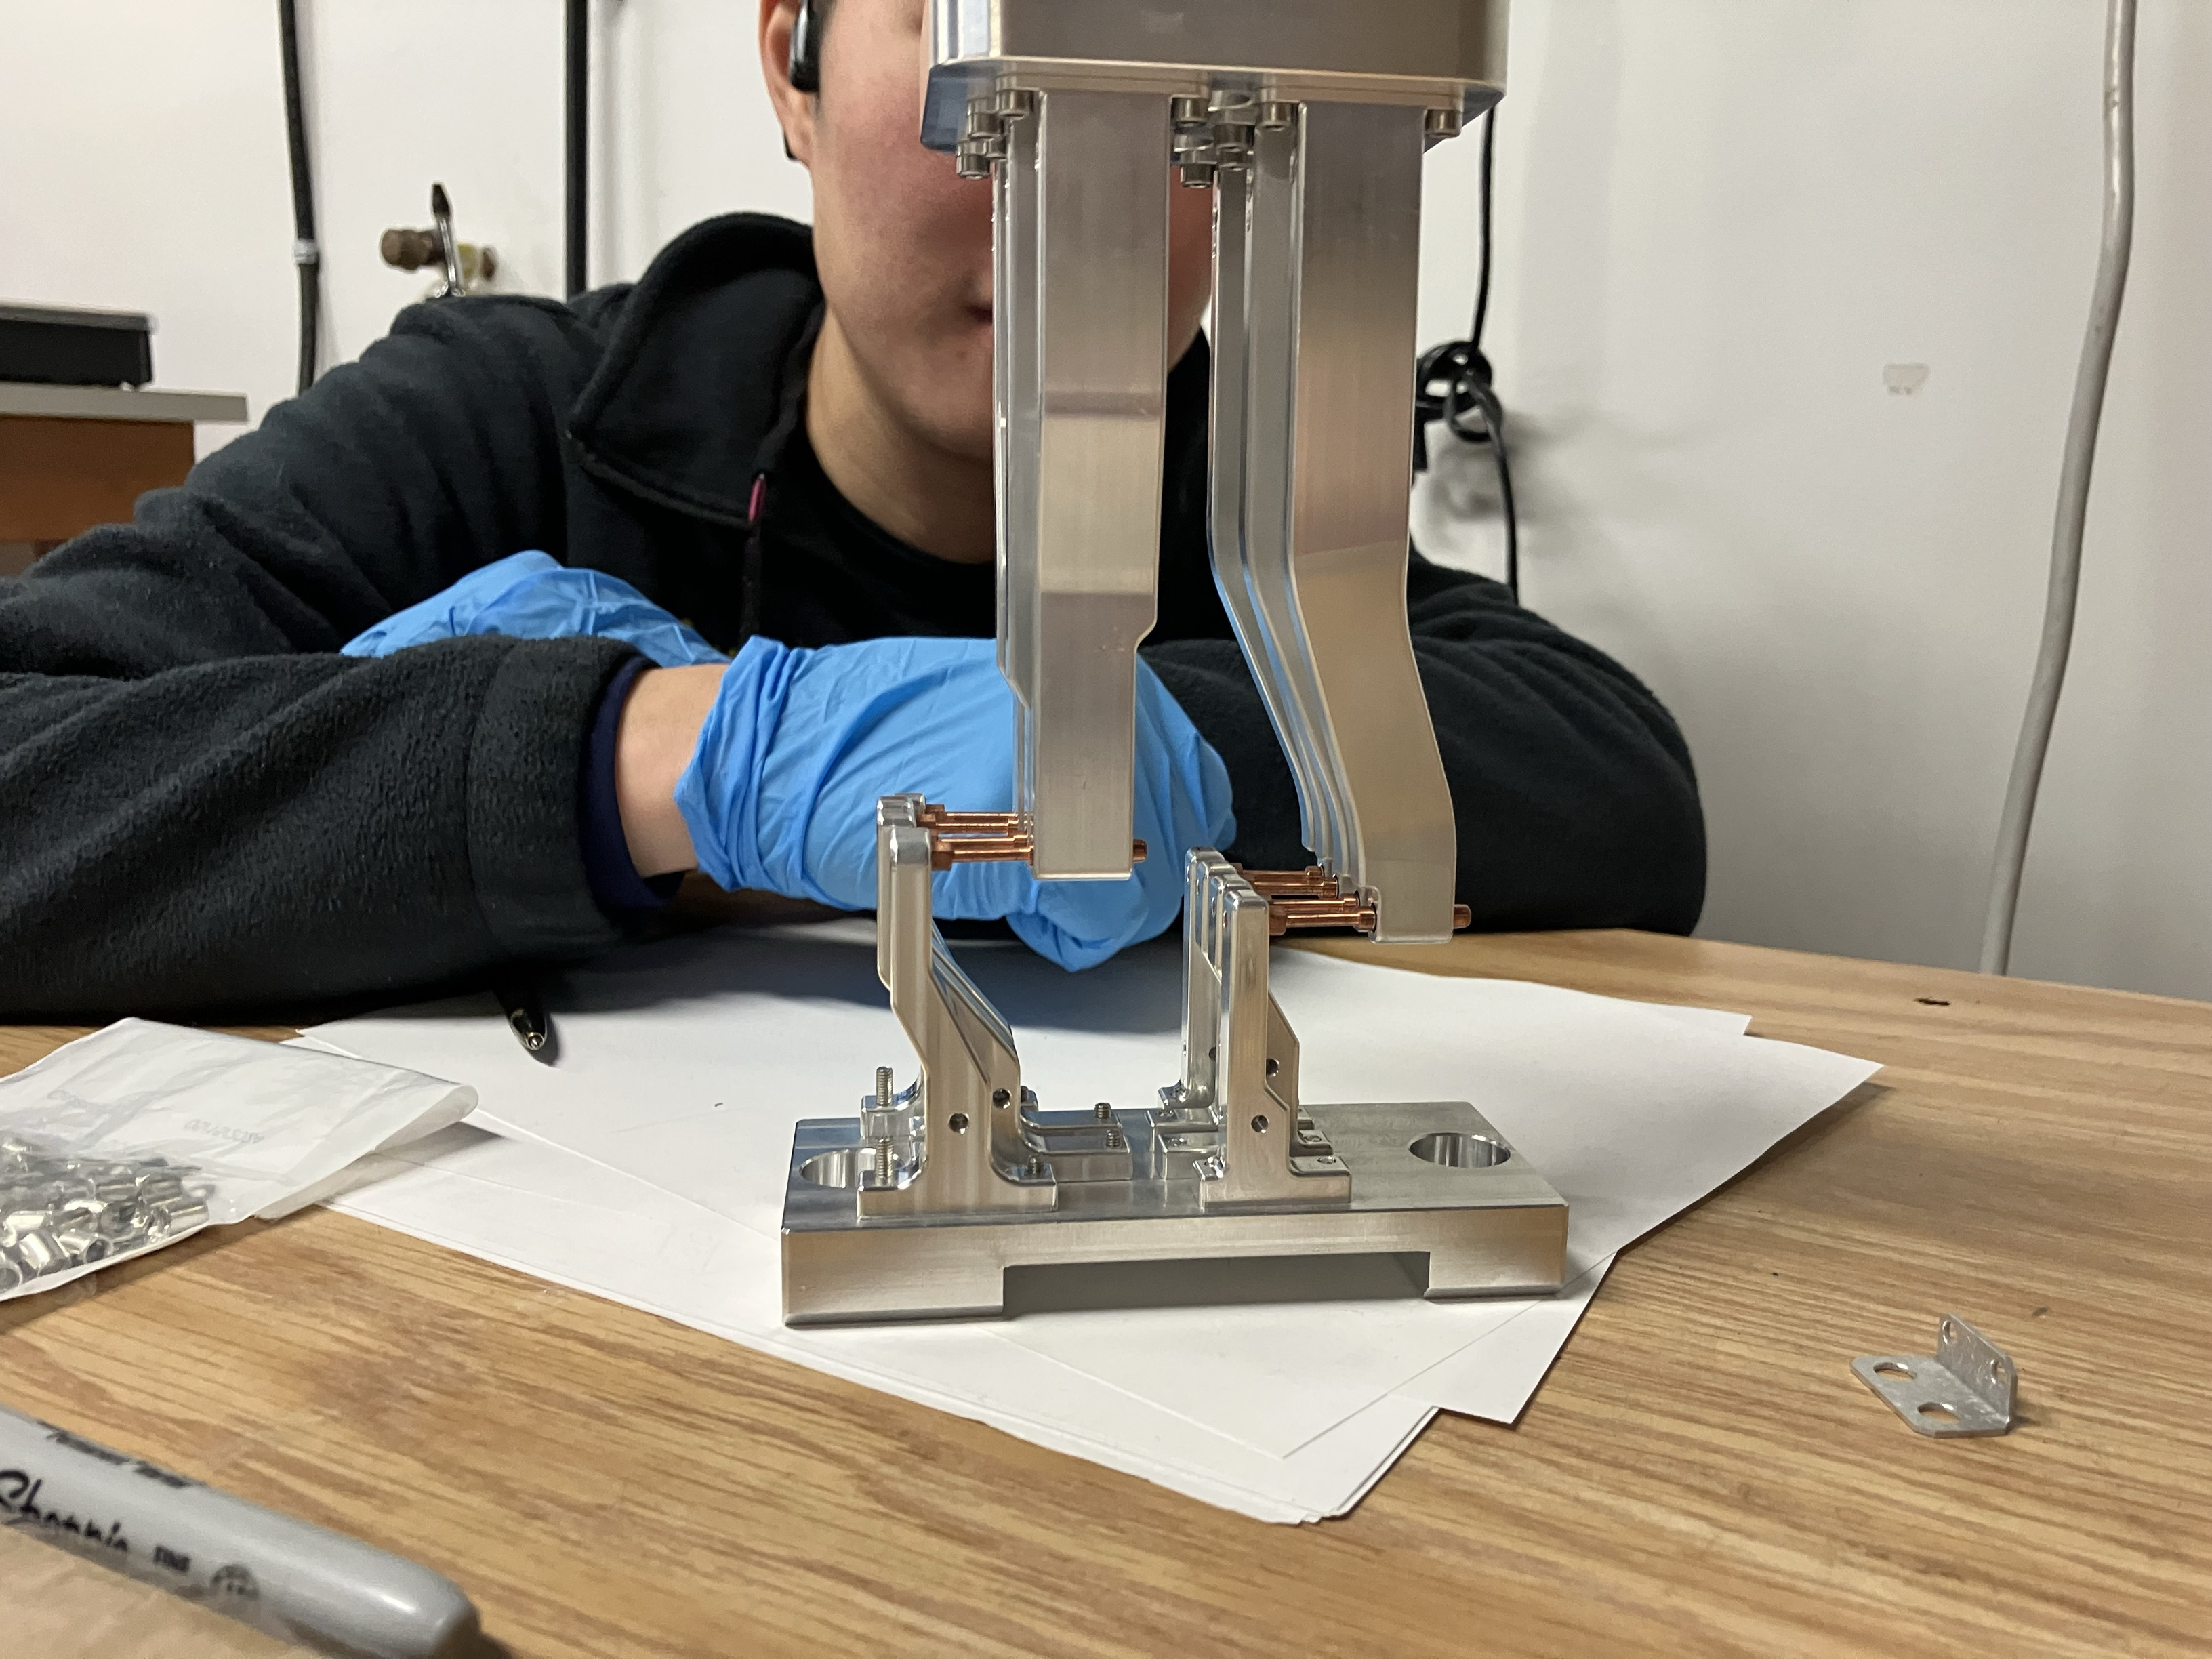
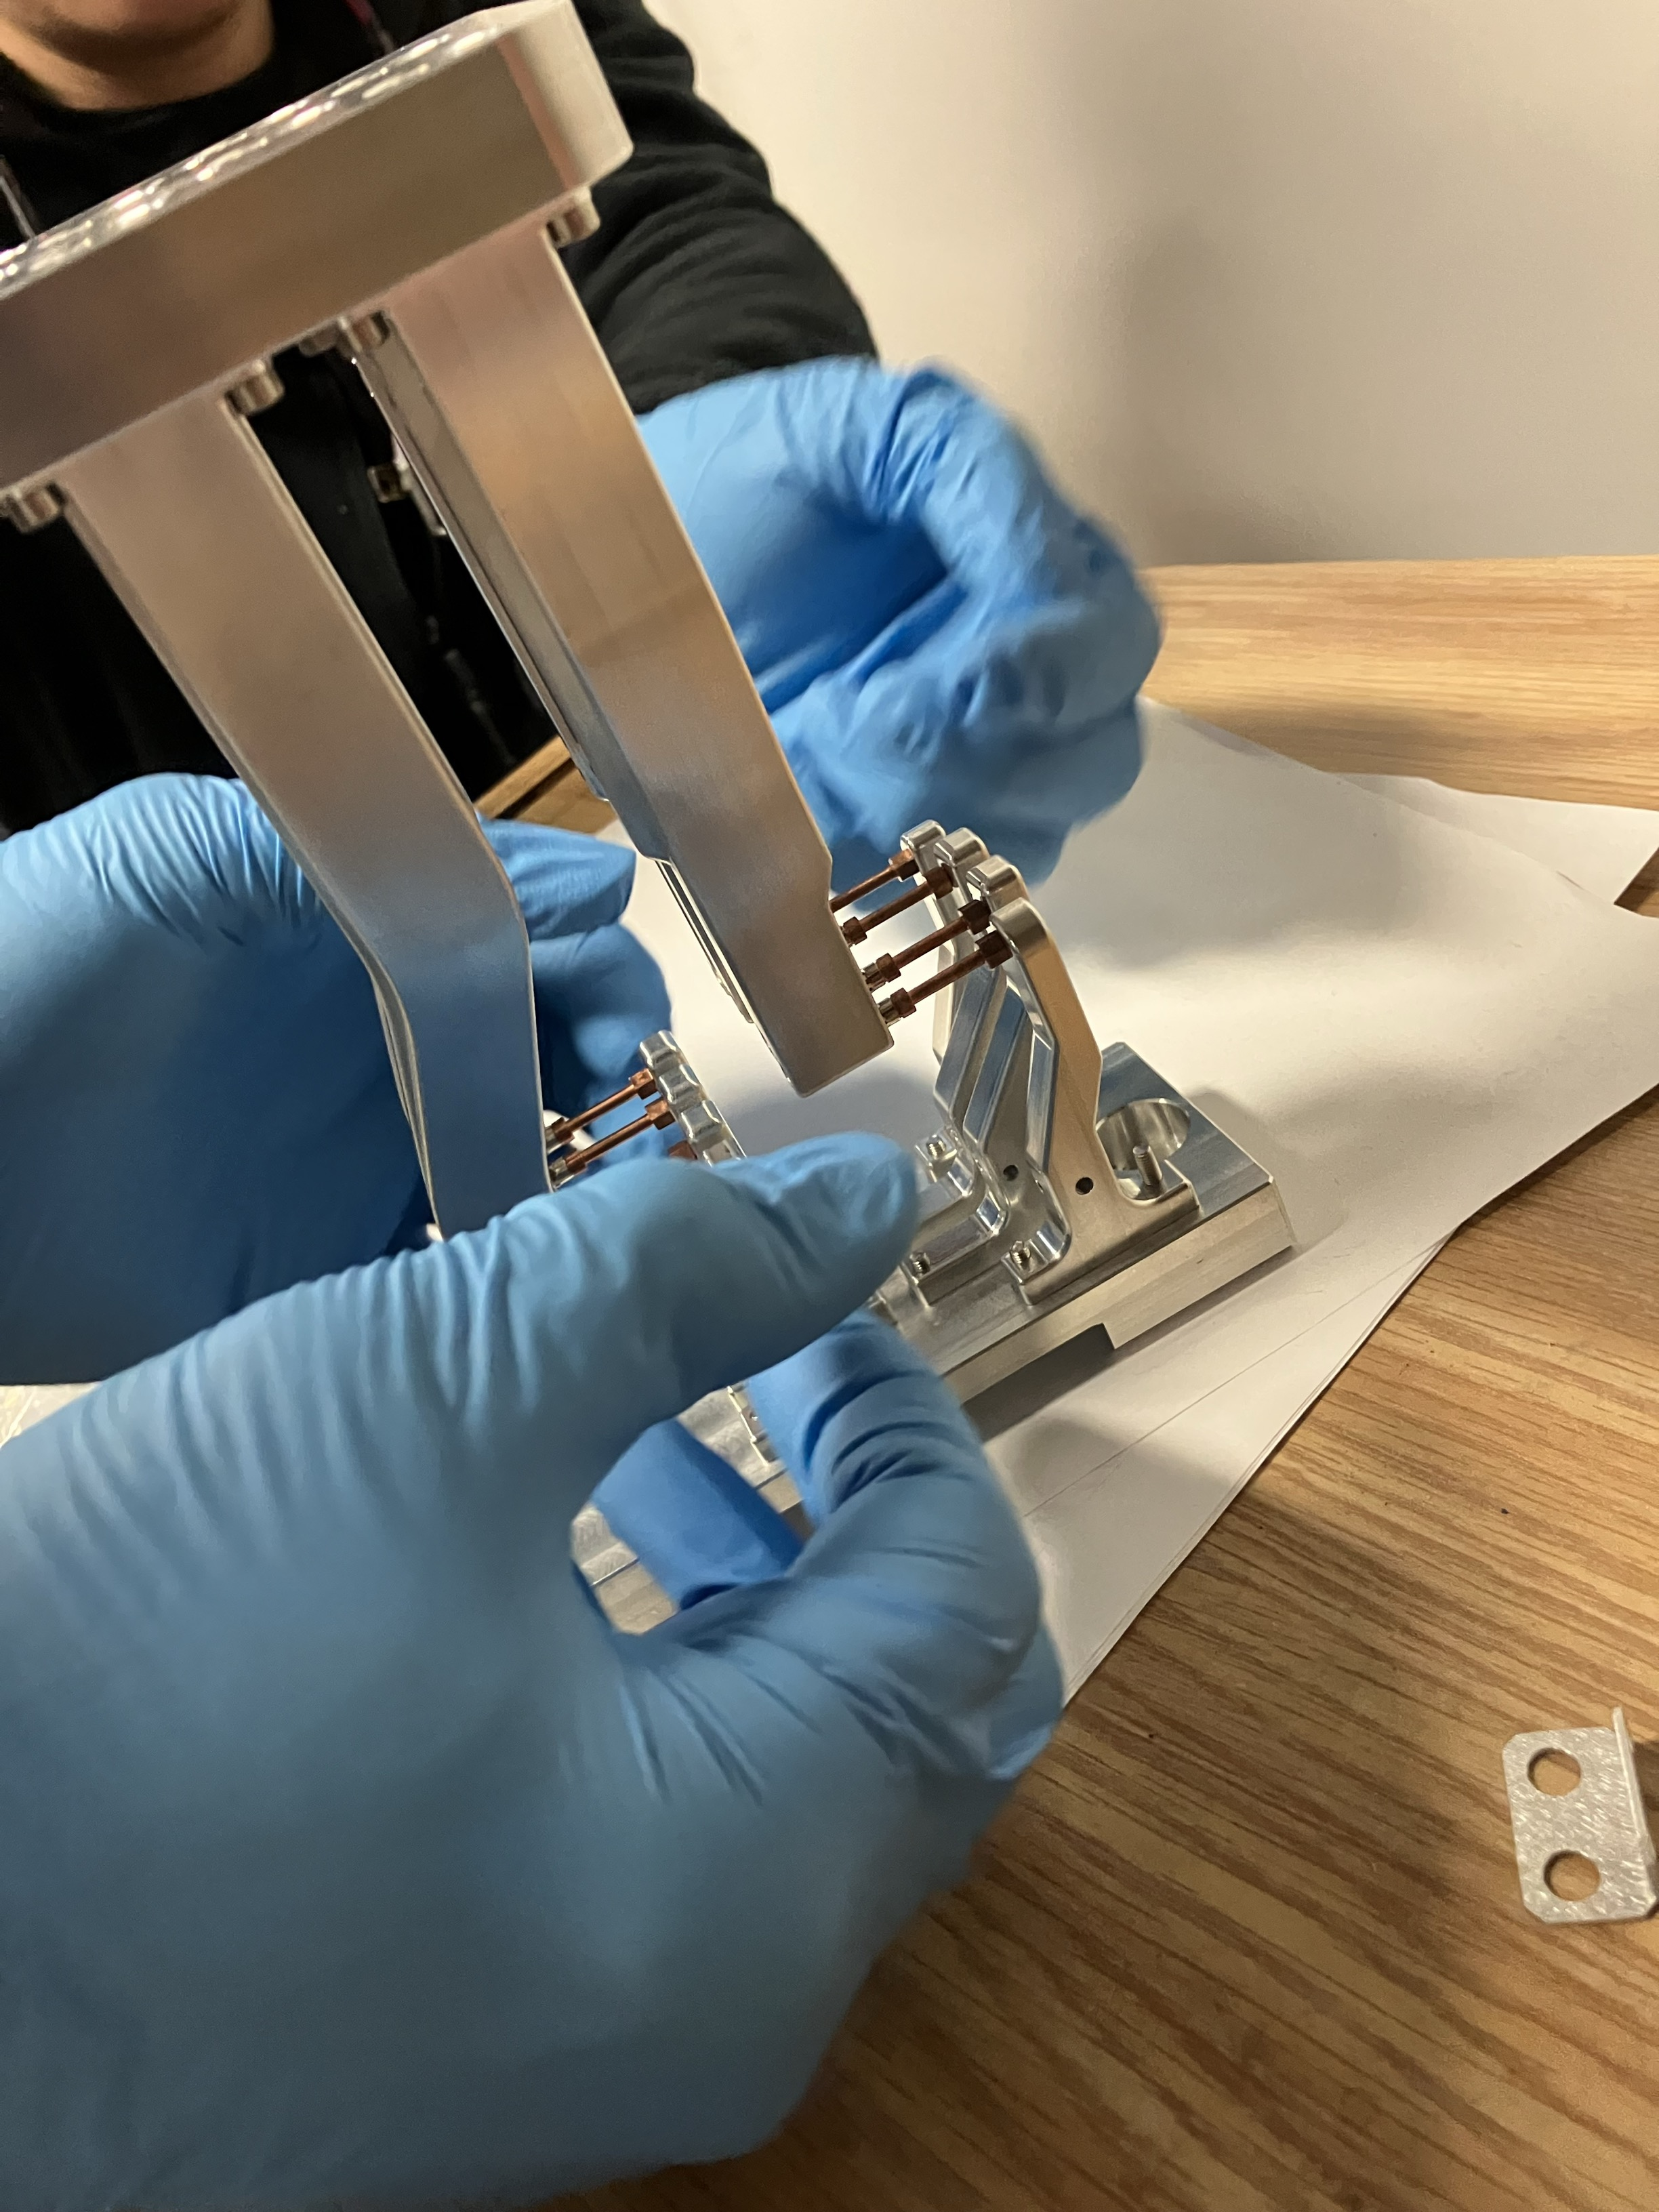
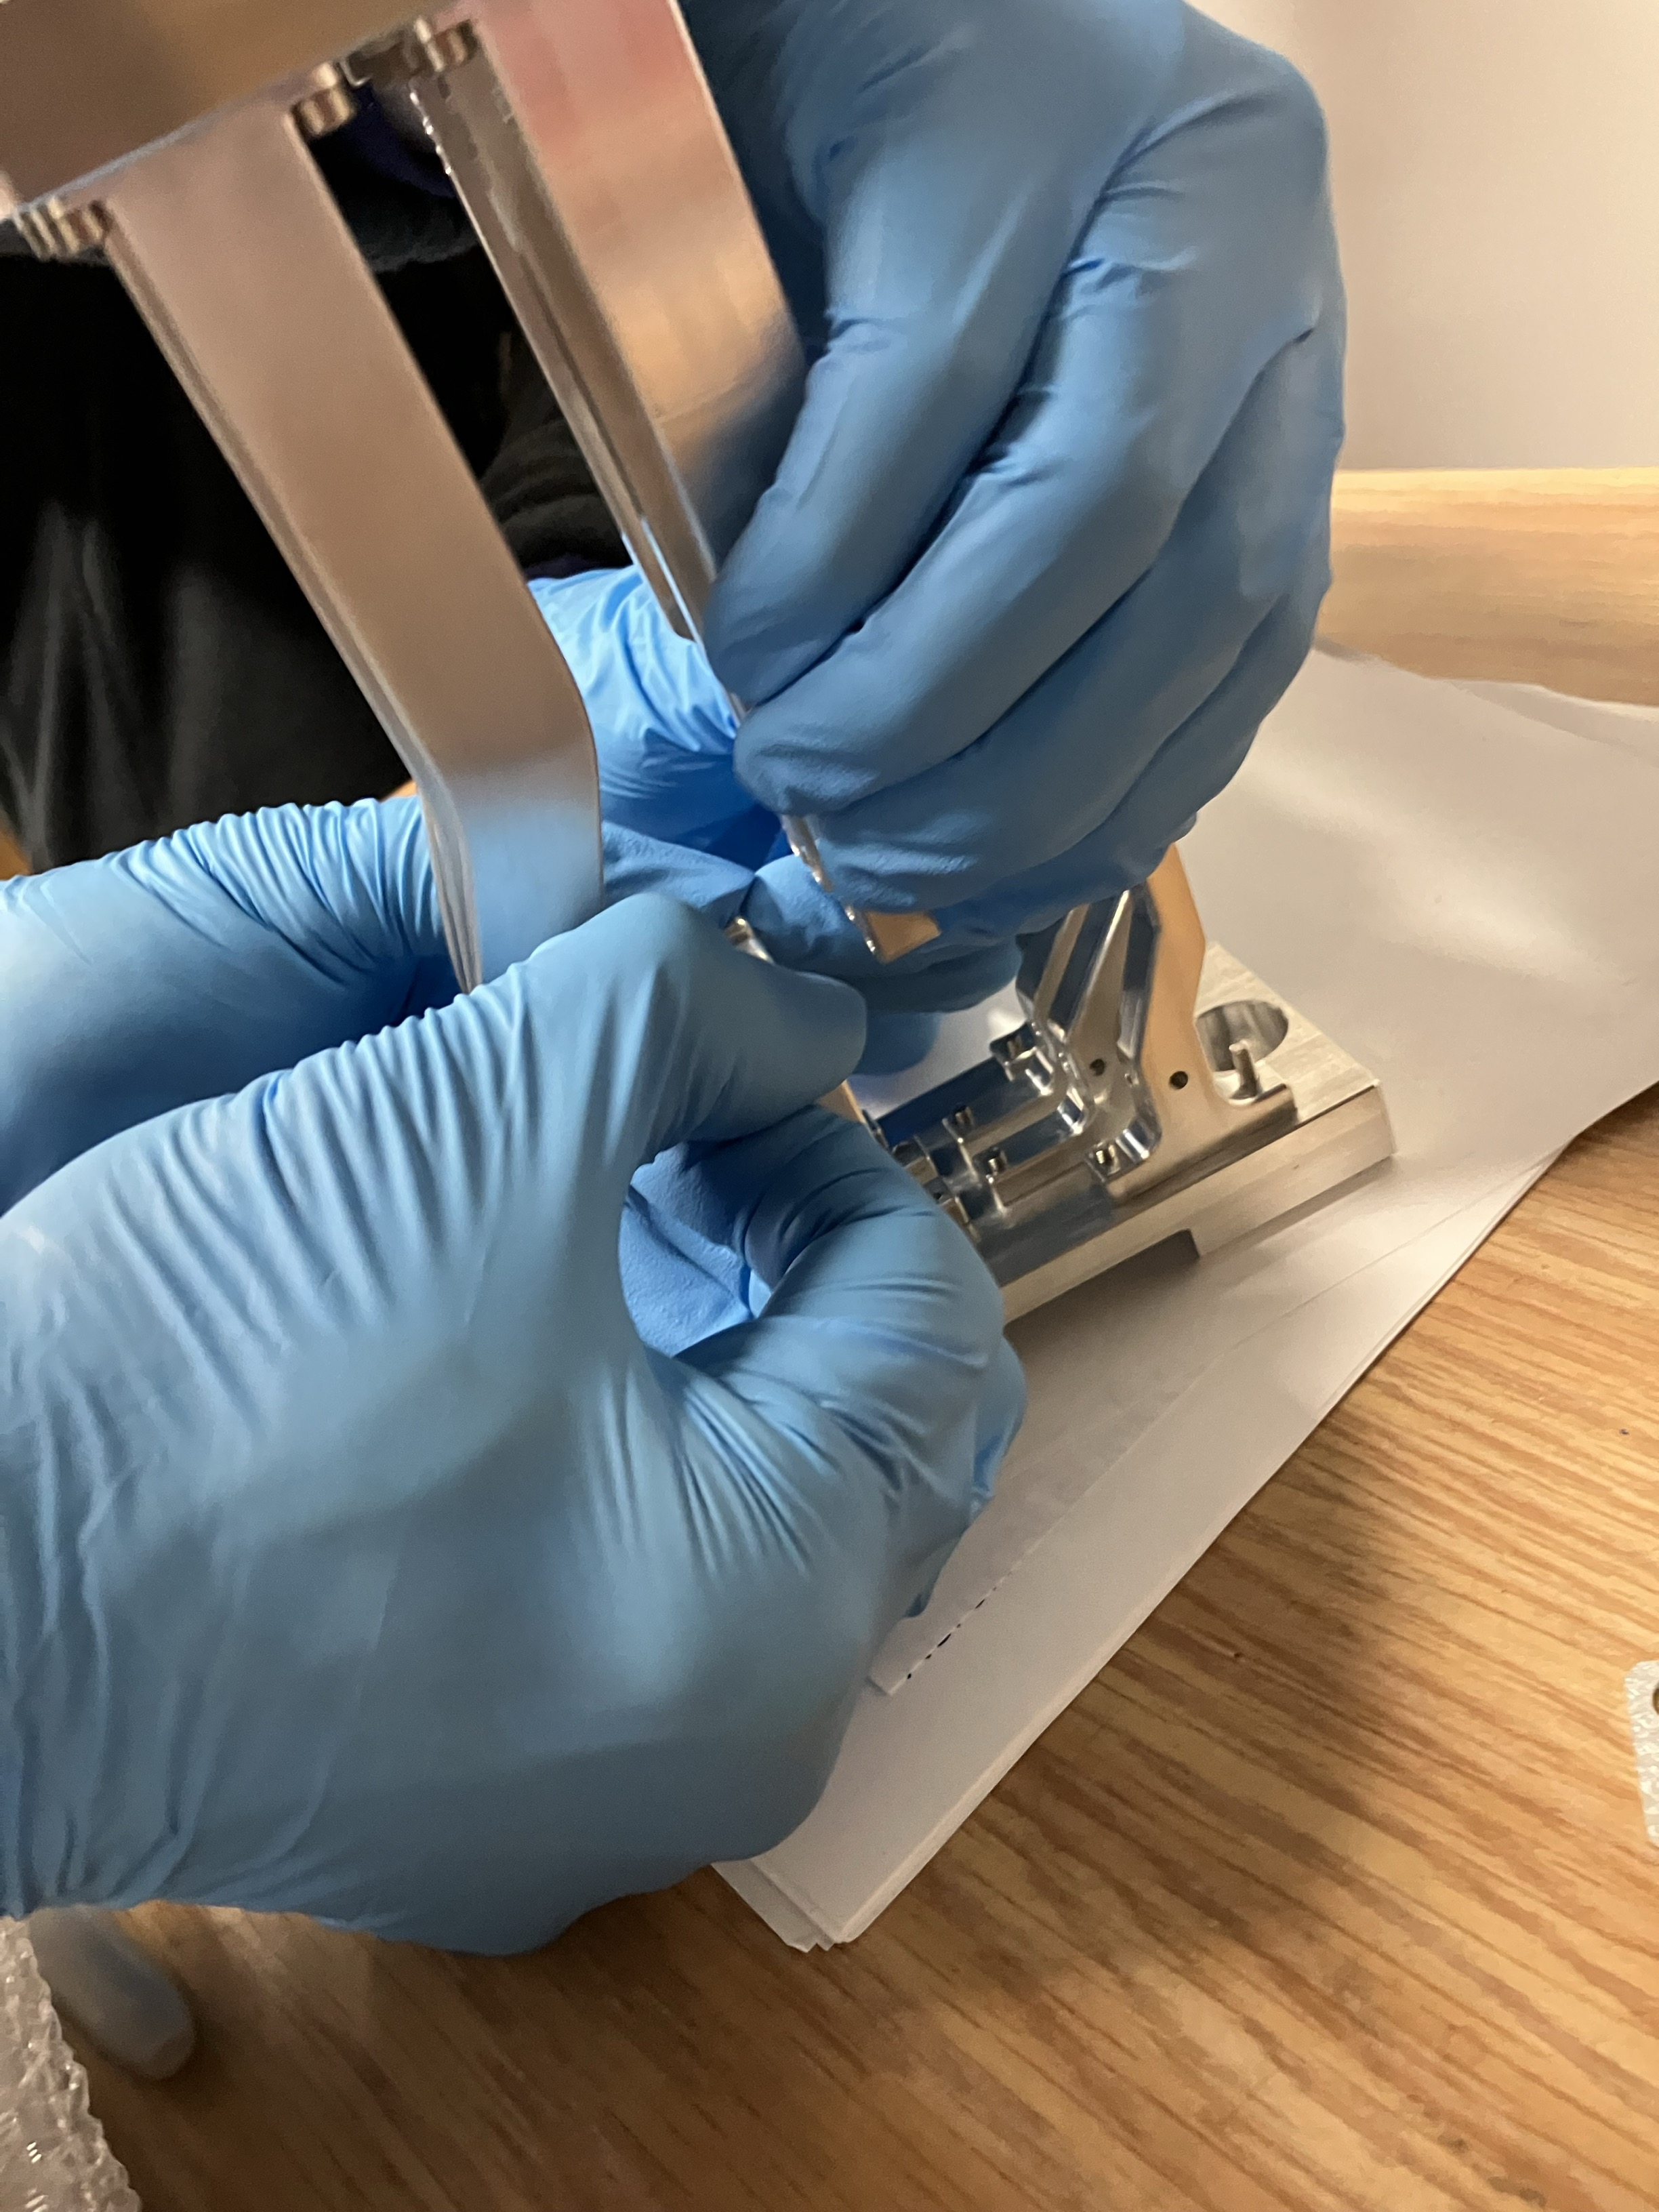
Aaron Tam | Hot Cell 1 | Development | Extraction Electrode Banana Plug (Show and Tell) | December 12, 2024 - Chad Fisher, Albert Kong, Aaron Tam, Austin Hagen
Tests:
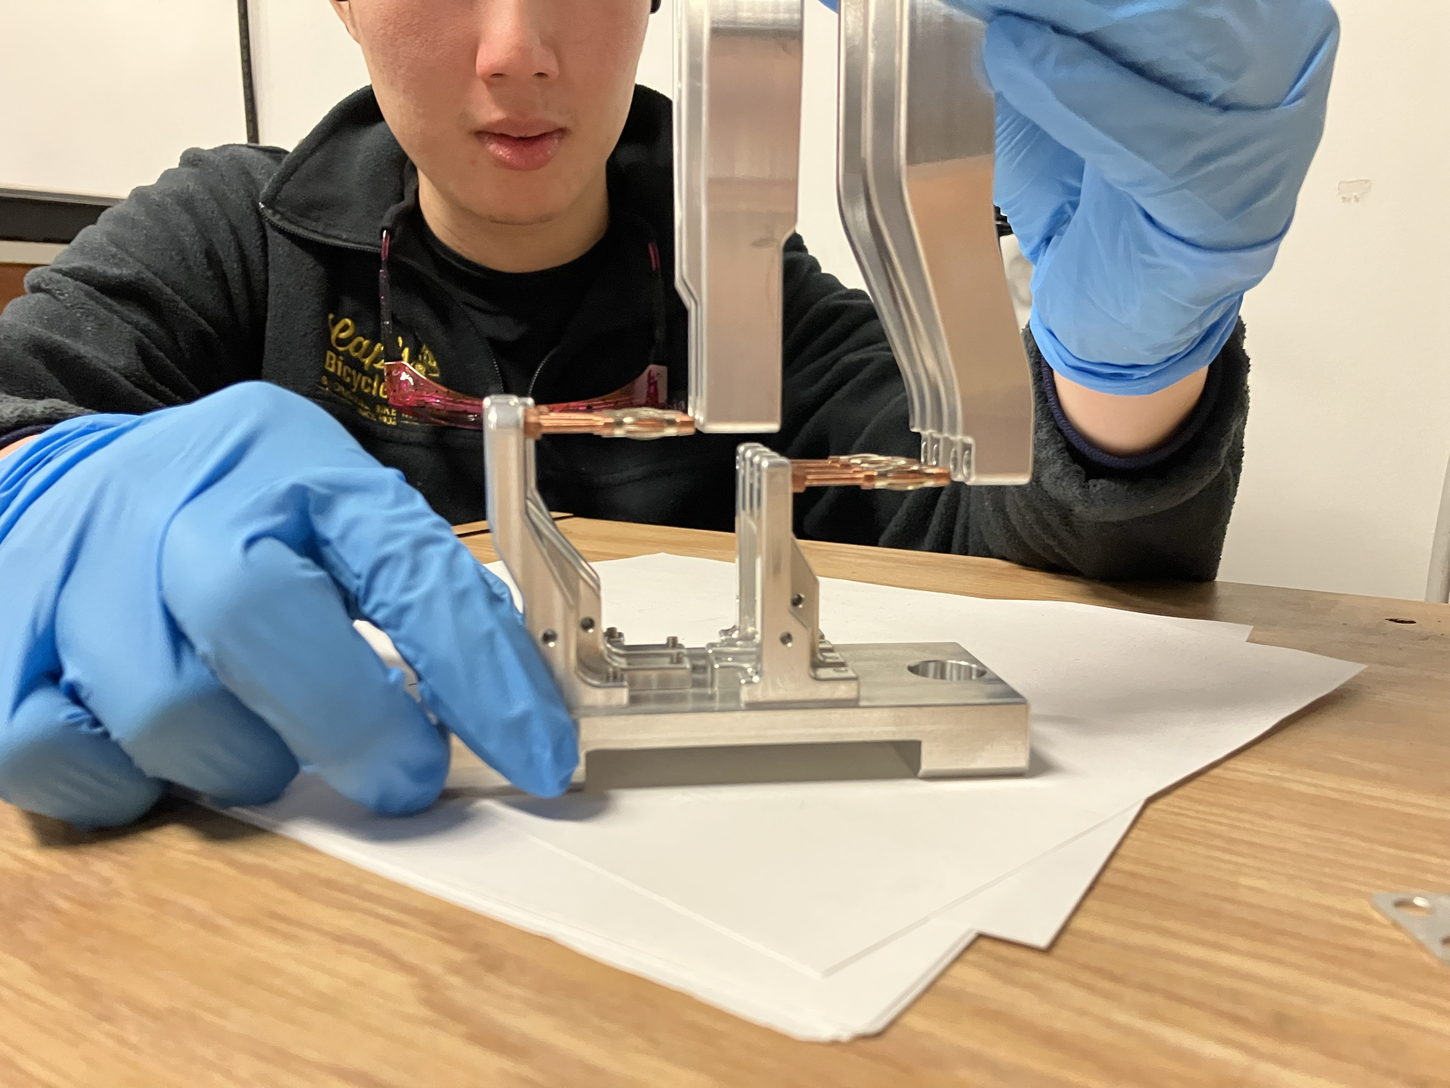
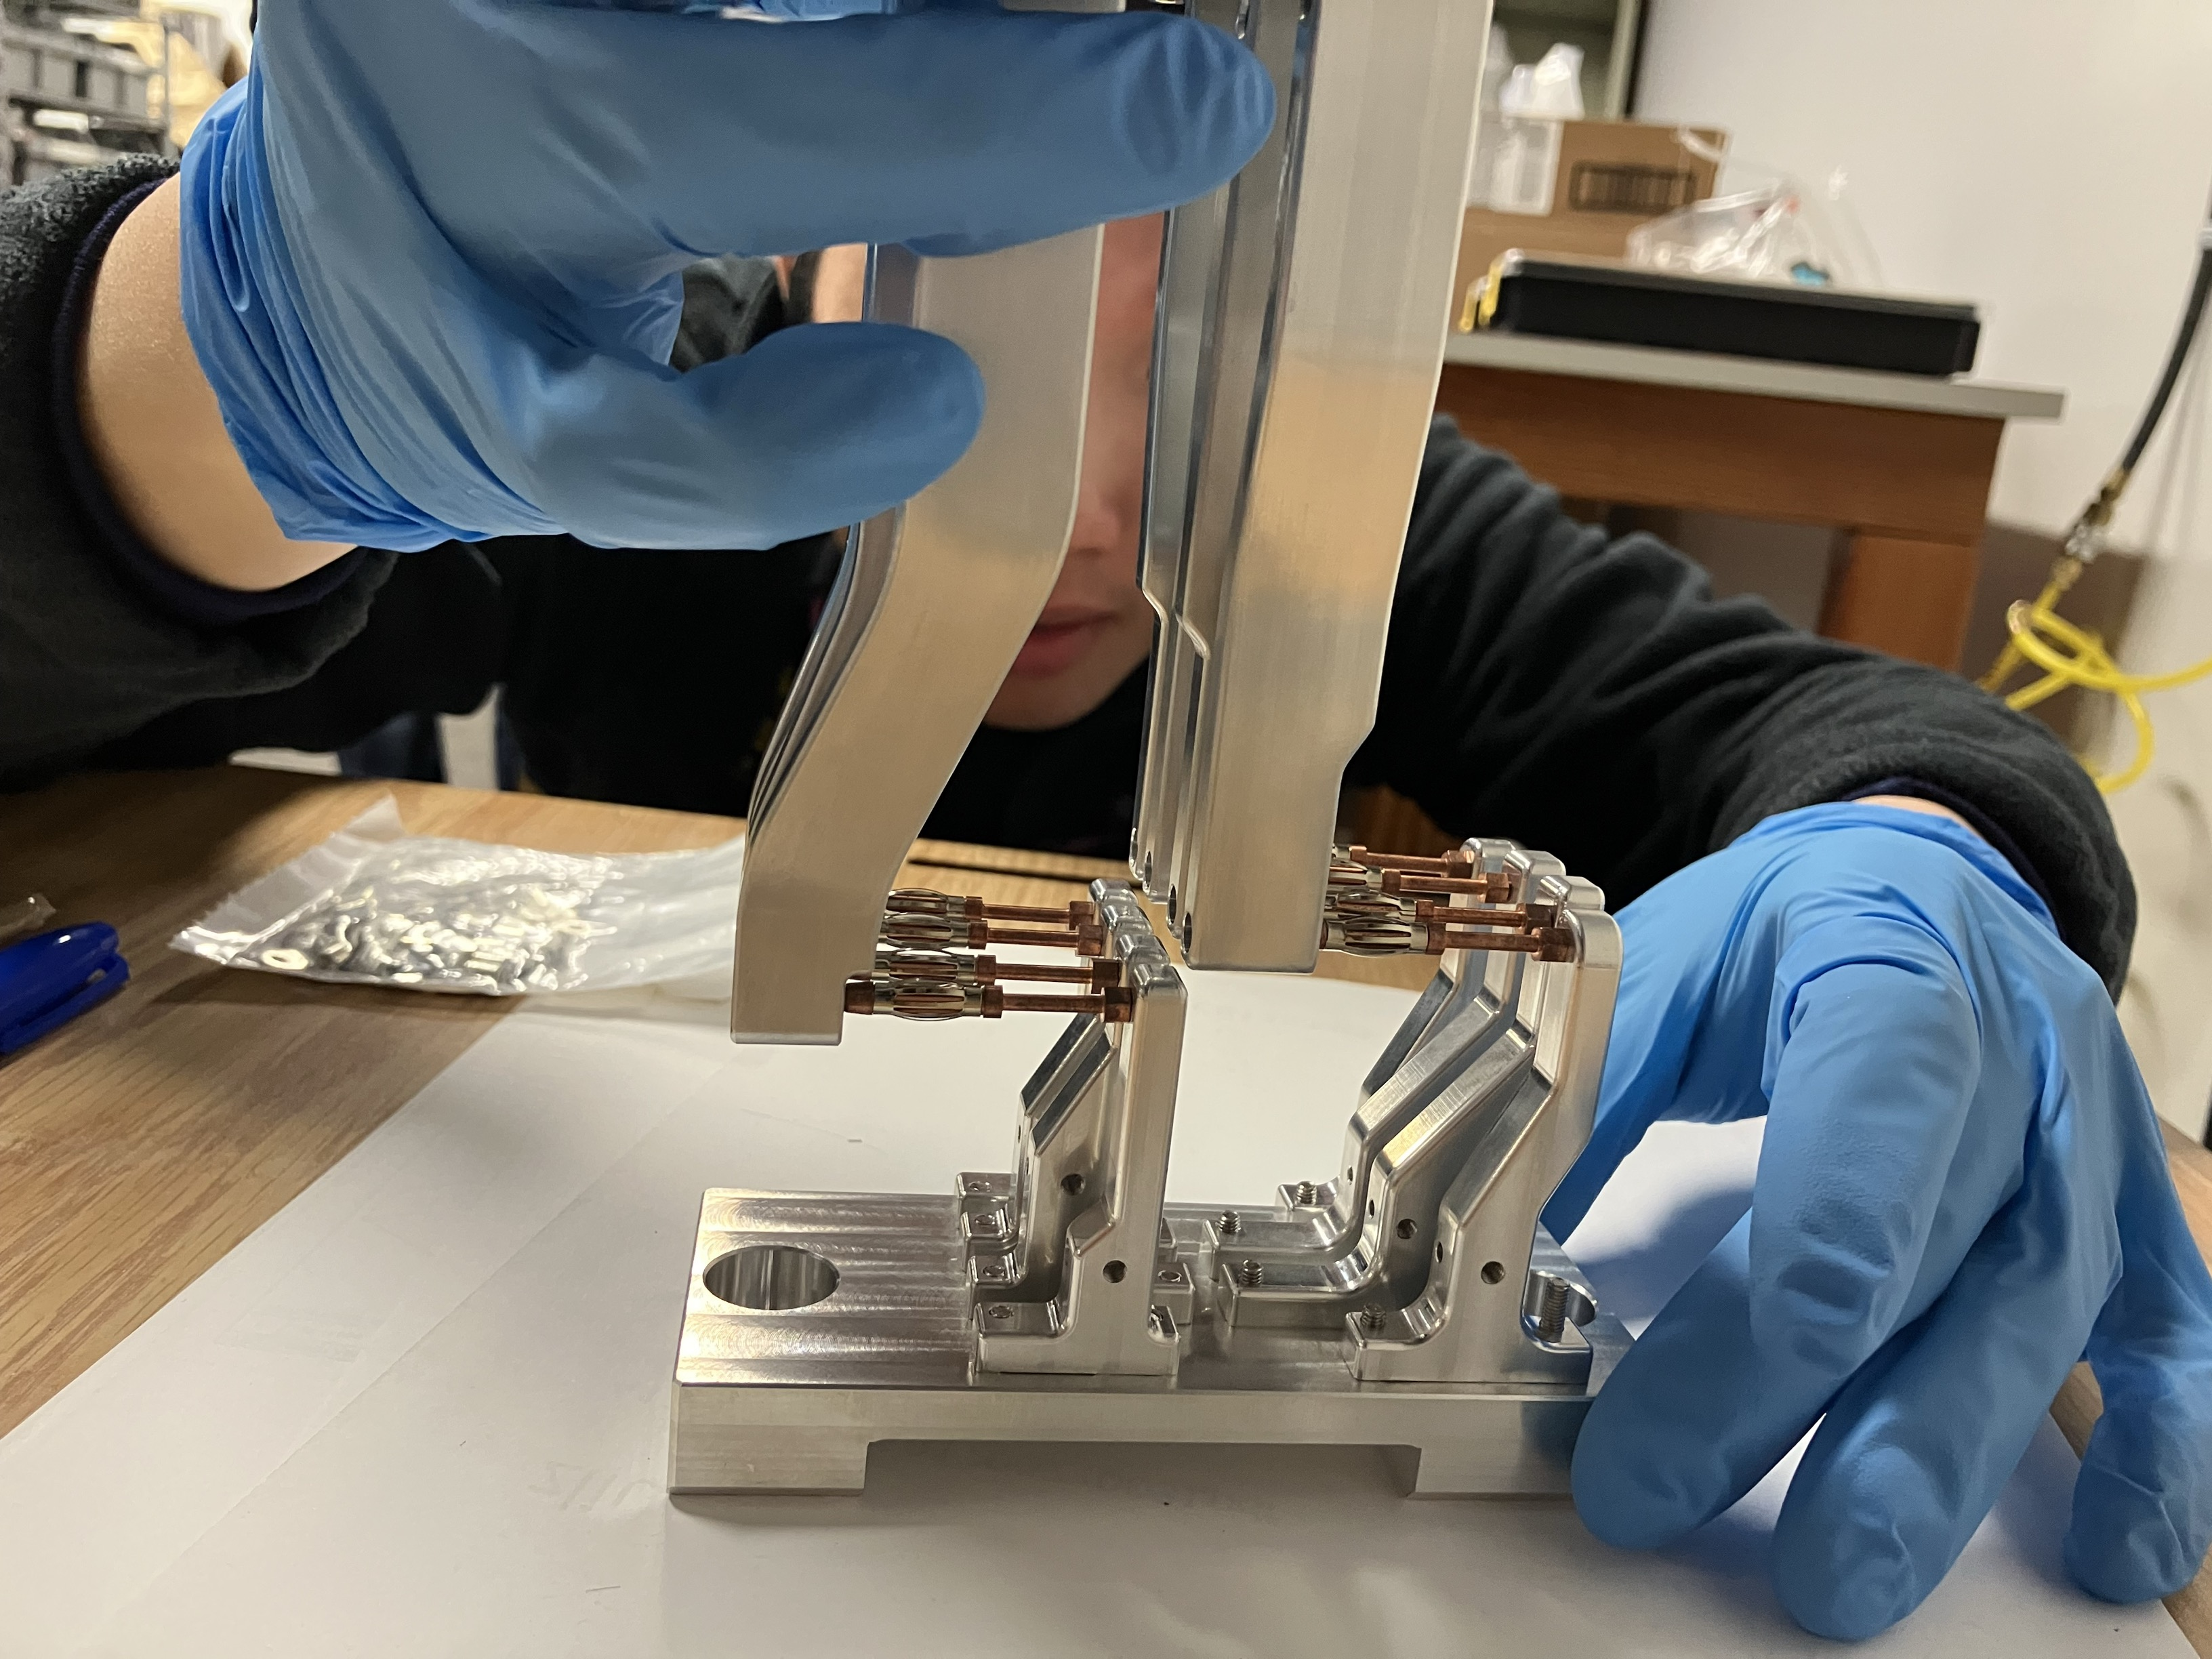
Loose piece connection and removal
- By hand, the two connections were brought together and removed carefully
Observation/notes:
- Copper extensions are fragile and can bend when removing extraction electrode.
- This makes this part fairly limited in its capacity to be re-used
- Copper extensions will need to be tuned before inserting into hotcell for replacement
Recommendations/follow up items/questions:
- Bigger lead-ins would be appreciated
- What is the exchange frequency?
- the flexible nature of the copper extensions makes re-use limited
- How many connections can we expect from the aluminum fingers?
- Would a closer locating feature specific to the pins help?
December 12, 2024 - Michael Genix, Aaron Tam
- Guide pins for the extraction electrode contact before the banana plugs
- As these pins are low tolerance, this will act as the guiding for the plugs
- Copper extensions have a much smaller diameter than the plugs, so positioning can be less precise in this area
- Exchange frequency is still TBD
- Pin and plug life is still TBD
- Potentially the copper extensions can be tuned in the hotcell
|
| Attachment 1: Alignment.jpg
|
|
| Attachment 2: Alignment_2.jpg
|
|
| Attachment 3: Fully_connected.jpg
|
|
| Attachment 4: Fully_connected_2.jpg
|
|
| Attachment 5: Removal.jpg
|
|
| Attachment 6: Removal_2.jpg
|
|
|
78
|
Wednesday, January 15, 2025, 12:57 |
Albert Kong | Hot Cell 1 | Development | APTW Front End Service Tray Flexible VCR Line Exchange Testing | Removal and replacement testing of the stainless VCR lines extending from the HVFT to the piston modules and FE plate is documented in this ELOG.
Exchange of the FE plate water connector lines is documented in a ELOG #79. Exchange of VCR gaskets in the permanent joints is given in ELOG #83.
Photos provided in PDF, download and open to view all, ELOG preview not guaranteed to show all.
Feb 13:
- Connecting VCR joints between PEEK seal water lines at FE plate to welded pipe section from HVFT was tested:
- Between the two joints, the one that is routed more internally was tested, there are more lines in the way of access to this joint so it is likely the more difficult of the two joints to service.
- The gas line routed from the back of the FE is routed next to this joint and interferes with servicing slightly.
- Retaining bracket on HVFT was kept on for the HVFT side of the line to simulate exchanging the VCR gasket only.
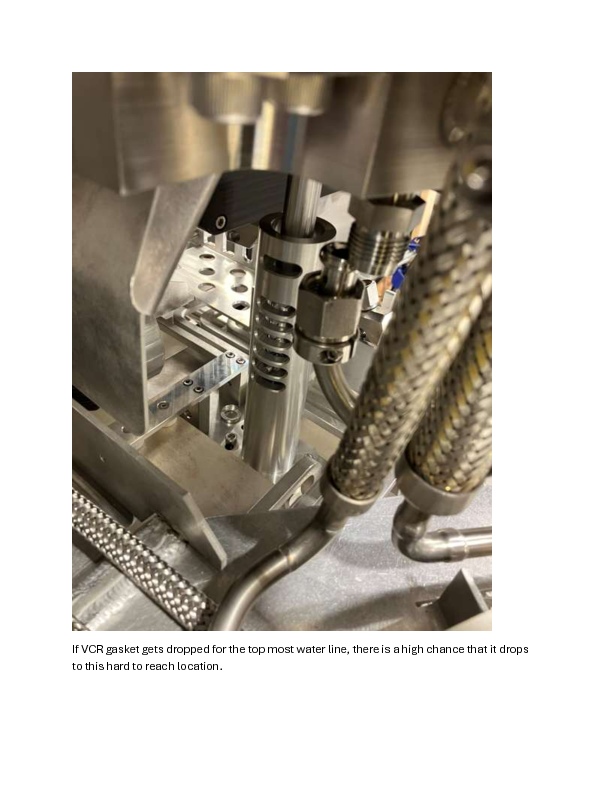
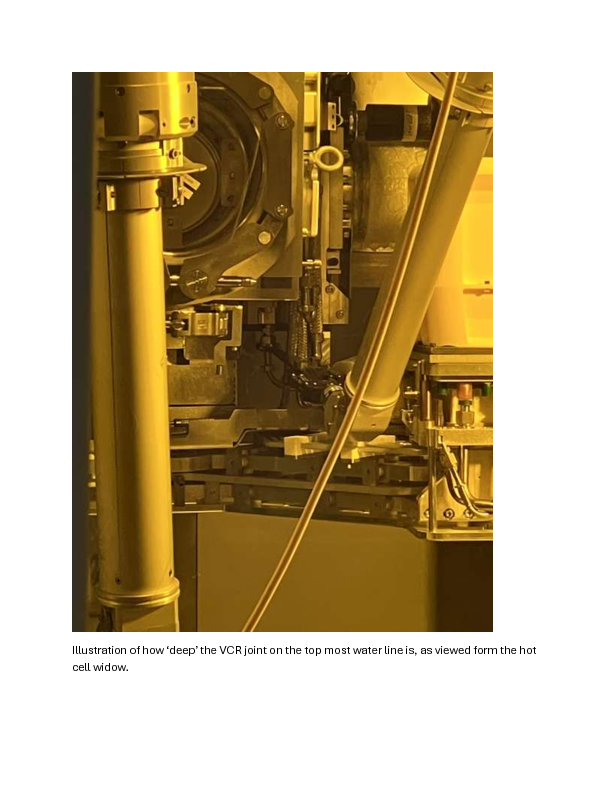
- It is very easy to drop the gasket during this operation, and in a very hard to reach location, would be good to come up with a solution to prevent this or minimize the chance of the gasket dropping into hard to reach crevasses, better if dropped onto lift table.
- Need to wedge something at the welded tube section to prop up the male VCR side of the joint for access for VCR exchange, large handled wrench worked best during testing.
- Recommend end-mount gasket to minimize risk of losing, end loaded gaskets are more secure than side loaded ones.
- Multi-pin bundle was not present during testing, in practice it will likely further obstruct the joint and increase the risk of dropping a VCR gasket, recommend unpinning FE side of the bundle and getting it out of the way in the real operation.
- Due to the way that the lines are welded, they tend to be misaligned unless 'turned' by the manipulator into orientation, a camera mounted on the base jig, a dedicated stand, or even on the table would be good to get an alternate view and ensure that the threads are aligned during servicing. This creates side load onto the threads and makes 'hand tightening' with the manipulator fingers difficult to do.
- By hand, the welded tube section looks like it could be removed without issue, assuming the VCR joints are undone, the FE plate side was tested separately.
- A design change suggestion that was discussed was the addition of some kind of retainer or other feature on the line routing trays on the FE to hold the male side of the VCR joint and help simplify the gasket exchange operation.
- Ultimately, however, we were able to successfully exchange the gasket in this line.
- The long gas lines between the HTV and the service tray was tested by hand:
- the electrical connectors on the FE plate (mass markers) were not present during testing, but we believe it should not have affected the outcome.
- the line(s) were successfully 'fished out' by hand, we believe it can go through the FE plate opening both ways (from the back or through the front) without too much issue.
- the gas line brackets on the FE plate needs to be taken off in order to exchange the top gas line
- the critical operation for the gas line will be removing the screws from the bracket, if it is dropped there is a high risk of it dropping into the FE carriage mechanisms and be difficult to retrieve
- a catch tray is strongly recommended to prevent this
- a hand tool to grab onto the sealing faces of the gas line is recommended (see previous observations in ELOG 72)
- Most other lines between the HVFT and the service tray look like they could be pulled out and returned without having to remove other lines, but we will check for sure when we revisit testing these lines.
- Note: one slightly concerning line is the one routed in along the lowest layer, obstructed by all other lines above.
We will resume testing by attempting to replace the gas lines with the manipulator
------------------------------------------------
Feb 20:
Gas lines:
- The ideal order of operation for exchanging these lines would be:
- rotate the FE such that HVFT faces window, undo bracket and release the HVFT side of the gas lines
- rotate FE back so HTV faces window, place protective cover/grabber on seal face as necessary, undo small screws for lines onto bracket, undo bracket screw and remove lines with bracket from FE plate
- fish out line to be replaced from HTV side, insert replacement, if line catches cable tray at any point, rotating on the axis of the line can help free the line
- insert new lines through the opening (likely good idea to have protective cover/holder for the seal faces at this point), mount onto bracket without screws, mount bracket onto plate with screw, put screws for lines on bracket
- remove protective cover on new lines.
- the above order minimizes the # of times the FE has to be rotated on the turntable.
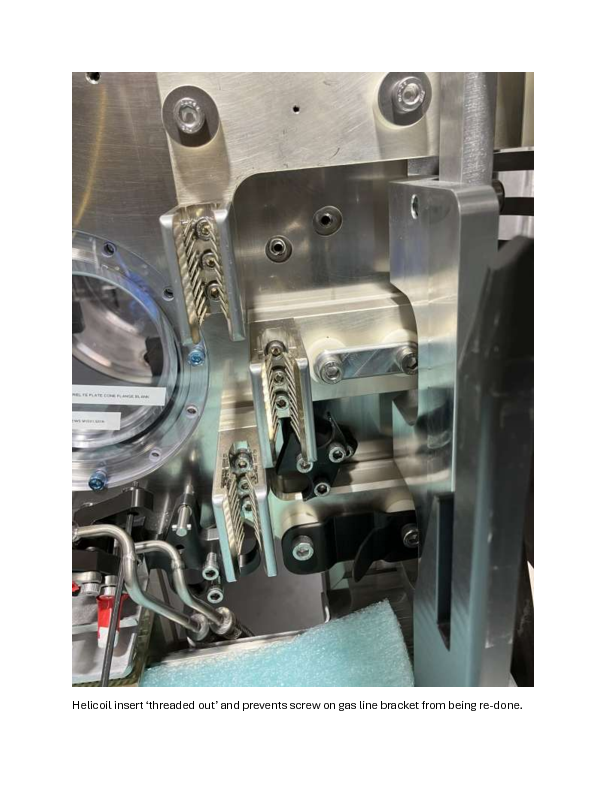
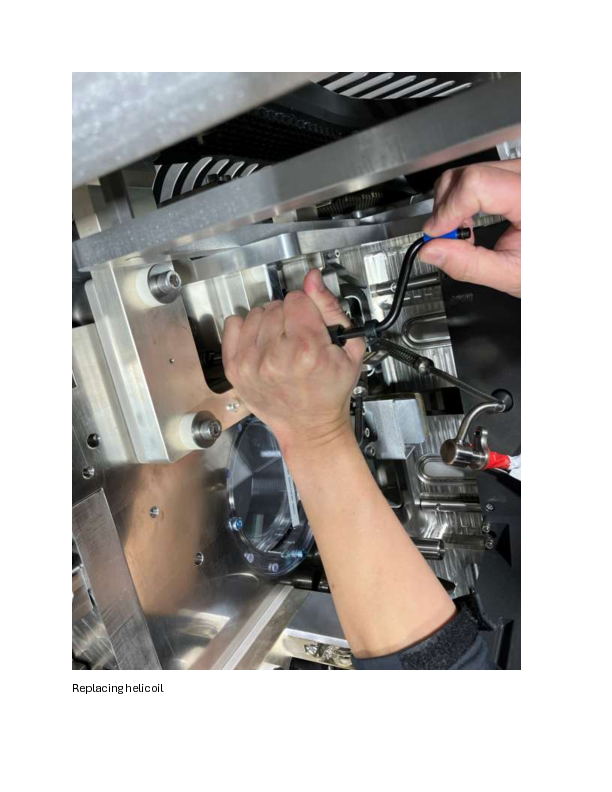
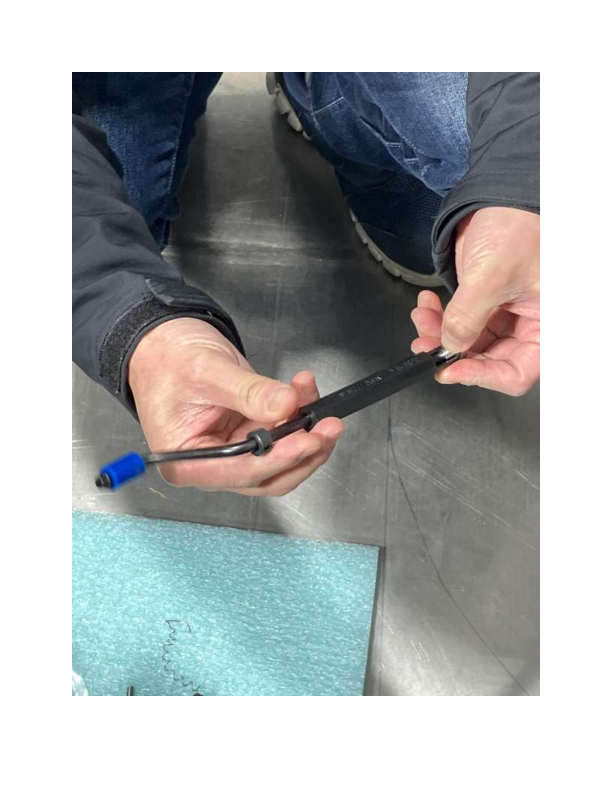
- When removing the gas line bracket screw by hand at the start of the testing session, as the screw was side-loaded by forces from the braided hose, the helicoil insert on the tapped hole spun out. This is a critical failure mode as if it were to happen during operation, it may necessitate the replacement of the part with the helicoil installed. This is often not possible within the hot cell so the whole FE assembly would instead be exchanged. To prevent this failure mode, we strongly recommend switching from helicoils to key inserts, which have drastically reduced possibility of spinning out because of how they are installed.
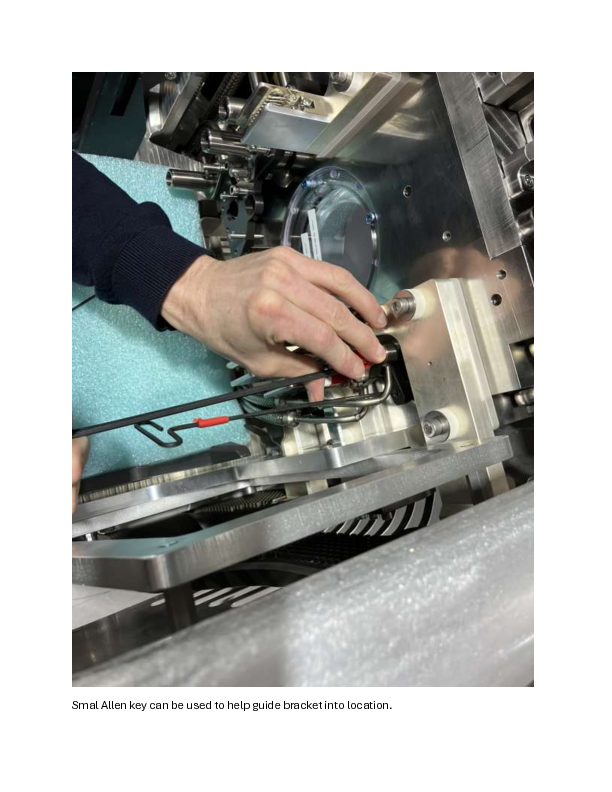
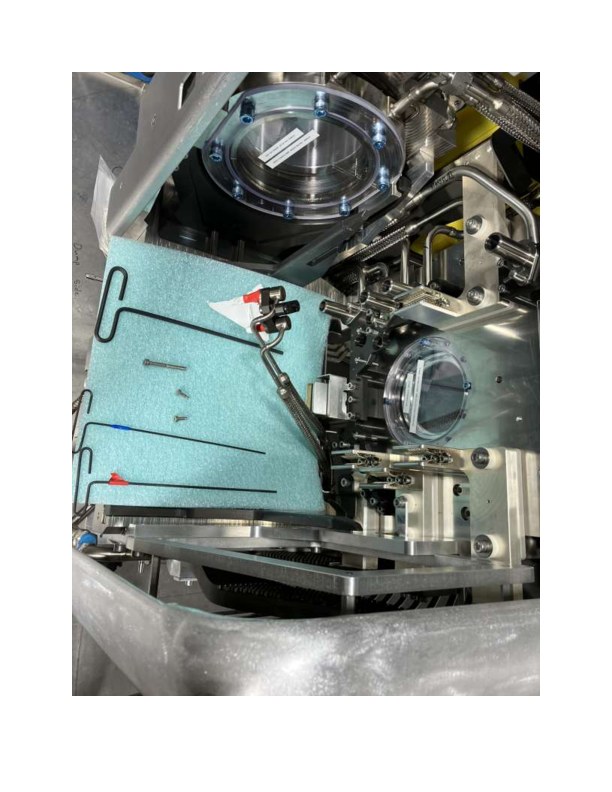
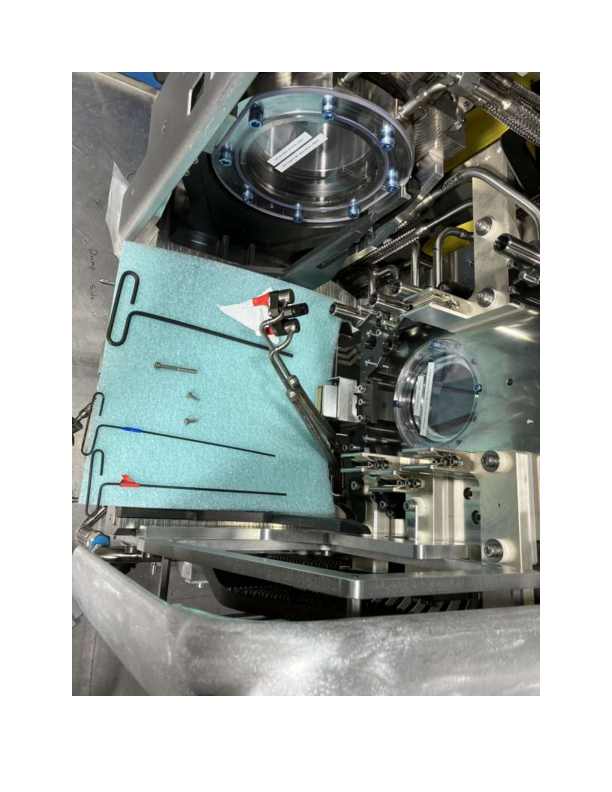
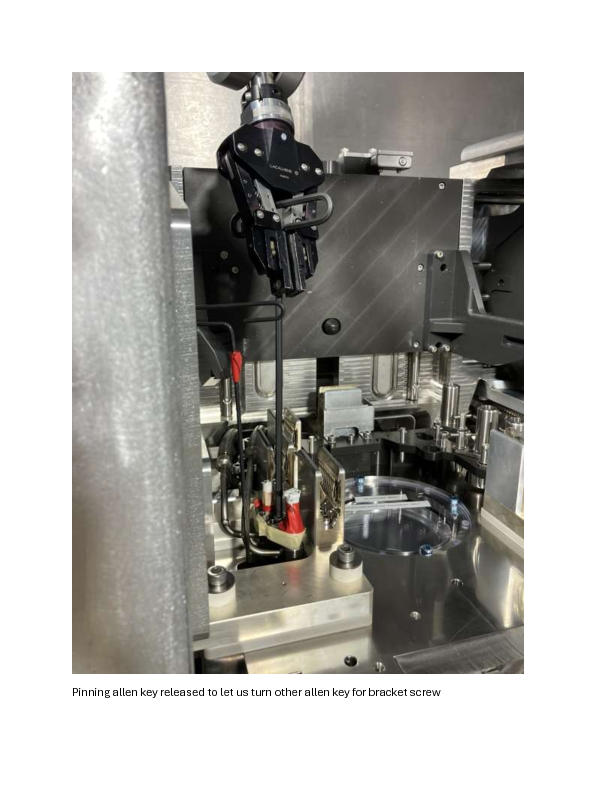
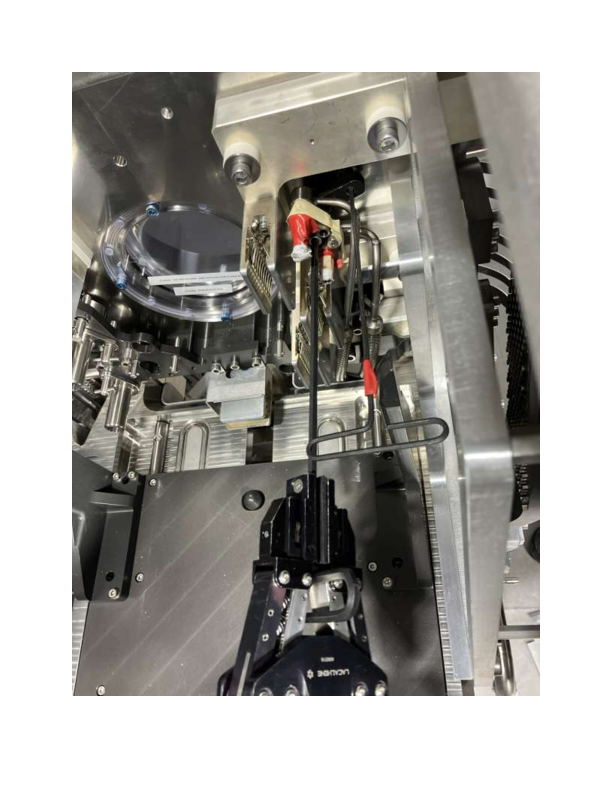
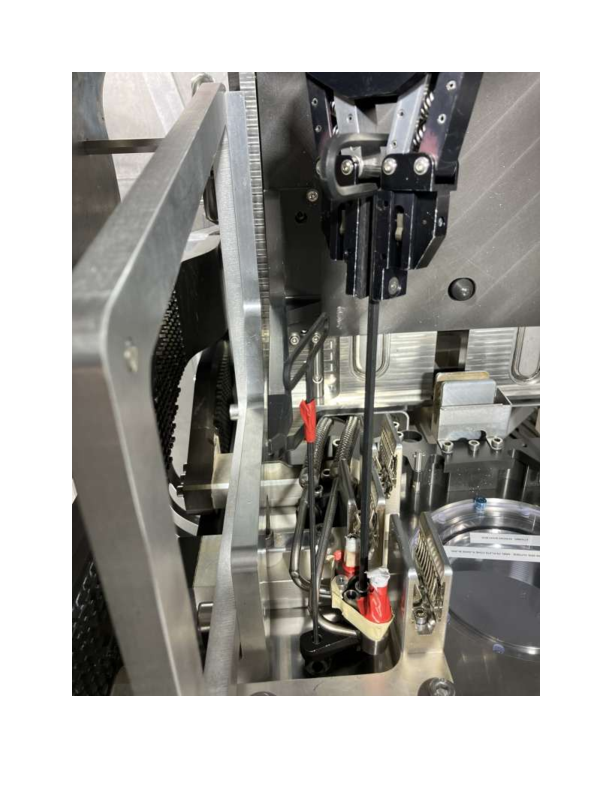
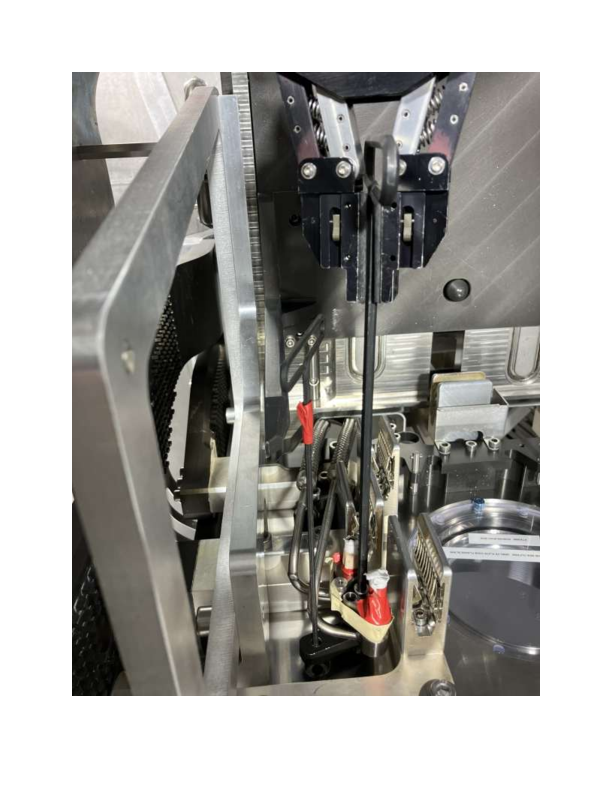
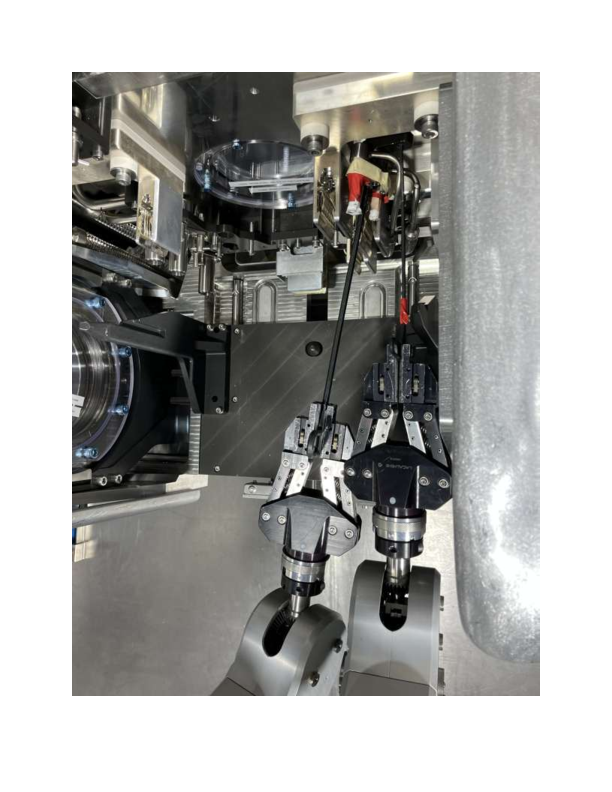
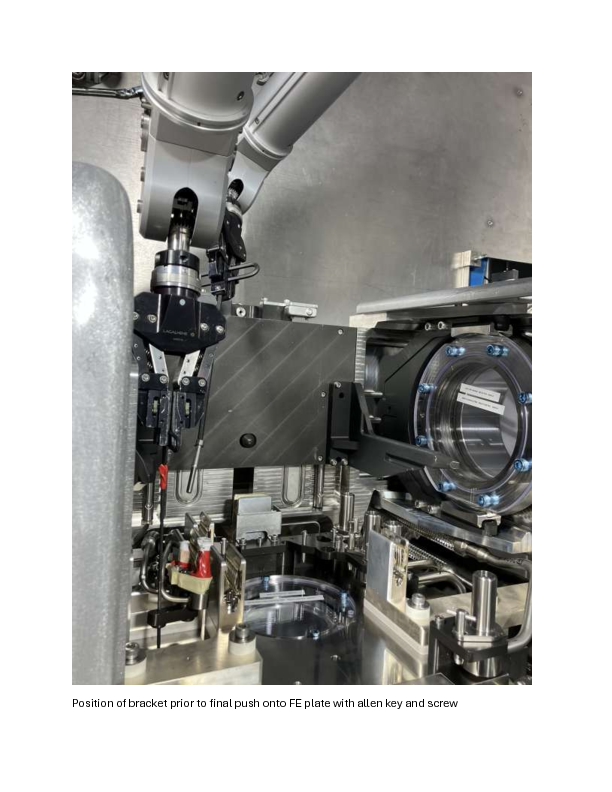
- Using a smaller sized Allen key lets us line up the bracket by passing it through the unused hole (see picture).
- We successfully pulled out the two gas lines up through the opening on the FE plate and reinserted them into place, ready to be mounted onto the bracket and reinstalled.
- Again, the caveat being we don't have any of the mass marker cables and connectors (barrel, multi-pin connectors) on the FE plate that would likely interfere with the gas lines.
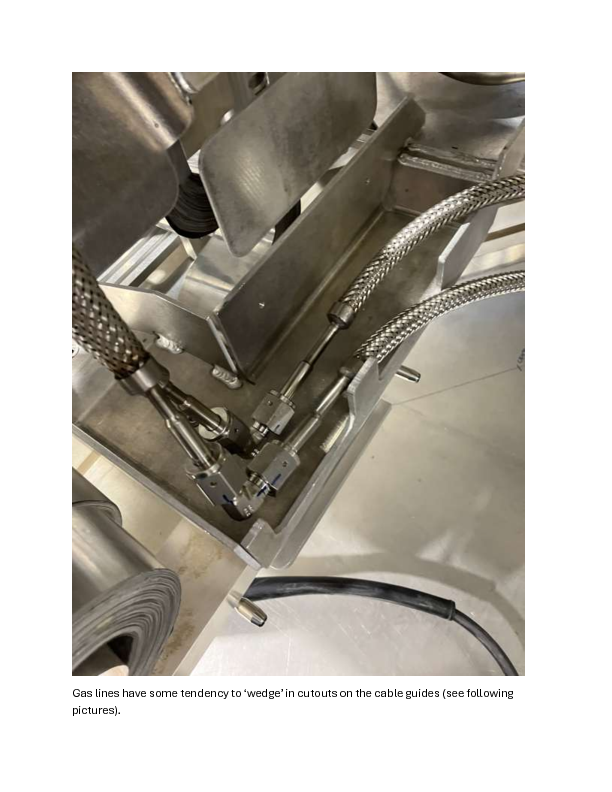
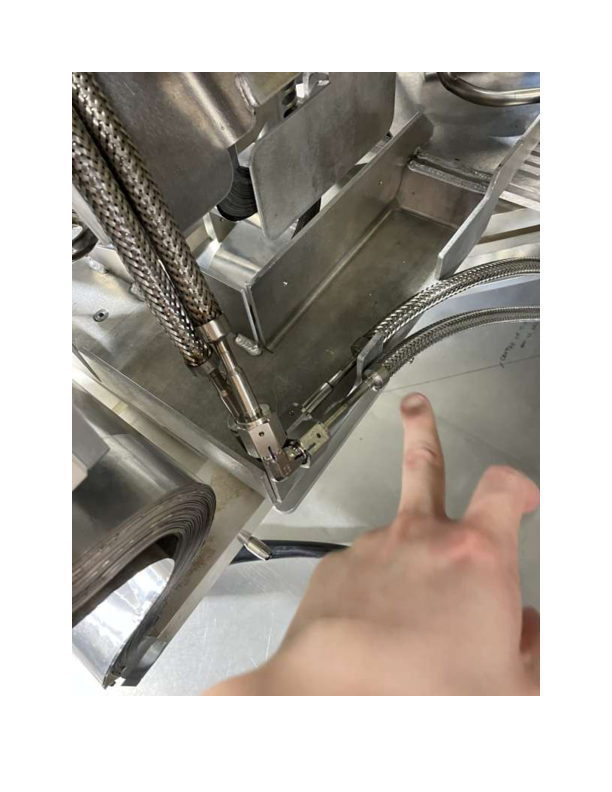
- There is a tendency for the lines to 'wedge' and 'catch' on cutouts on cable trays, but this can be remedied with proper views and by simply loosening and rotating the lines if it feels like they've caught onto something.
- We will fix the key insert in the coming week and finish up hot cell testing of the gas line (just need to return the lines onto the bracket and re attach the bracket onto the plate).
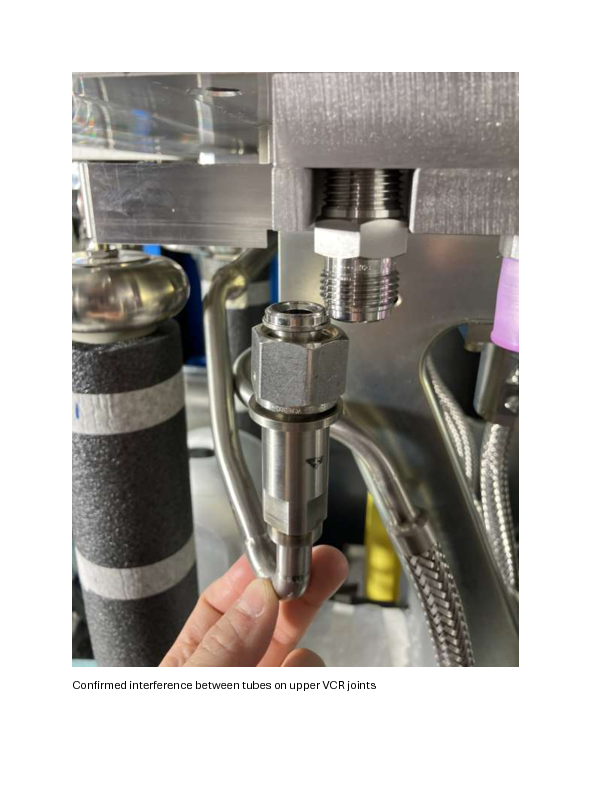
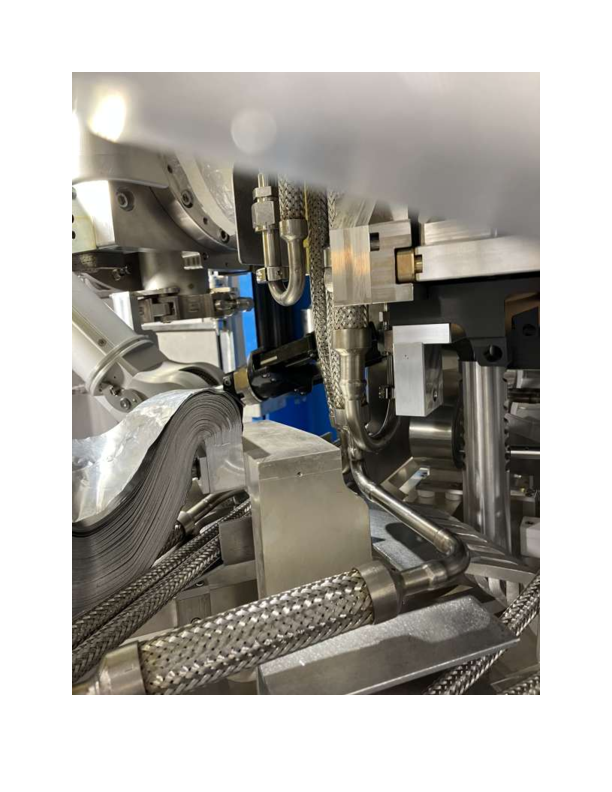
Besides the above, we also confirmed that there is interference between tubes at the upper VCR array with 4 joints (see picture).
------------------------------------------------
Mar 06:
- The helicoil that spun out was replaced
- We are confident from prior testing that we can take off the gas lines from the bracket and take off the bracket from the FE plate and fish the faulty gas line from it's routing path
- Something to allow us to distinguish the upper from bottom line would be good if only replacing a single gas line, used tape during testing
- Attempted to reattach gas lines to the bracket
- great difficulty, need 1 manipulator to hold the gas line, another to hold the bracket, and a third to operate the allen key and insert the shoulder screw
- likely possible but will take many attempts
- note that it was possible to pick up the small shoulder screw with the T-handle allen key
- one shoulder screw lost during testing and could not be retrieved, this is a likely failure mode during operation
- recommend full exchange of gas lines on bracket -> the preferred approach
- two manipulators recommended for routing the gas lines back in when attached to the bracket
- there is a possibility for the gas line to catch In an awkward spot behind some HV shielding (see picture)
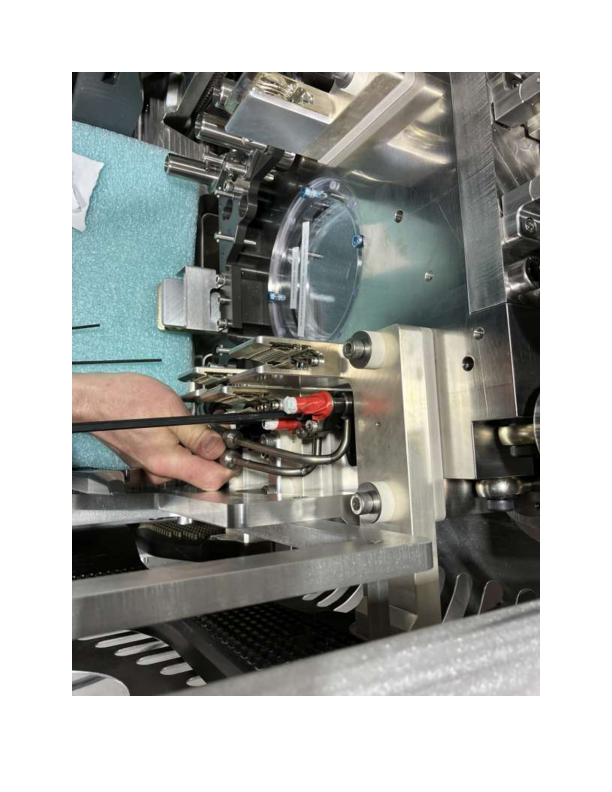
- smaller sized allen key used to 'pin' and roughly locate the unbolted alignment hole of the bracket, recommend checking that the used allen key fits into the threaded hole before using
- operation order is: feed lines mostly in, roughly position to allow allen key pinning, pin with allen key, bring the bracket closer to the alignment holes, use allen key with fastening screw to bring the bracket together with the FE plate as a final operation
- generally cramped work area, in the final step for tightening, needed to remove manipulator from pinning allen key
- during the test, the bracket feature that is meant to align with the slot on the FE plate was not aligned fully as the bracket screw was tightened but at the very end it snapped into alignment
- The replaced helicoil did not feel particularly smooth, possibly the underlying thread was damaged
- The retaining tab for the gas line makes the operation difficult, would be a good idea to remove if possible
- If the helicoil in the unused threaded hole on the FE plate is unused it is recommended to remove it to prevent it from being accidentally unwound and interfereing with future bracket exchange operations
- without close up cameras, difficult to see when screws start and when the pinning allen key is in place
|
| Attachment 1: Feb13_ServiceTrayToFEPlateLinesExchangeTesting.pdf
|
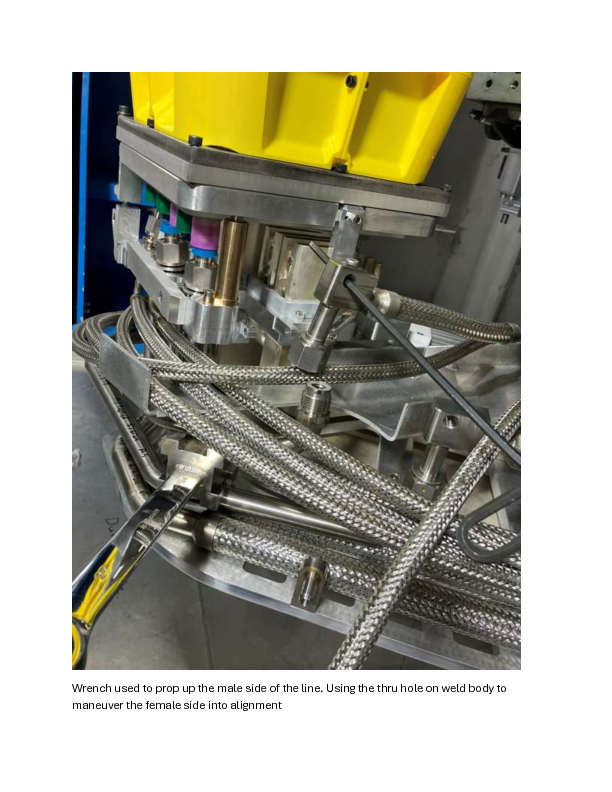
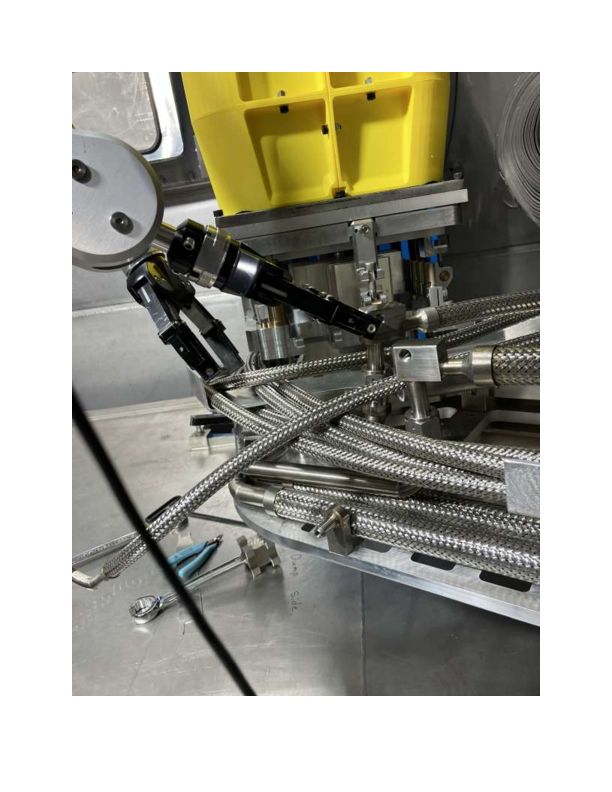
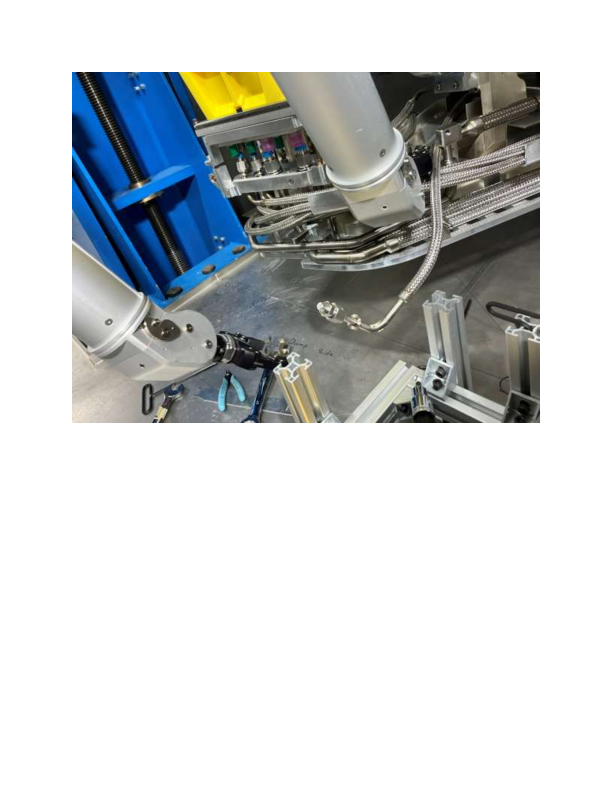
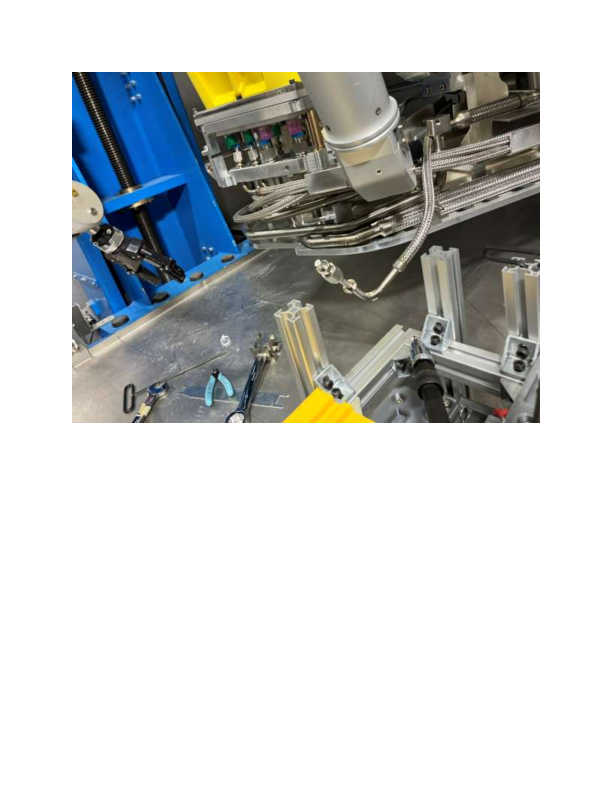
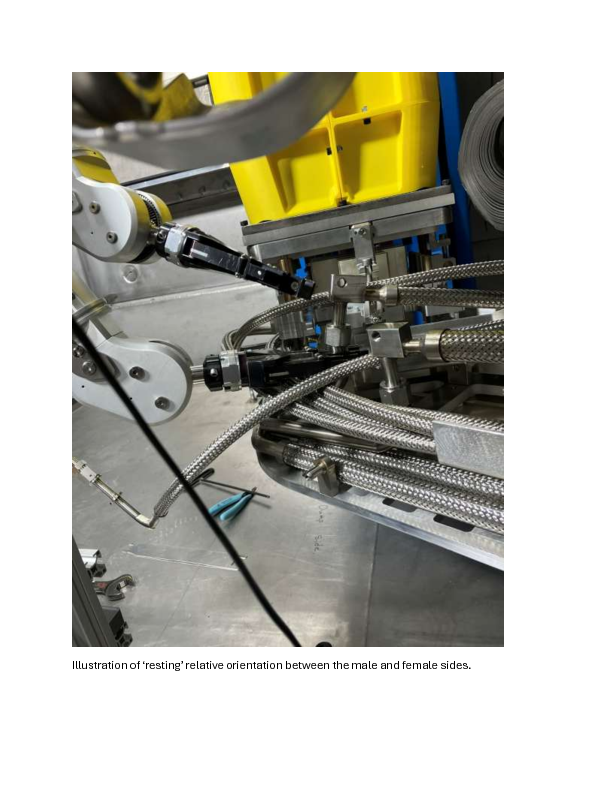
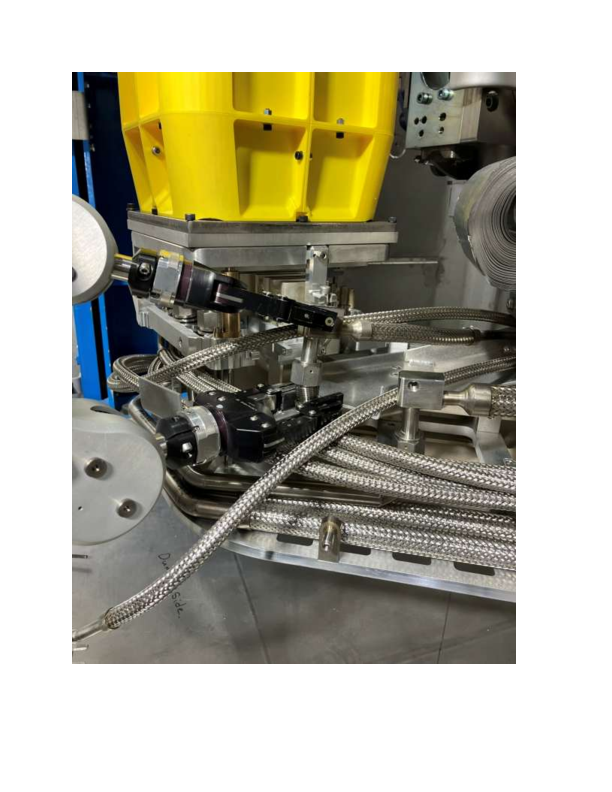
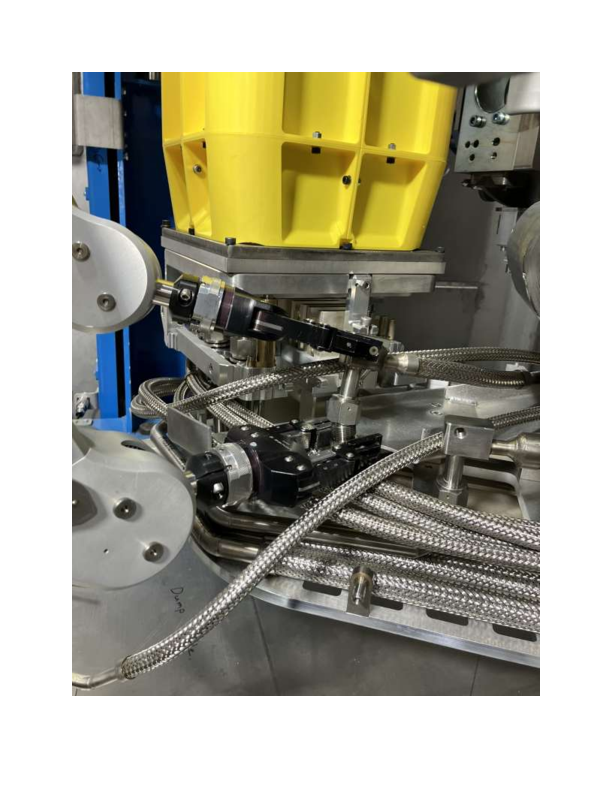
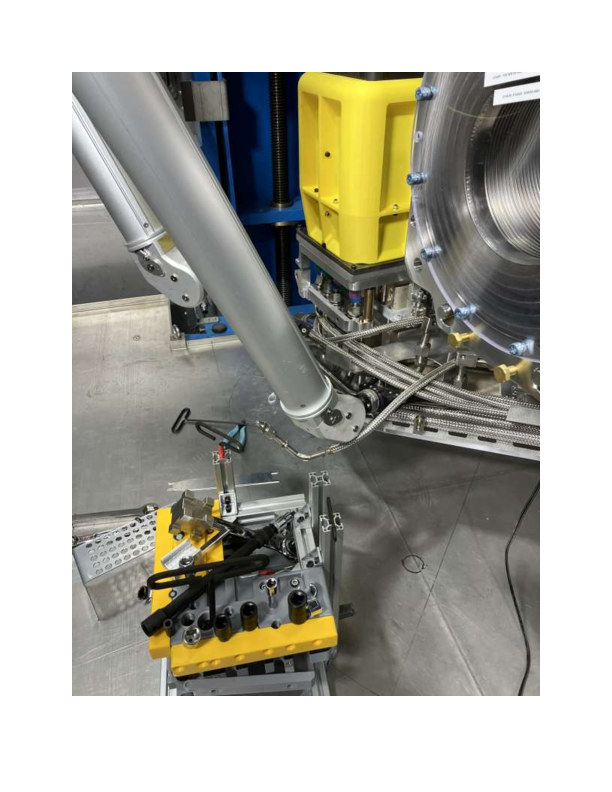
|
| Attachment 2: Feb_20_FE_Plate_Gas_Lines.pdf
|
|
| Attachment 3: Mar_06_Gas_Line_Exchange.pdf
|
|
|
79
|
Wednesday, January 15, 2025, 12:57 |
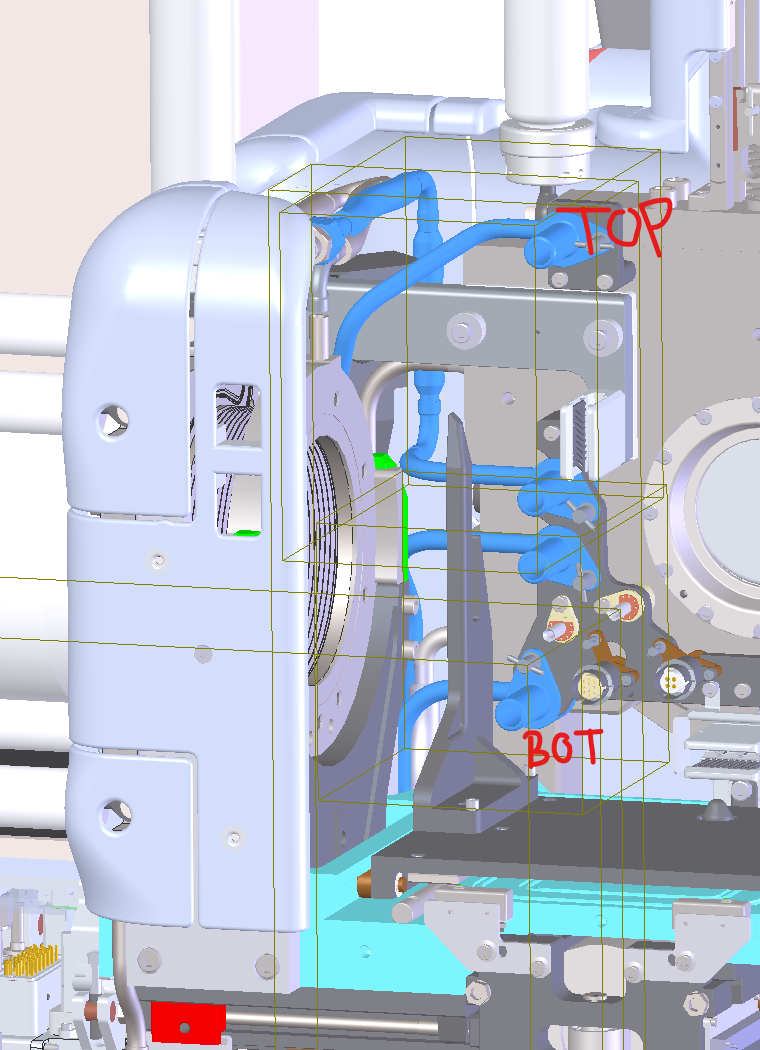
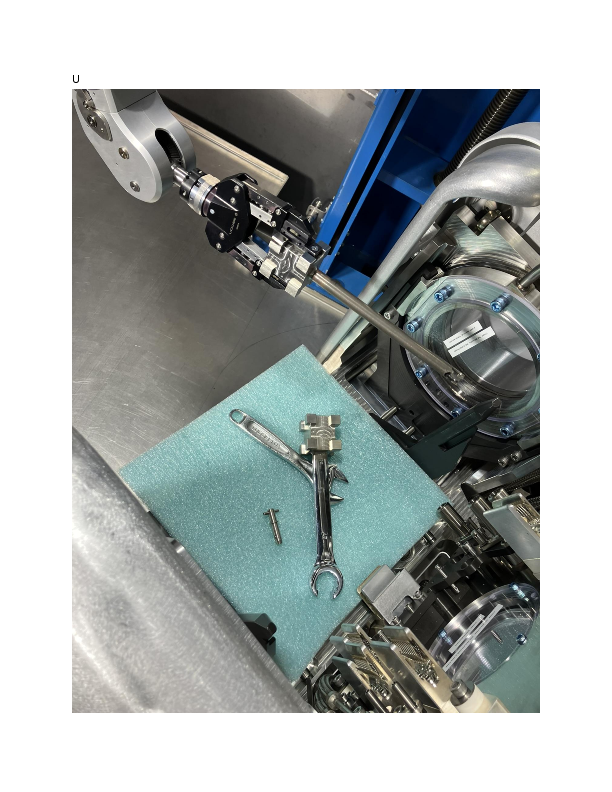
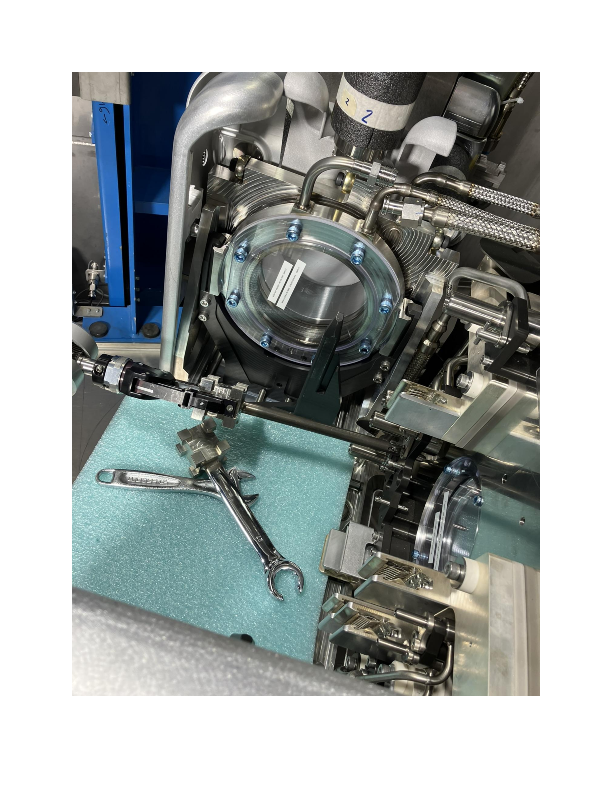
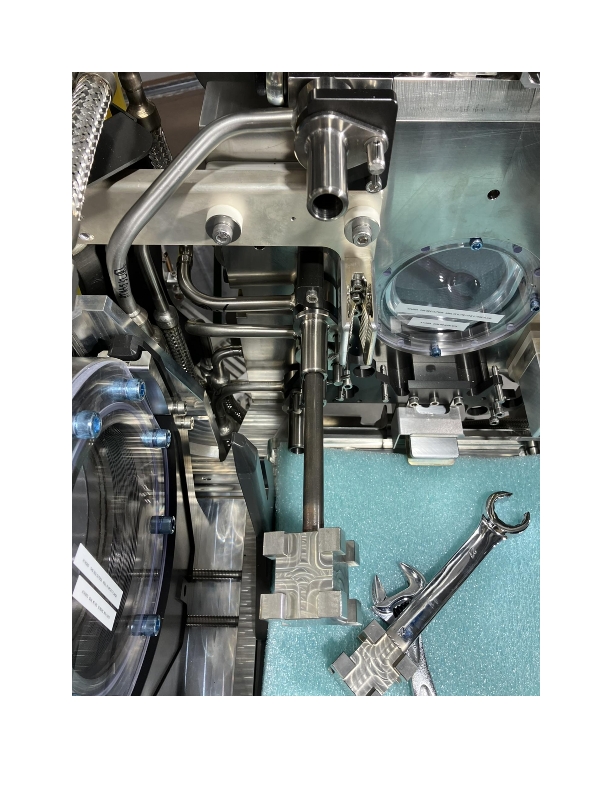
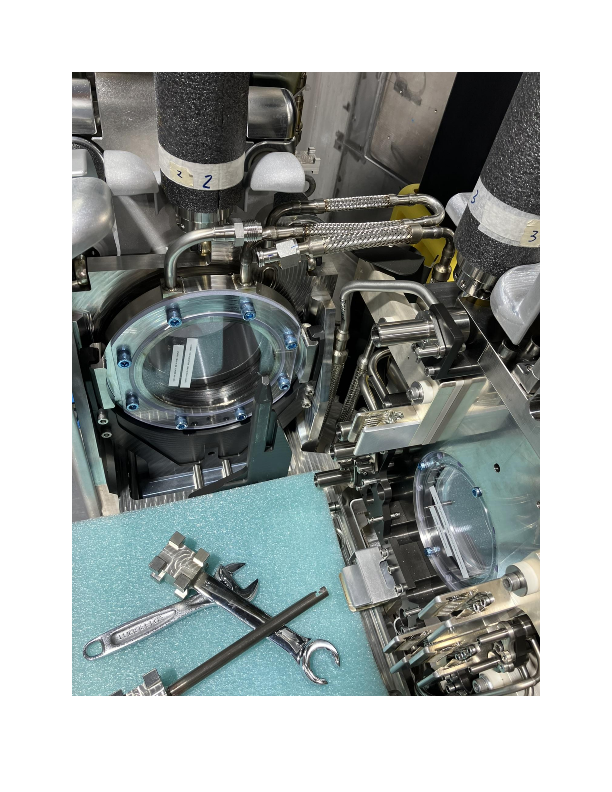
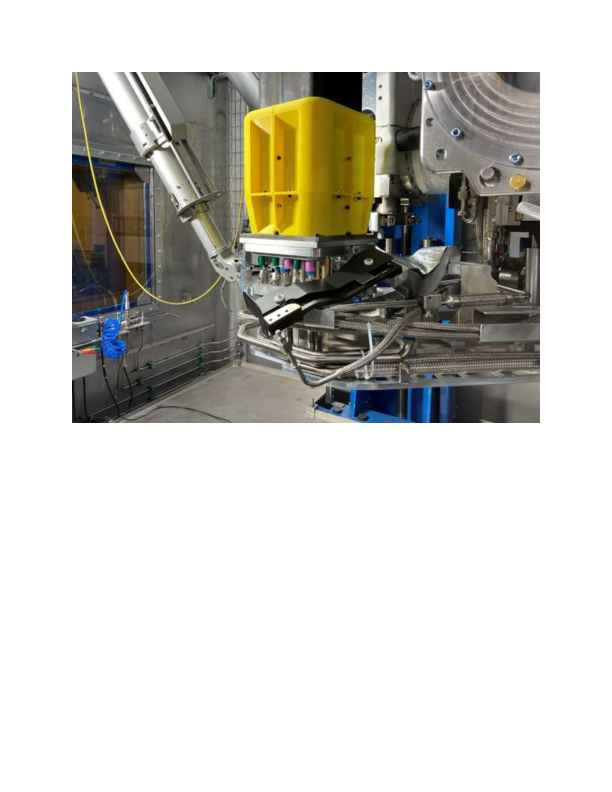
Albert Kong | Hot Cell 1 | Development | APTW Front End HTV Water Connector Exchange Testing | The four water connections on the front end plate of the APTW that will connect to the HTV were tested for replacement with the manipulators:
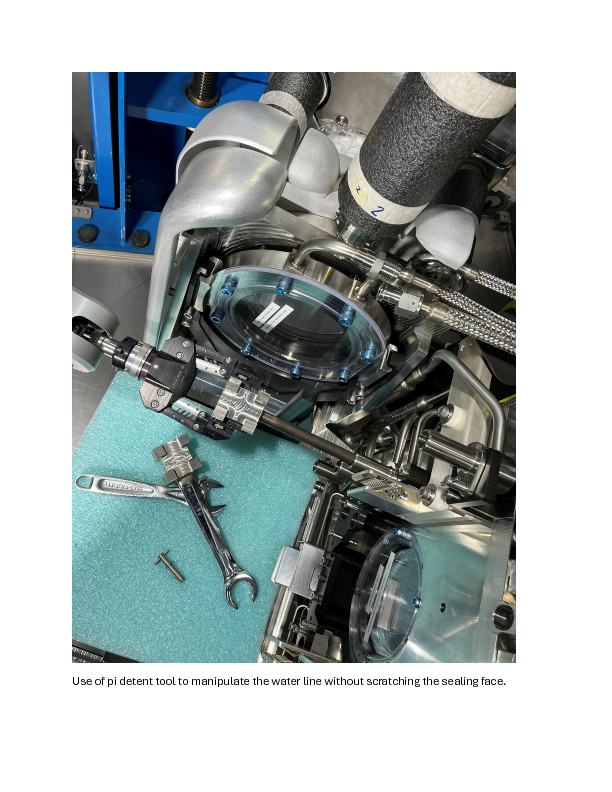
- The pin on these connectors were fairly easy to remove and replace with the old pin detent tool.
- The pin detent tool could also be used to manipulate the water lines while protecting the sealing face.
- The horizontal VCR joint on the DRIVE BEAM CONE (ATA3674) could be undone with the manipulator and standard wrenches, it is advisable to use 'semi-closed' wrenches on the nut to prevent it from dropping when torquing or undoing the joint.
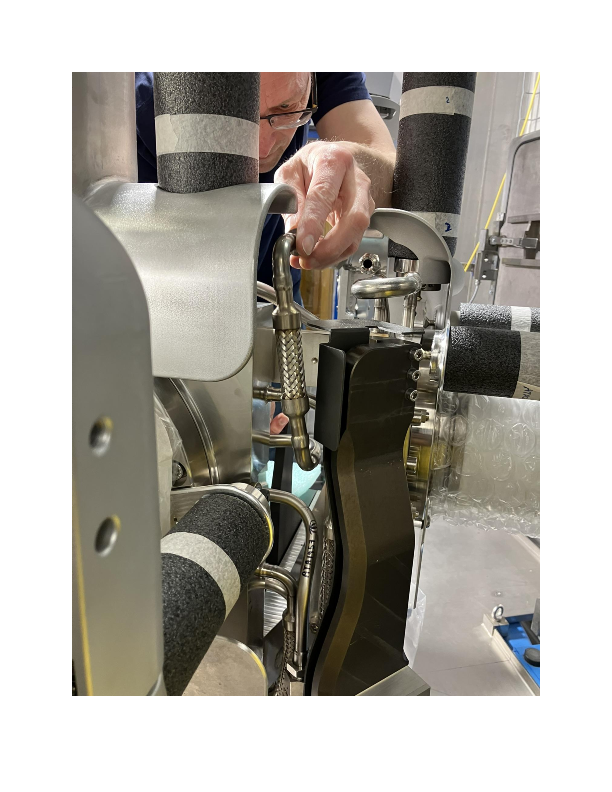
- Of the four water lines, only the top line could be taken out and returned by hand, testing with manipulator still to be done.
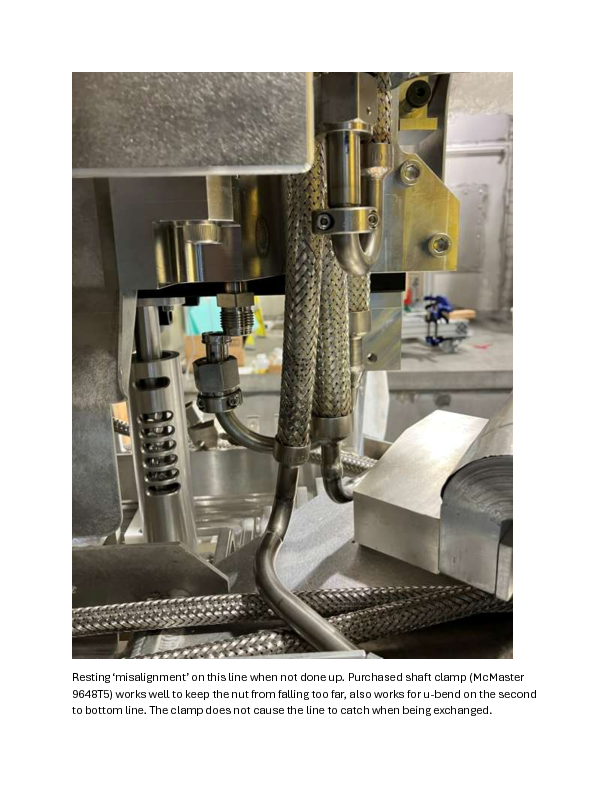
- It would be nice for this top most line to have a clamp or something to keep the VCR nut on the bottom U-bend from falling.
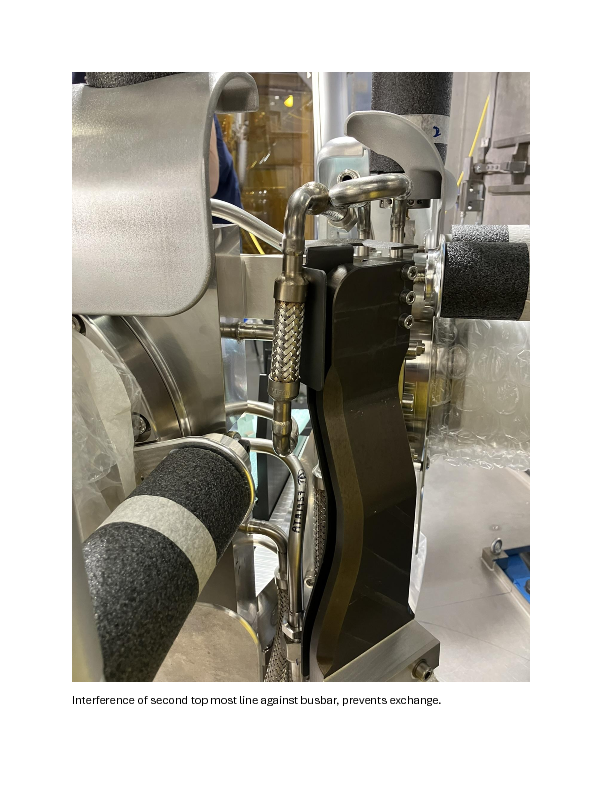
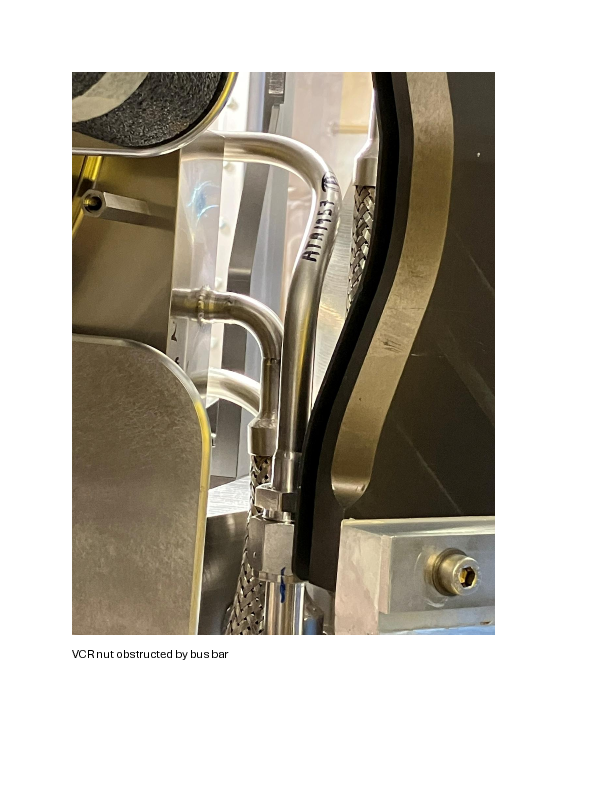
- The second line from the top interferes with the bus bar when trying to be removed by hand.
- The second line from the bottom has a VCR connection obstructed by the same bus bar when trying to remove by hand.
- The bottom line catches on the other lines when trying to remove by hand, the other lines likely need to be removed first to allow this line to be exchanged.
- is the intent for the bus bar need to be removed to exchange these lines?
- The VCR nuts on the water lines located by the bottom of the bus bars will require the turntable to be raised most of the way up to access with the manipulators.
Testing will resume in the following week for these water lines.
------------------------------------------------------------------------
UPDATE Jan 23, 2025:
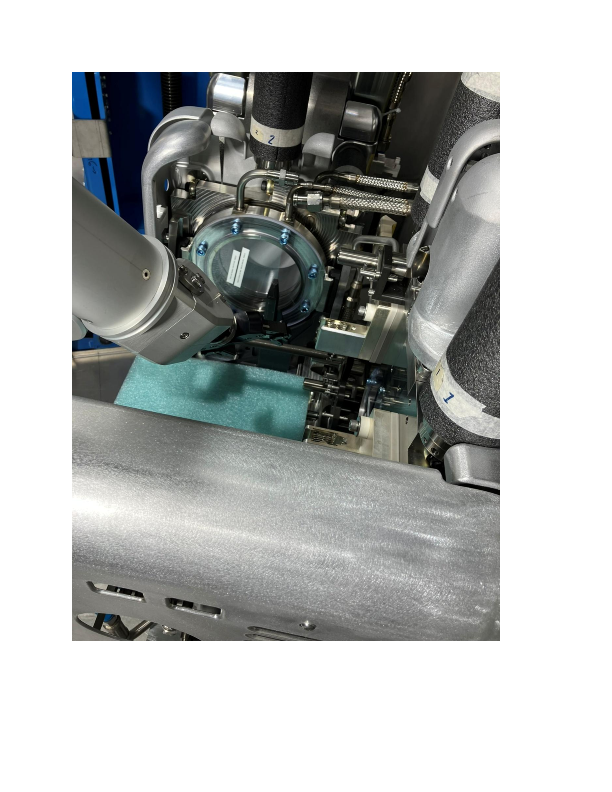
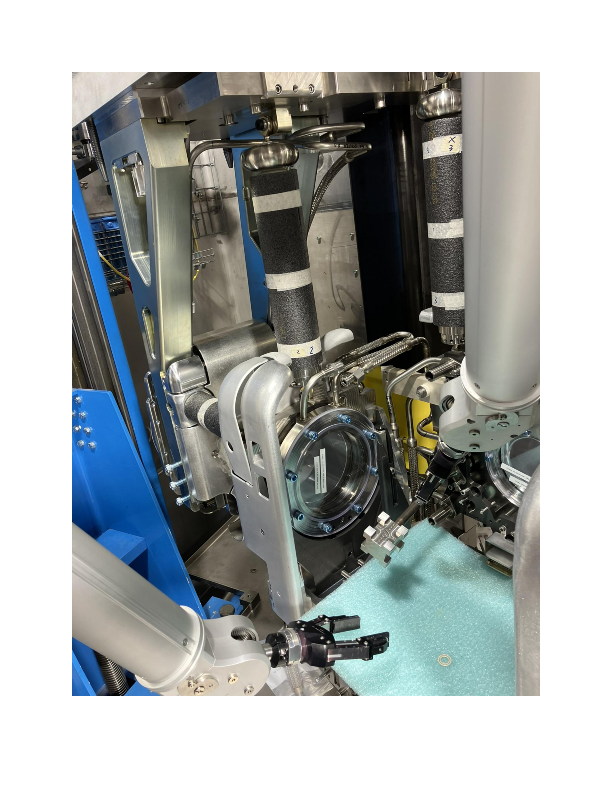
We tried to exchange the for water connections on the front end plate again, but this time with the rear busbars removed (by hand, did not have time to test by manipulators):
- Notes on rear busbar removal:
- top array of 3 screws should be reachable by the torque tool
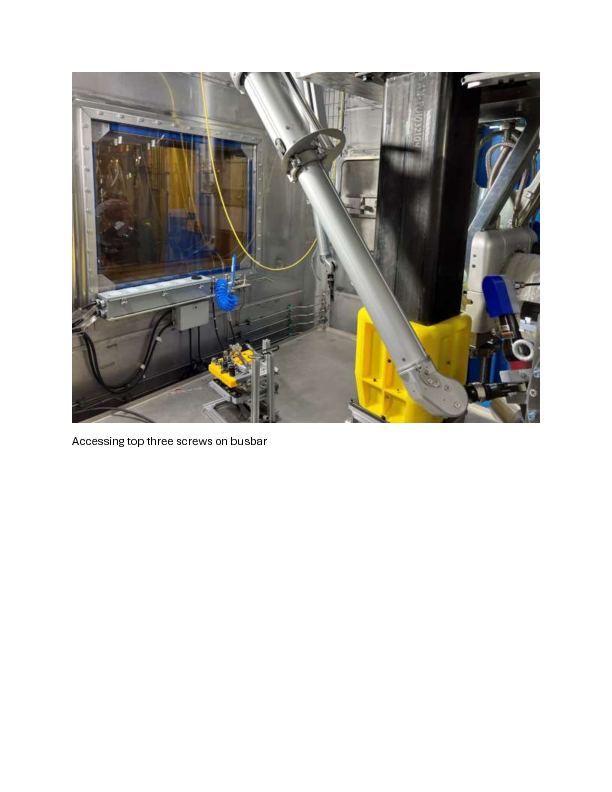
- side screw that fastens the sheet metal peice should also be reachable by the torque tool but with a relatively short attachment
- optimally, the module would be raised pary-way on the turntable to reach these screws
- we can keep the busbar attached to the flexible connector at the bottom
- damage to flexible connector should not happen under normal circumstances, unless something heavy gets dropped onto it from a height
- General notes on VCR joints on flexible lines:
- Ideally the male VCR are captured so we can tighten with just 1 manipulator/wrench, particularly those in the cramped spaces behind the FE plate
- Having the male VCR end at least welded will help make starting the VCR nuts easier, if not, will need to hold it with another wrench
- May be not a good idea to use side-load gaskets as they fall out more easily and can bridge potential gabs in high voltage carrying conductors
- Notes on replacement of lines with bus bar undone and rear VCR's undone:
- Top line can be removed and returned with manipulators without other lines being removed, as with previous testing, a clamp or other feature to keep the VCR nut from falling down the 'U' will help. Also, it would be recommended to not return the pin detent before doing up the VCR in the rear when returning to give the line more adjustment.
- Second to bottom line is replaceable with the manipulators without other lines being removed.
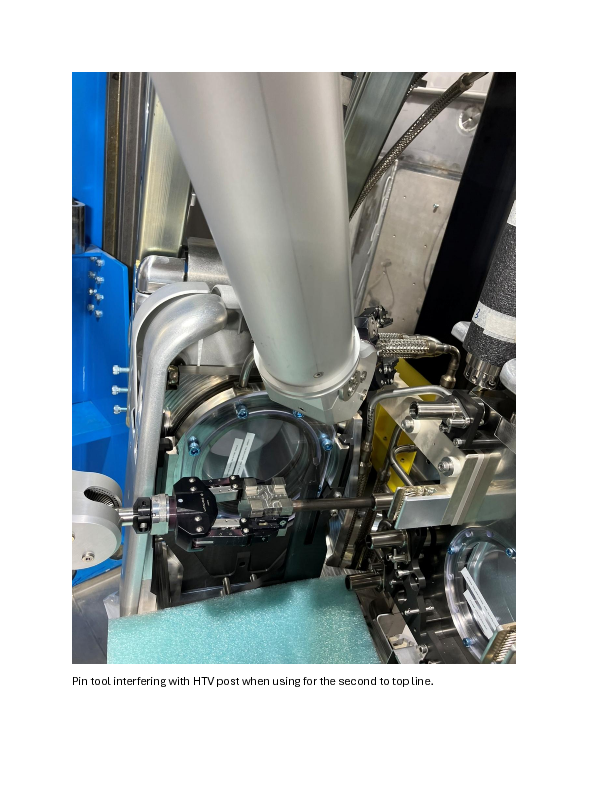
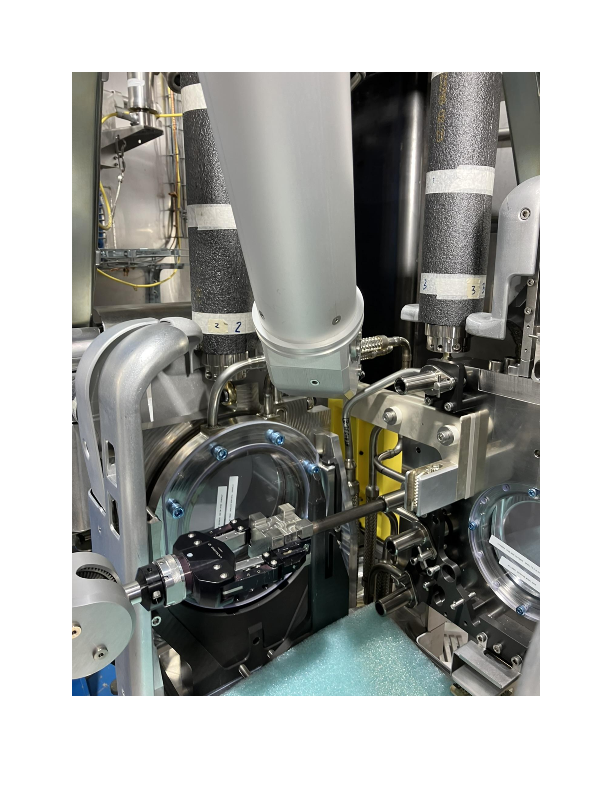
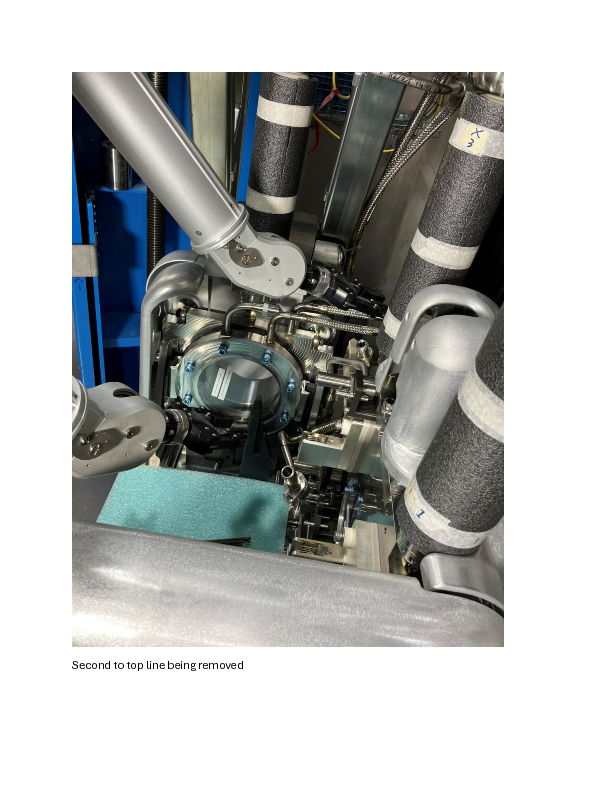
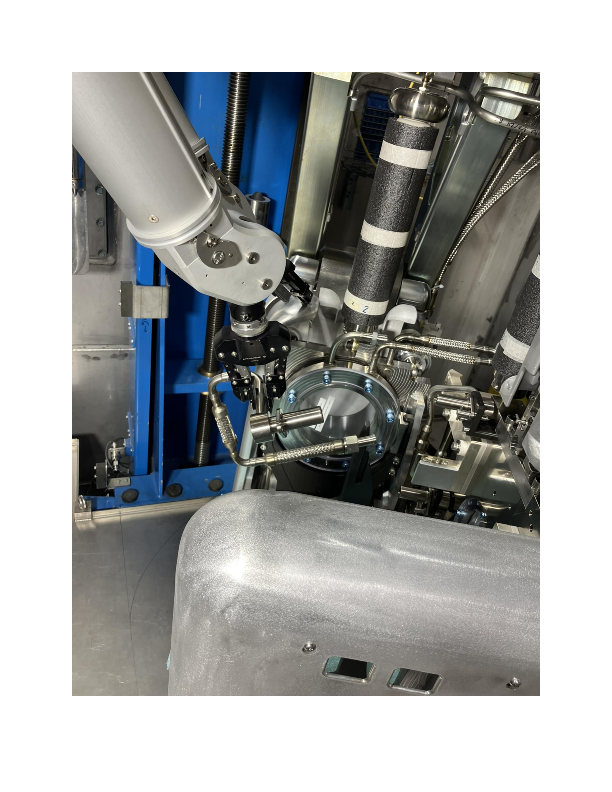
- Second to top line interferes slightly with a rigid tube line, it is possible to adjust the bend slightly so no interference is encountered when removing/installing, removal of the line with pin detent tool not possible because the tool interferes with the HTV carriage post, soft cover for direct grabbing with manipulator recommended,
- The VCR nut for this line is positioned in a way that makes it difficult to get a wrench on and tighten, we only have around 30 degrees of rotation, and the male side is floating which requires another wrench to hold it in place. starting the nut difficult because the line tends to come together misaligned. re-doing VCR accomplished buy quite difficult due to interference and double-wrench operation.
- From discussion with Michael Genix, the reason for the interference with the hard line is to keep them on the same plane when the drive side is pushed in and out with the piston to prevent interference with other components.
- Having the detent pin on the HTV end of the water line out helps with establishing the VCR joint for this line.
- Use of side-load style gasket not encouraged here because there is a strong tendency for the gasket to slip out and fall into the HTV carriage sliding faces and other crevasses in the FE assembly
- Bottom line requires top line to be removed for replacement with manipulators.
- having a string on the removed line may help route the new line into place
- there is a tendency for the line to catch on screws, shoulders, etc. when returned, good camera angles will help
- the slot on the FE plate for this line does not have much lead in and tends to cause the line to catch, a bit particular when returning
- Replacement of the VCR's will be tested in the coming session alongside replacing other braided lines in the FE assembly.
------------------------------------------------------------------------
UPDATE Jan 29, 2025:
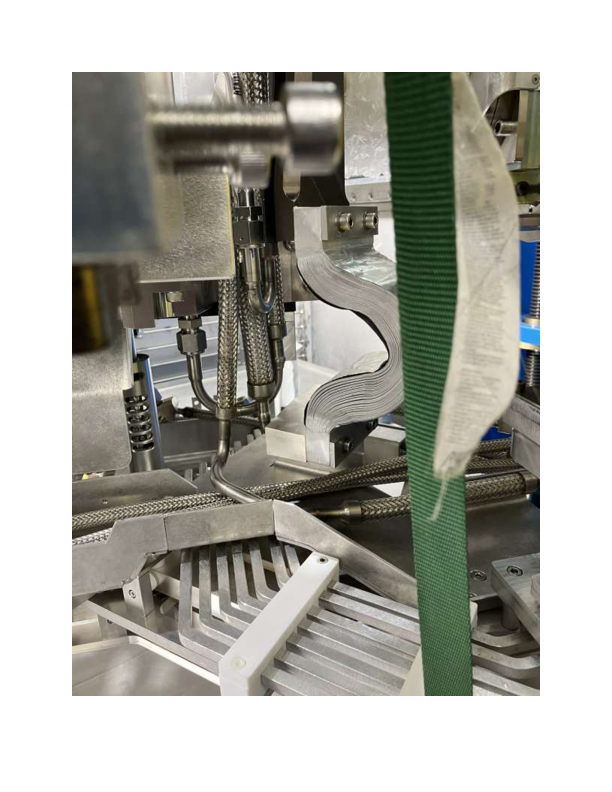
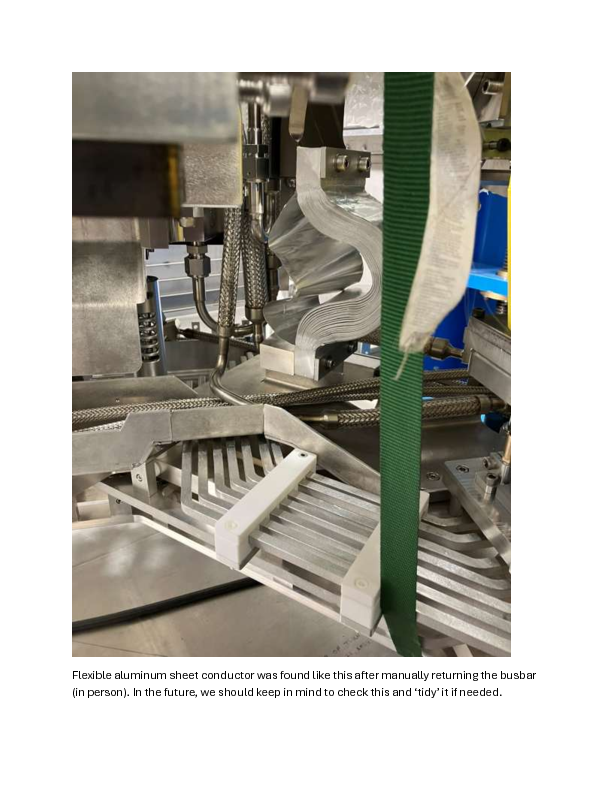
- The rear busbar attached to the flexible aluminum sheet conductor was successfully taken off with the manipulators:
- Flexible aluminum sheet conductor may need to be 'tidied' after the busbar is removed and returned (see picture)
- Washers on screws here are likely to be dropped when removing, it may be a good idea to switch these out to a different style of washer, maybe a retaining push nut (like: https://www.mcmaster.com/94813A200/)
- The big screw holding the metal sheet on the busbar has already visibly damaged plate at the mounting point, adding a washer to this screw may be a good idea
- It may not be necessary to have the washer be captive for the bigger screw because the busbar could be removed without needing to fully undo the screw
- Having the big screw partially threaded on may actually help with reinstalling the busbar by keeping it roughly in the right location for the three smaller screws to be threaded in at the top.
- Note that the smaller and larger screws were accessed with the FE in different orientations, i.e. there are different optimal positions to access these screws.
- Access to the small screw was achieved using the extended length socket key that was recently purchased, attached onto the torque tool
- Access to the larger screw was achieved using a ratcheting wrench and a standard socket key, the torque tool had difficulty accessing the big screw due to interference with other parts of the FE
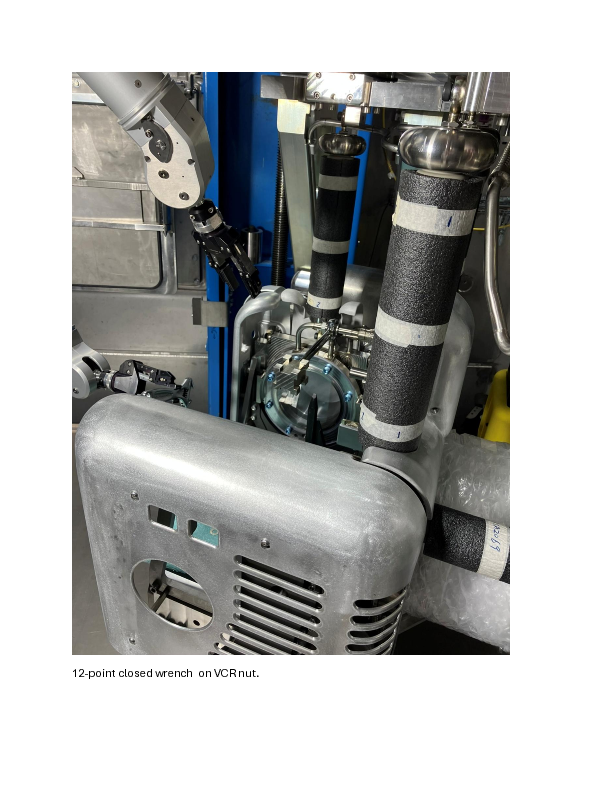
- The VCR joint on the second to bottom water line was successfully undone and re-done with the manipulators:
- an adjustable wrench was used for the male nut on the VCR
- a custom 12-point secure wrench was used for the female nut on the VCR
- there was great difficulty getting the two wrenches in place, some contributing factors include:
- the large custom handle on the 12-point wrench,
- the short length of the adjustable wrench << this made the operation more cramped when having both wrenches accessing the joint from one opening, also prevents accessing the male and female VCR sections from separate openings
- small access space to the VCR joint,
- interference with a HV shielding plate in one access angle,
- interference with the unfastened busbar in another access angle
- if the turntable is not raised, the manipulator shafts will interfere slightly with the shielding plates on top of the FE when trying to access these nuts << this issue is mitigated if the turntable is raised
- It is advised to go from the second access orientation where manipulator interference with the HV shield is avoided
- there was some difficulty starting the VCR nut, flexible metal sheet was used to raise the nut from the U-bend
- after much trial and error, a 'pinching' action was used to position the flexible line while keeping the un-welded male side of the VCR joint from rotating, this then allowed the female VCR side to be pushed up and the threads started with the second manipulator
- range of motion available for the wrenches when re-tightening the nut is limited by interference
- upon reflection, because of the interference, it may be beneficial to have keep the male side of the VCR joint on the rear un-welded. This will provide an additional option for which side of the joint to turn when re-tightening, and can help alleviate issues with the limited range of motion
- to replace the VCR gasket, for this joint it is advised to have the water tube on the FE plate unpinned, the hard line can then be swung out at the rear to provide access to the VCR gasket on the male side.
- during testing for this joint, we found that the slide-on style of gasket stayed on quite well on the male VCR side, this is unlike the horizontal VCR joint on the second to top line where the slide-on style gasket came off and dropped many times during testing
- Portable magnetic cameras would be good to get better views of the rear VCR joints that are 'tucked away'.
- For further testing, shaft clamps for the rear female VCR side was purchased to keep the nut from falling (https://www.mcmaster.com/9648t5/), we will need to check whether these clamps affect our ability to extract and replace the water lines.
------------------------------------------------------------------------
UPDATE Feb 06, 2025:
- The VCR joint on the second to bottom water line was re-tested with full-size wrenches:
- noticed that full size wrench on the male side interfered a bit with the braided section of the water line
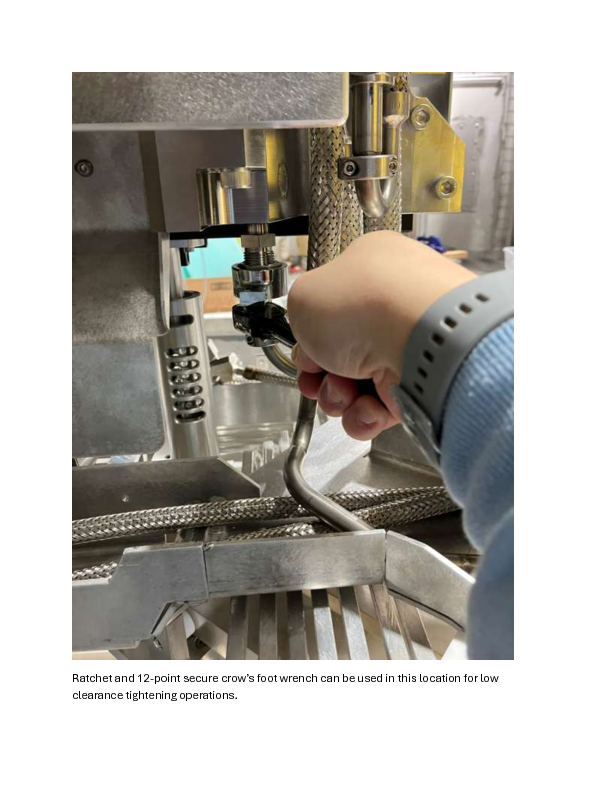
- Having a 'captive' wrench, similar in design to the low clearance VCR wrenches for the HVFT joints may be good to use for the male side of the second to bottom water line (possibly a crows foot and appropriate size of ratchet would work)
- when un-doing the joint a wrench was dropped that broke a ceramic screw
- it would be a good idea to have a system of catch trays for the service tray to protect sensitive components against falling tools and to prevent losing VCR gaskets and other small components where they may bridge across high potential and cause issues in the future
- The addition of clamps (McMaster 96485T) does not affect the ease with which this line is replaced since the female side is hard lined (not part of removable section), and should not affect adjacent line replacements (diameter of clamp not much bigger than nut diameter)
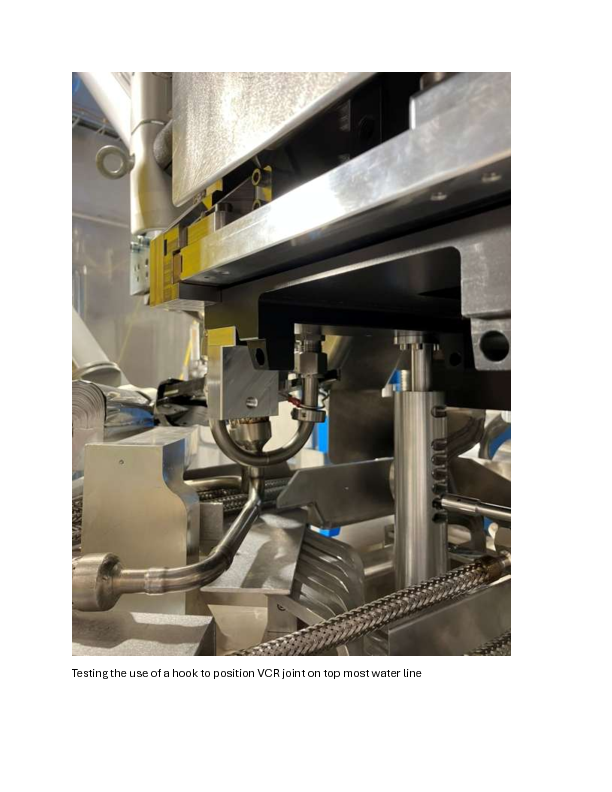
- The VCR joint on the top most water line was undone and re-done:
- undoing relatively straightforward since male side is welded
- when fishing out this line, the gasket has a tendency to drop in a 'pit' by the main pinned support shaft for the service tray that is hard to reach. a catch tray will help prevent this
- the VCR starter tool was useful to get the VCR nut on this joint to spin off
- To replace the gasket here, we found that it is optimal for the water line pin to stay in place, we can swing out the flexible hose section and slide in a normal gasket or a side mounted one, assuming a VCR inserter tool is made.
- To re-do the joint:
- because the resting position of the female side is misaligned with the male side, a hook tool was necessary to bring them in to alignment.
- a makeshift 'hook' was used, but a better, full-length one could be made
- When the FE is 'square' with the hot cell window, the left manipulator interferes greatly with other parts of the FE when trying to access the nut to start
- this is ultimately a difficult joint to re-start, with great risk of dropping VCR gaskets, but it could be done
- the VCR starter was used to bring the nut back to finger tight
- A ratchet and 12-point crows foot might be useful for tightening due to the small angular clearance available in this location, a standard wrench may not have enough rotational configurations at finger tight to be placed fully on the nut
- Follow up item:
- long handle 3/8" drive ratches purchased
With this, hot cell testing of the FE plate water lines is complete. |
| Attachment 1: Screenshot_2025-01-15_121632.png
|
|
| Attachment 2: Jan15_FE_Plate_Water_Lines.pdf
|
|
| Attachment 3: Jan23_FE_Plate_Water_Lines.pdf
|
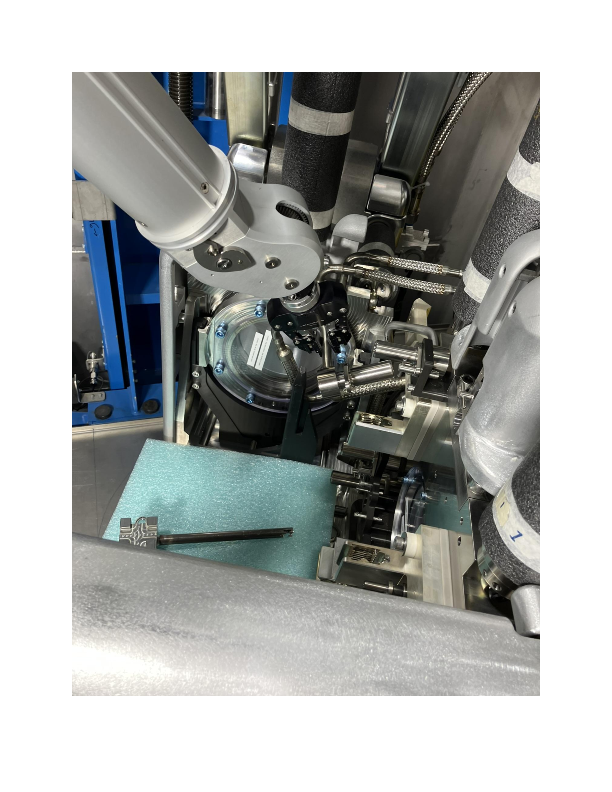
|
| Attachment 4: Jan29_FE_Plate_Water_Lines.pdf
|
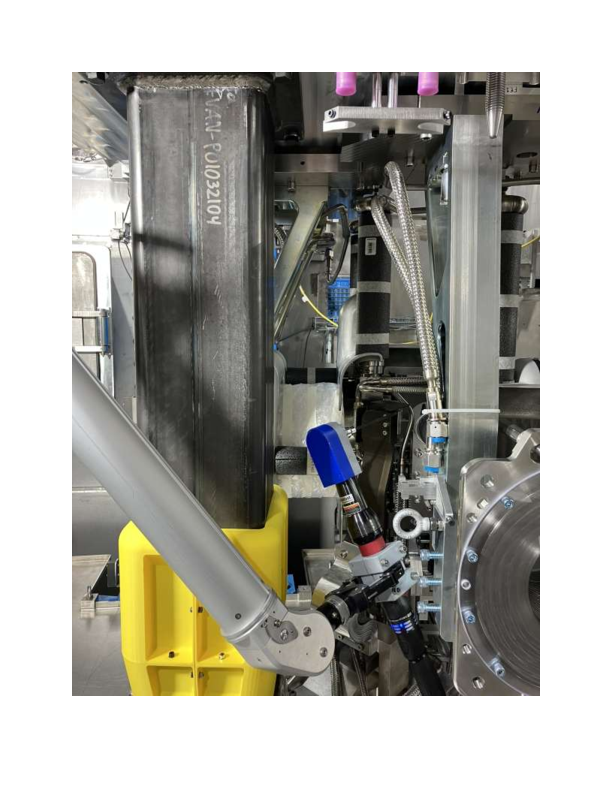
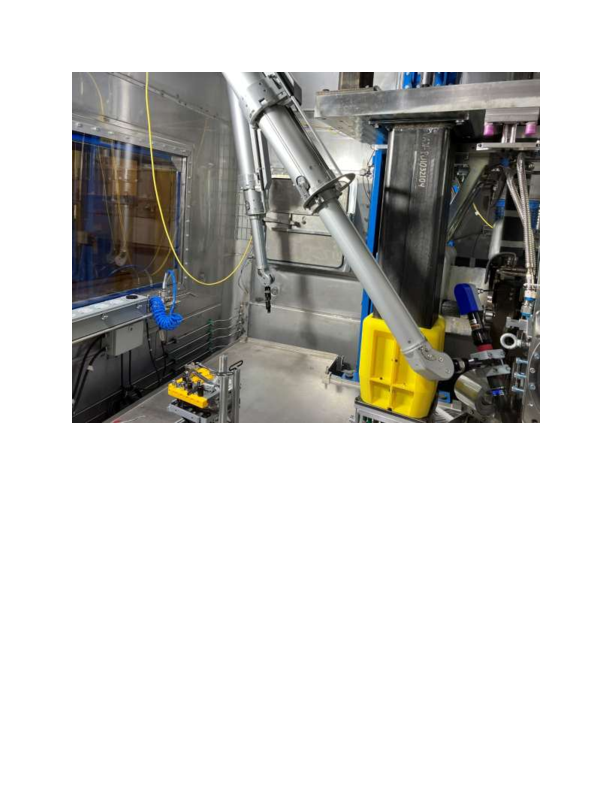
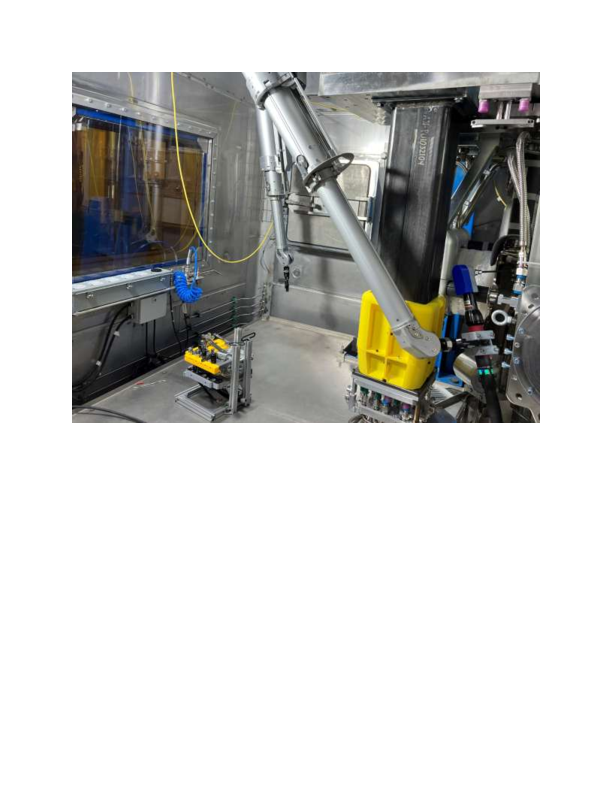
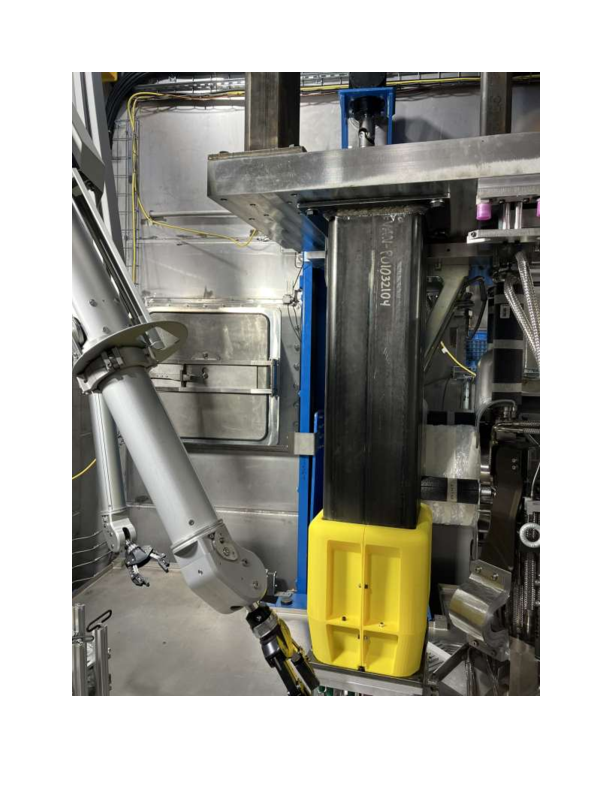

|
| Attachment 5: Feb06_FinalHTVFEPlateWaterLineExchangeTesting.pdf
|
|
|
80
|
Wednesday, January 15, 2025, 13:09 |
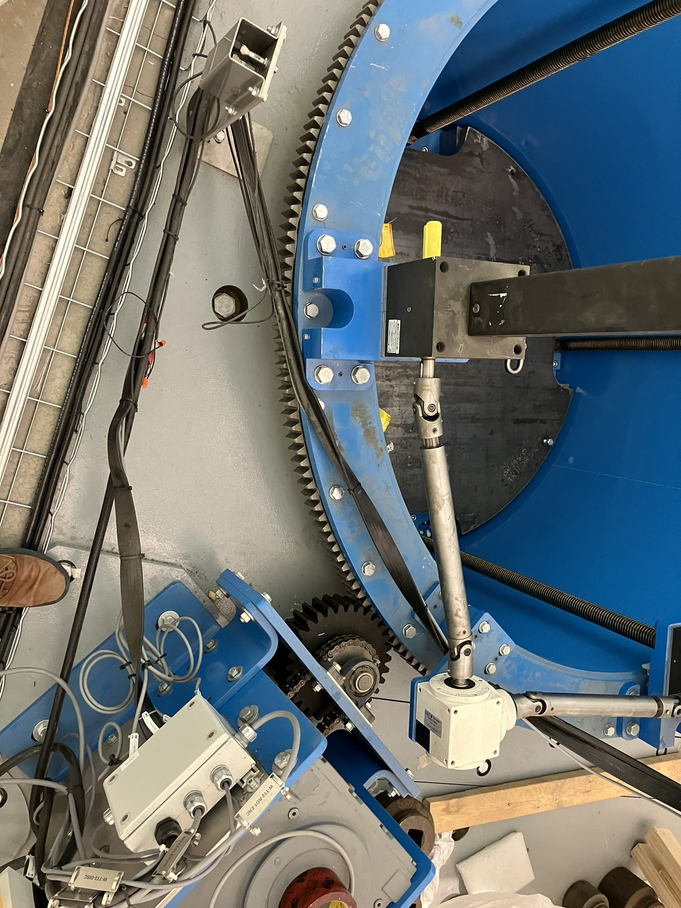
Albert Kong | Hot Cell 1 | Repair | West turntable festooning pillar and cable damage | Some issues were encountered with the turntable controls on the west hot cell, as a result the festooning post for the turntable was damaged. While the post was out of commission, the turntable was operated without actively monitoring the top of the hot cell and some cables ended up catching on the limit sensors, causing some slight fraying. The cables were duct-taped to prevent shorting for now but should be inspected and replaced accordingly in the future. We should also check that the sensor bracket did not move from where itshould be. |
| Attachment 1: IMG_0973.JPEG
|
|
|
81
|
Wednesday, January 15, 2025, 13:23 |
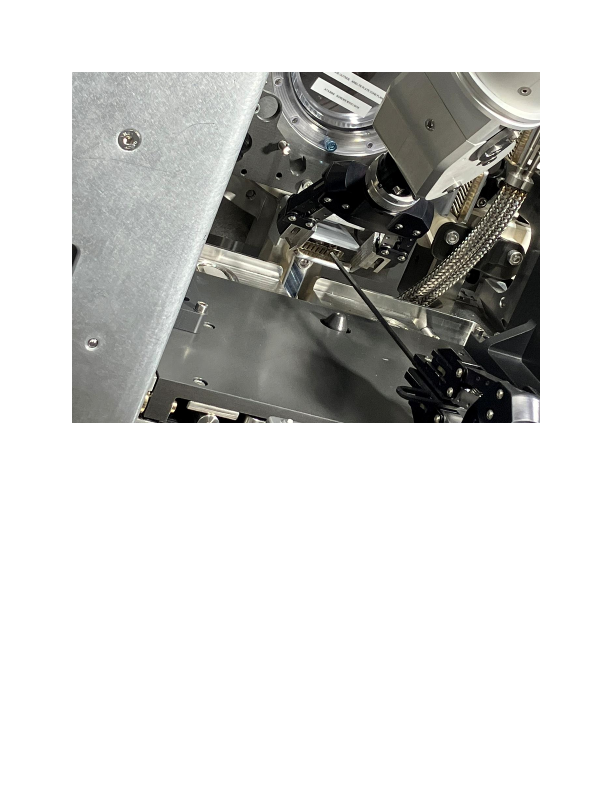
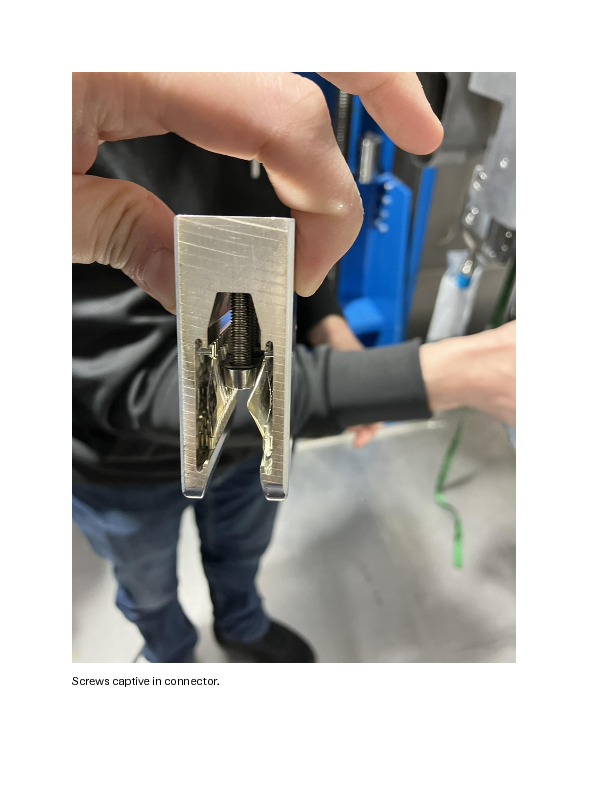
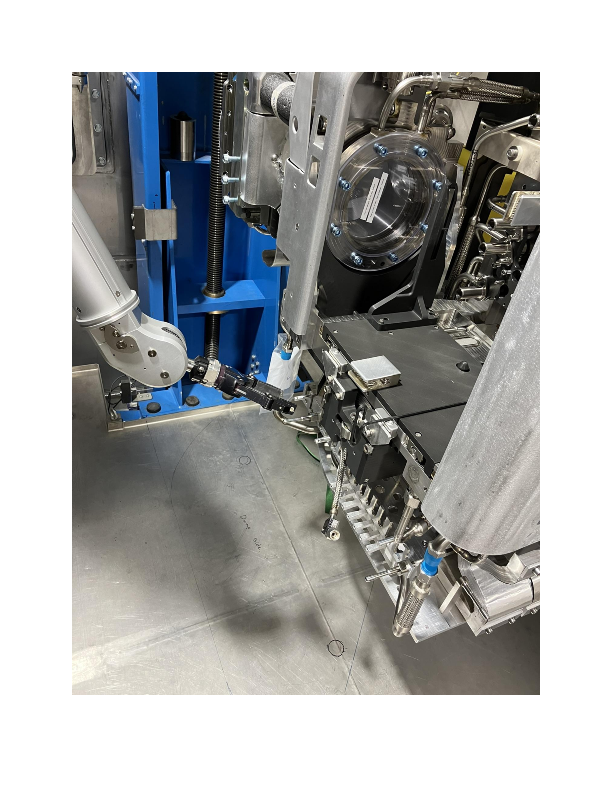
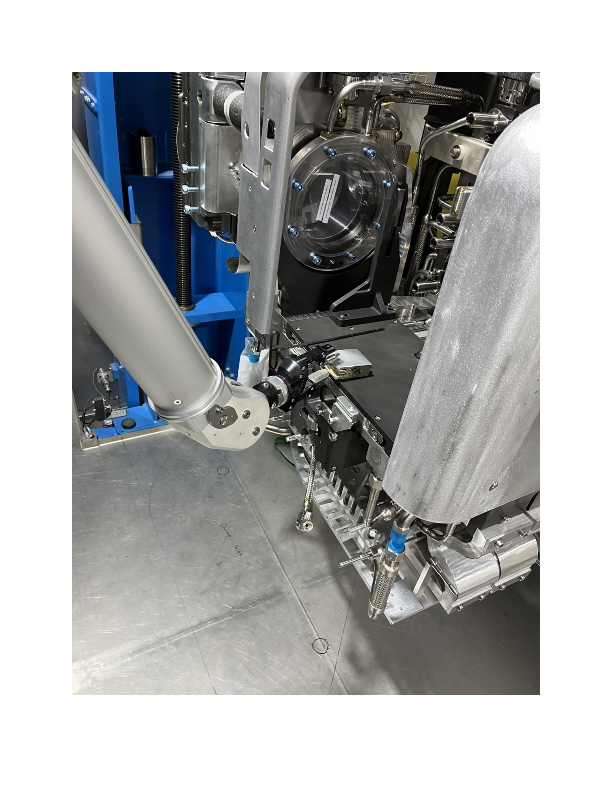
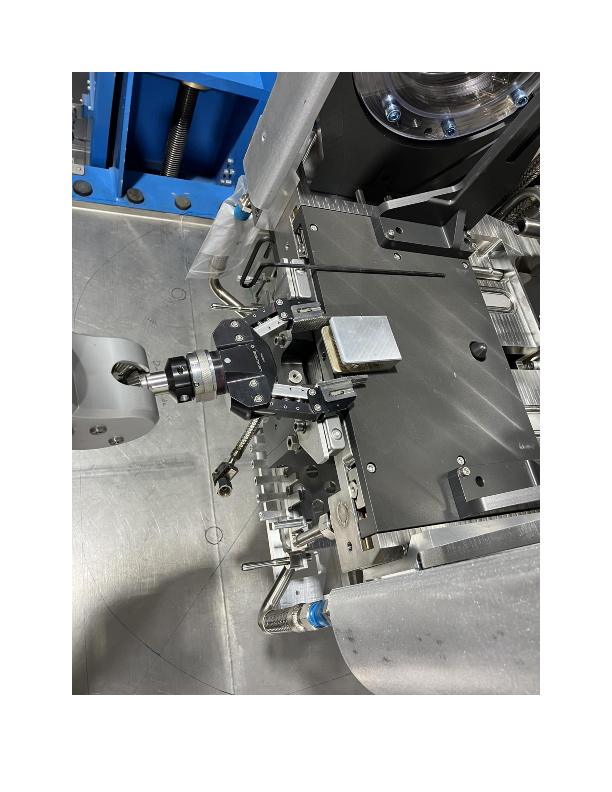
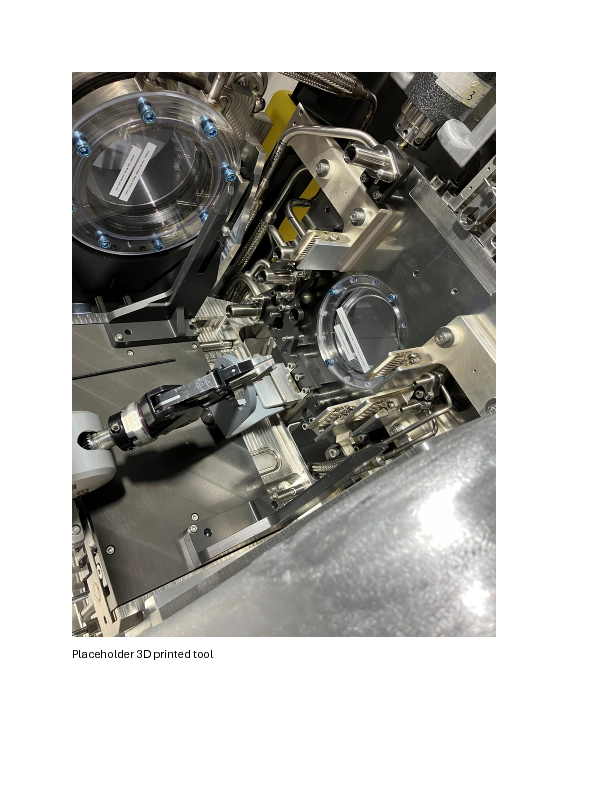
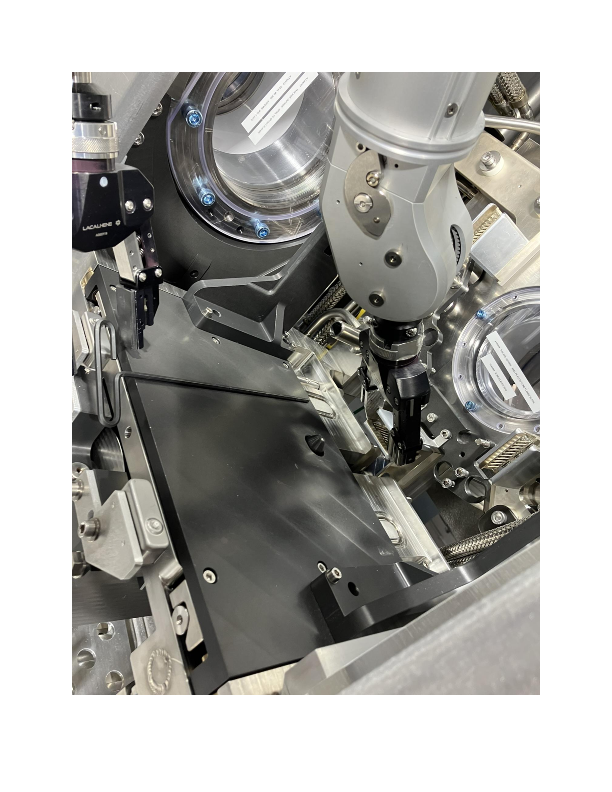
Albert Kong | Hot Cell 1 | Development | APTW Front End Power Busbars Stabuli Connector Exchange | We successfully performed a removal and replacement of a power busbar stabuli connector on the front end plate where the HTV connects to:
- The middle-lower connector was tested as the others are more straightforward to work with.
- It may be a good idea to use a 3D printed jig to wedge into the connectors without damaging the flexures/pins.
- A longer hex bit on the hot cell torque tool would greatly help this operation.
- Even without special tooling the bottom connector returned and mated back onto the locating features relatively easily with just the manipulators.
- Longer hex bits purchased, 3D printed too left for future.
- Screws and washers are effectively captive in the connectors which helps
|
| Attachment 1: Jan_15_Stabuli.pdf
|
|
|
82
|
Wednesday, January 15, 2025, 13:52 |
Albert Kong | Hot Cell 1 | Development | APTW Front End VCR Gasket Selection | Today RH (CF and AK) agreed upon using the following style of gaskets for the ARIEL front ends:
- All metal rings to be used to avoid plastic retaining rings deteriorating due to radiation and leaving bits stuck in the nuts
- Parker style (4 VGR-SS and 8 VGR-SS) gaskets for all VCR joints, except
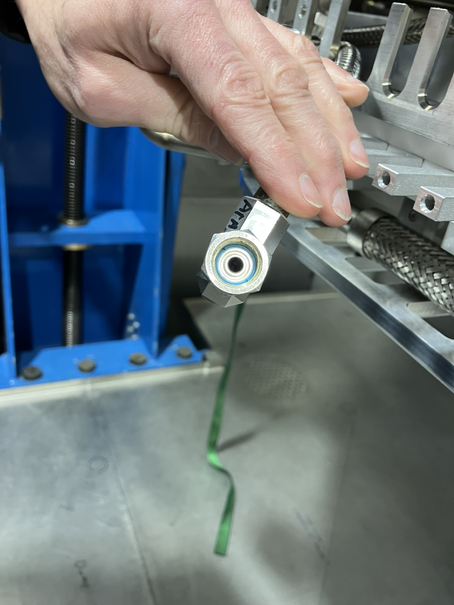
- For the piston module and hanging water line VCR joints (found in the 'back', these should use SwageLok side-load gaskets (SS-4-VCR-2-ZC-VS and SS-8-VCR-2-ZC-VS)
- The primary reasons for which are clearance issues to fit normal loading VCR tools in these joints.
|
| Attachment 1: IMG_0960.JPEG
|
|
|
83
|
Thursday, February 13, 2025, 18:00 |
Albert Kong | Hot Cell 1 | Development | APTW Front End Mid-Height and Upper VCR Joint Access and Service Testing | Feb 13:
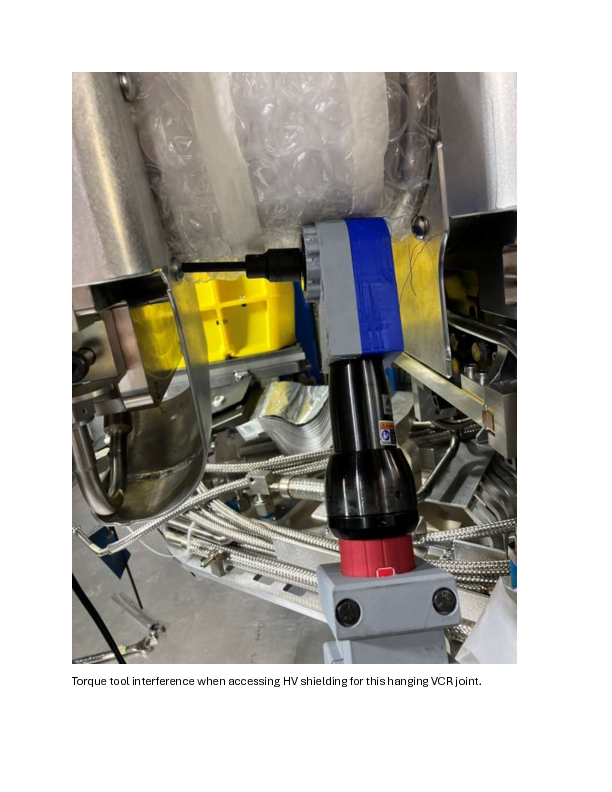
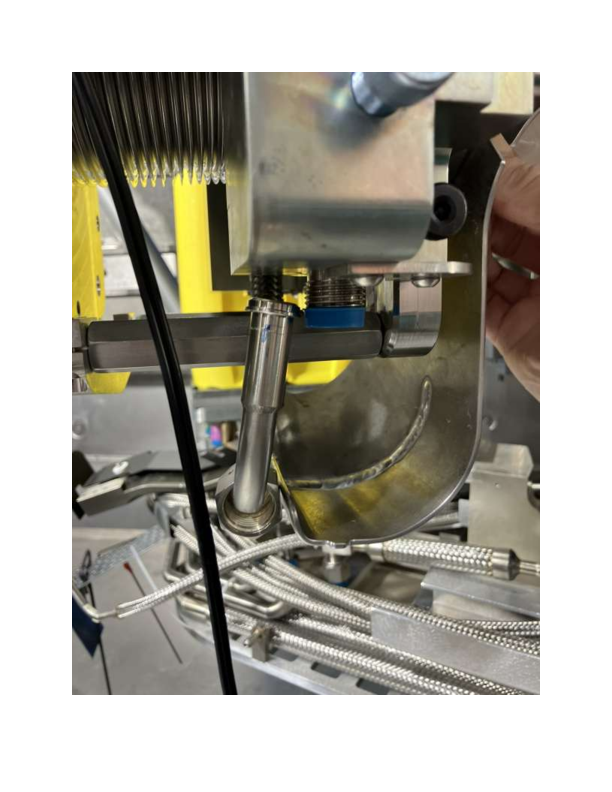
The 'hanging' VCR joint on the driver side was successfully exchanged by hand:
- The adjacent HV shielding had to be removed to do so
- Access to the screws on the shielding is limited so likely the use of a manual ratchet and socket key is required
All other 'mid-height' VCR joints ok for gasket exchange since they are accessible
The driver side upper VCR line was tested:
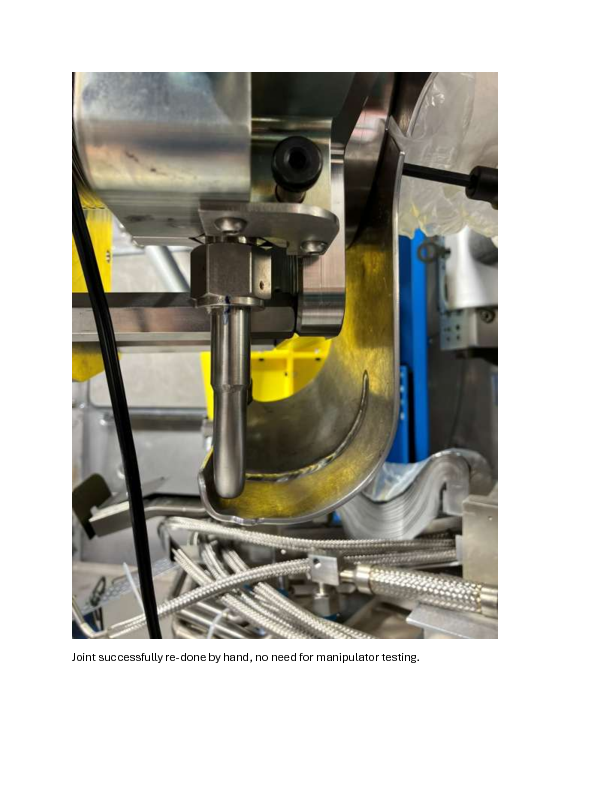
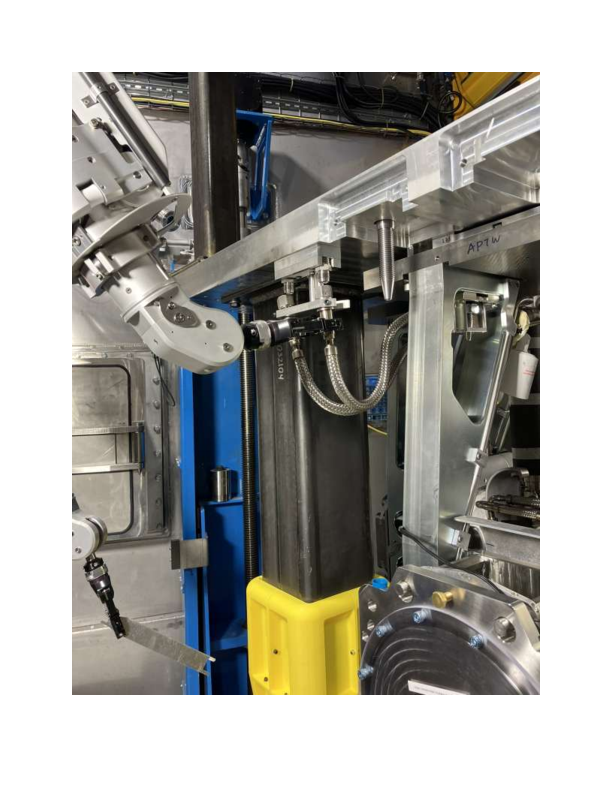
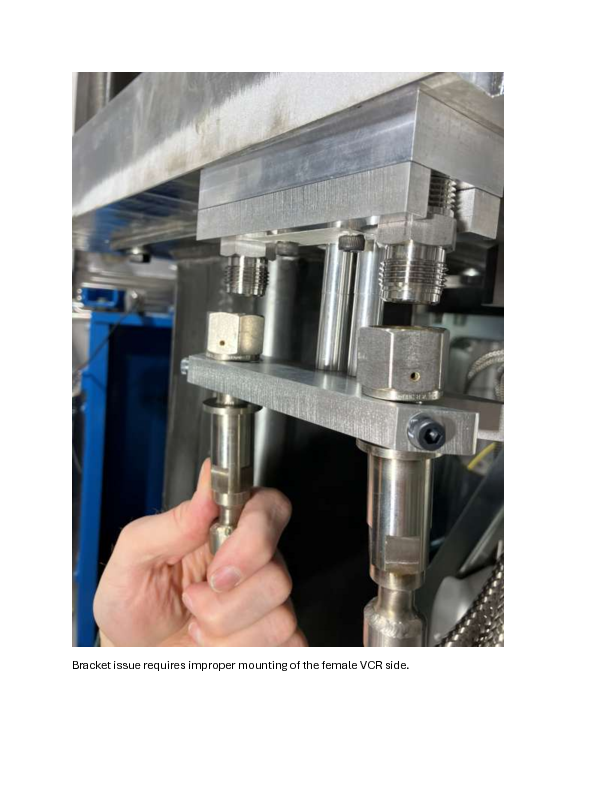
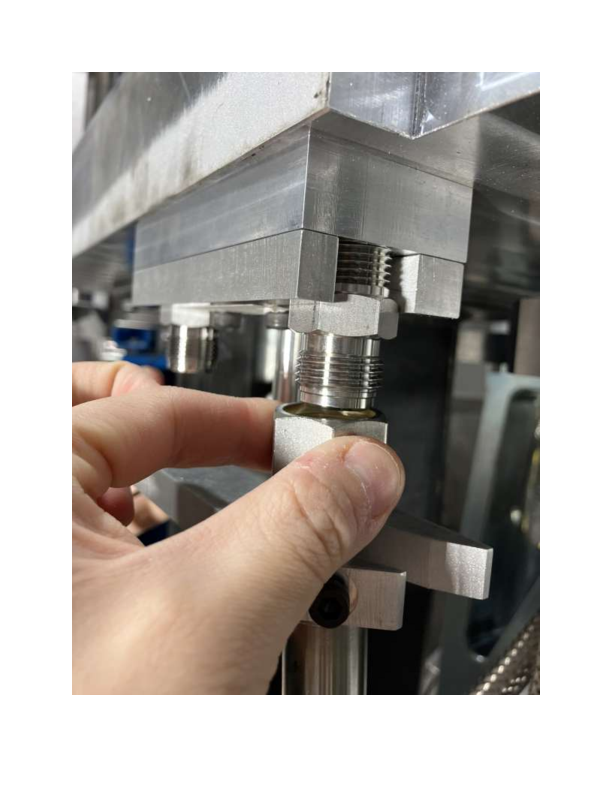
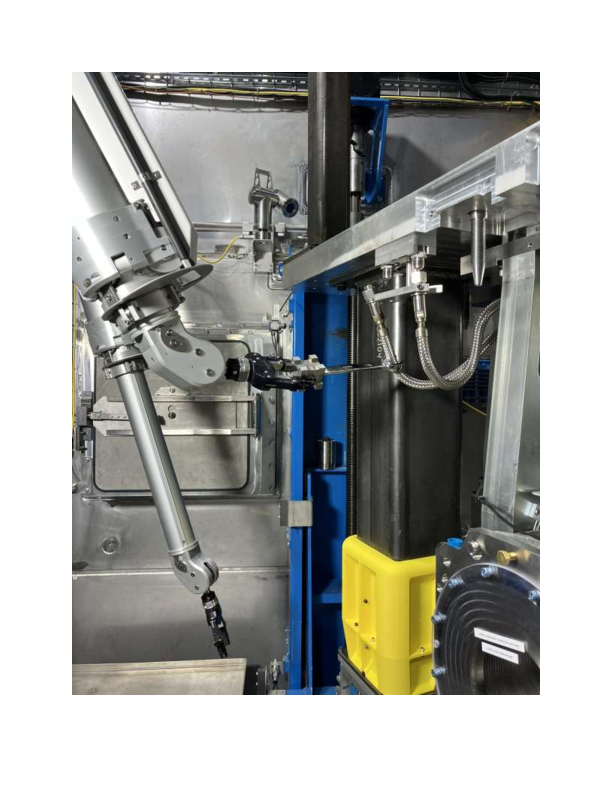
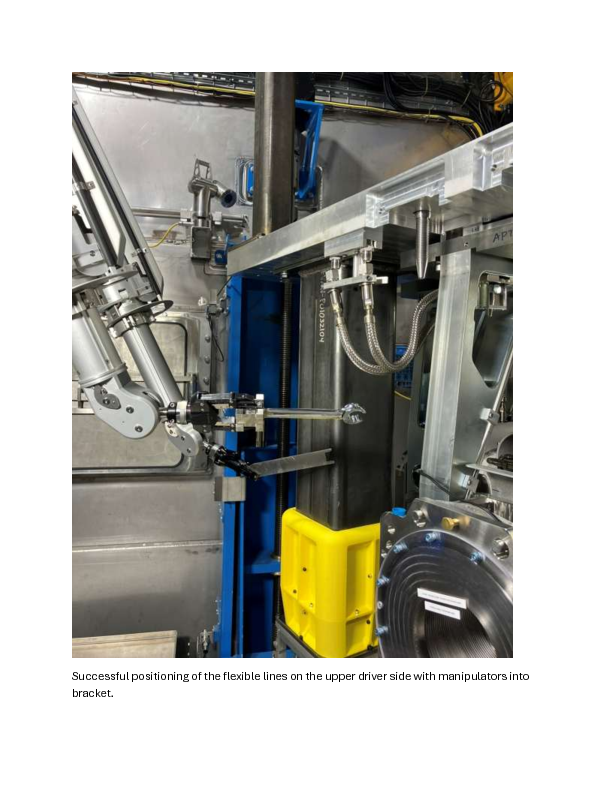
- Issue with bracket for male side on shield plug, the adapter does not thread in fully
- Flexible hose could be positioned into bracket with manipulators
- Upper VCR lines will be revisited when correction to bracket is made and when the interfering tube on the HTV side is solved.
|
| Attachment 1: Feb13_UpperVCRTesting.pdf
|
|
|
84
|
Thursday, February 20, 2025, 14:44 |
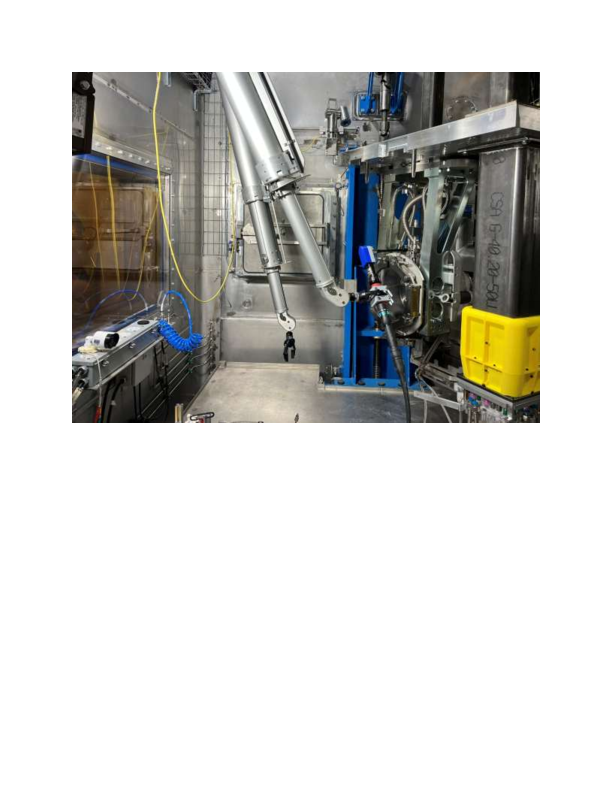
Albert Kong | Hot Cell 1 | Development | APTW Front End KF Gasket Clamps Servicing Tests (By Gate Valve) | Covers testing for dealing with KF joints by the gate valve on the FE.
Photos provided in PDF, download and open to view all, ELOG preview not guaranteed to show all.
Feb 20: Tested two KF clamps joints by the gate valve area
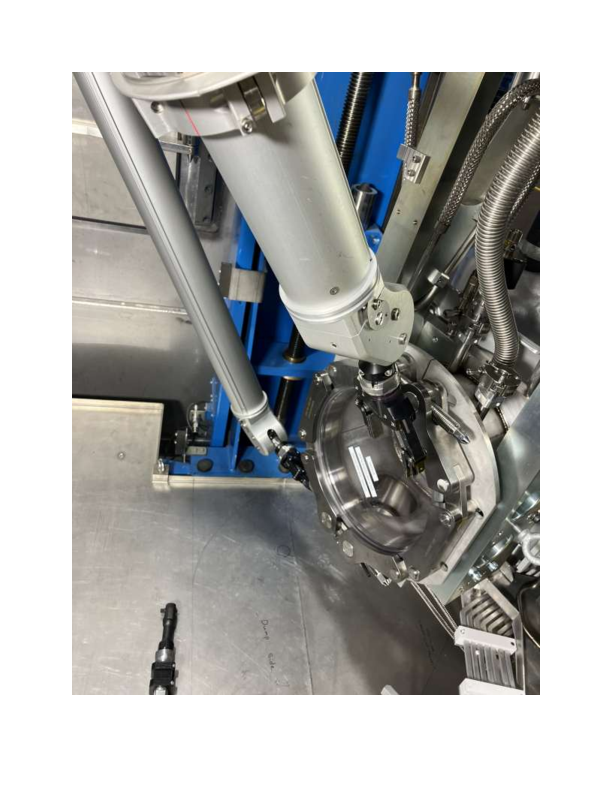
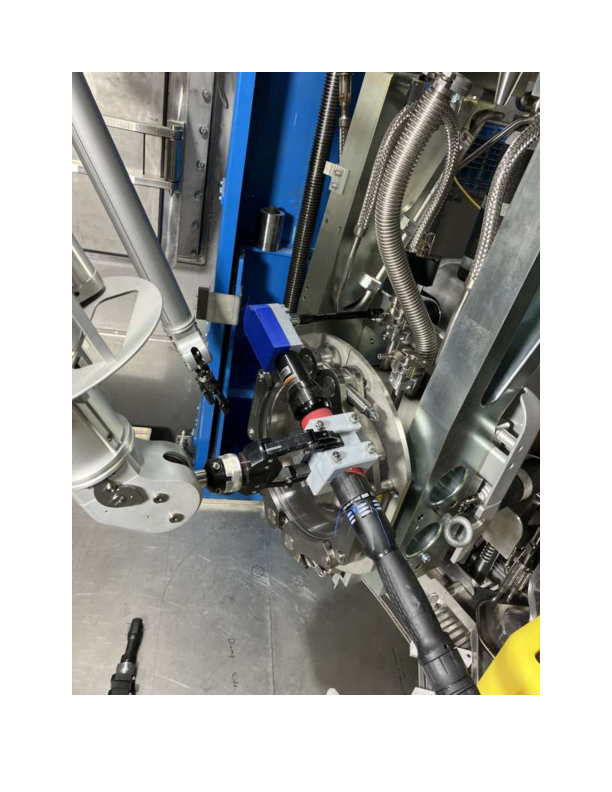
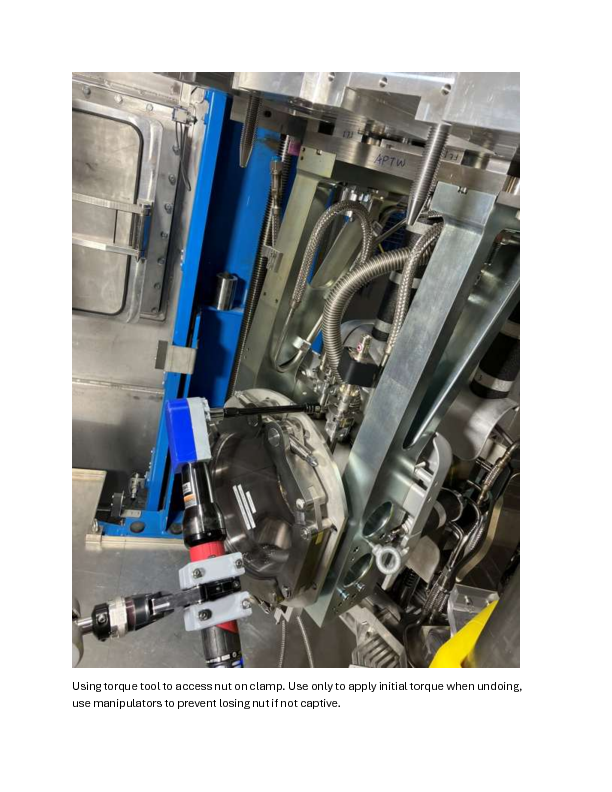
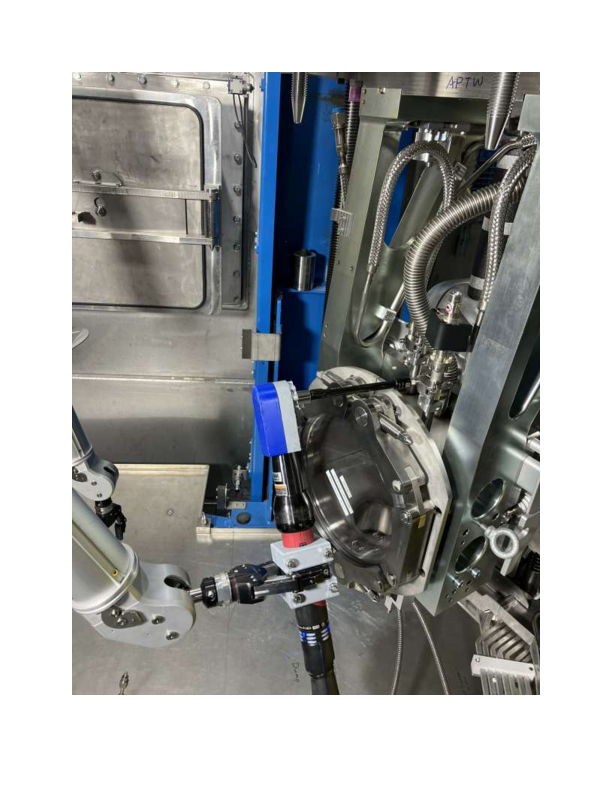
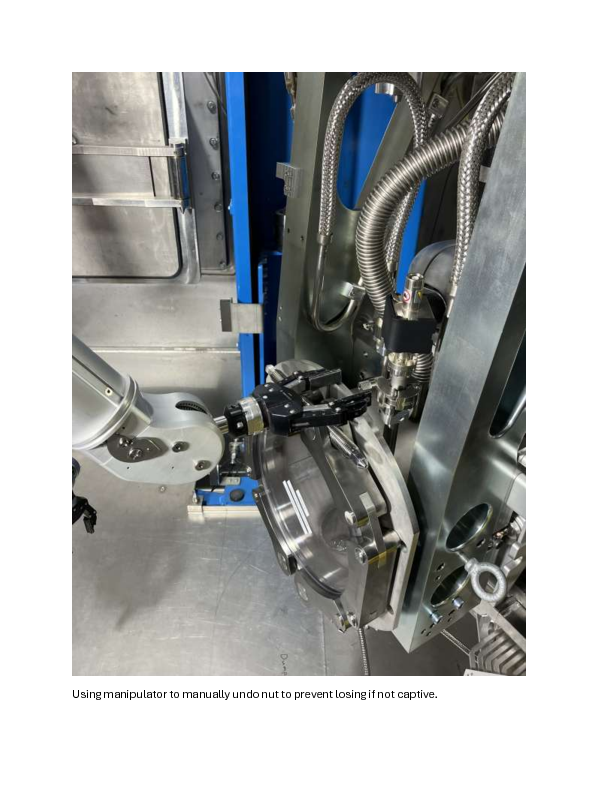
- When undoing the KF nuts, recommend starting with torque tool, then undoing by hand to prevent excessive loading in the updated retained design or prevent losing the nut if we decide to not have the nut retained.
- Having a retained design may help by giving the hot cell operator feedback when the nut is brought out as far as it can.
- During testing, we did not capture possible side loads on the 'free' side of the KF joint, though after reviewing the TISA version of the connectors, they may not be as strongly loaded so this is likely not a problem. Instead, the problem will be preventing the 'free' side from being dropped.
- A 'captive' KF gasket may be advantageous to better ensure the joint is re-done properly when servicing and to minimize the risk of the gasket falling out (although during testing this risk seemed minimal).
- After initial search, an off-the-shelf solution does not seem to exist, would likely have to be modified in house, which is undesirable.
- We were working with 'old' designs for the clamps without captive nut on the clamp and with shorter screw and smaller hex size on the nut.
- The external clamp had a larger nut than the rear, more realistic to what we understand will be implemented in the redesigned clamps.
- For testing both, we used only the clamp body with the bigger nut.
- To move clamp body from the exterior joint to the interior joint, we had to remove the HV shielding on the back
- We noticed that the screw on the HV shielding was not captive but we recommend for this to be changed to be captive is possible
- Both KF joints were successfully serviced (undone, gasket accessed, re-done)
- We did not test replacement of the gaskets, a tool is recommended to aid this
- Access to clamp nut on exterior joint is ok, interior joint access could be better (orientation not optimal, could be adjusted by rotating the bracket)
- Larger size KF line that crosses in front of the interior line was not tested due to missing clamp assembly.
- The larger KF line will likely need to be disconnected and moved out of the way if we need to service the interior KF joint.
- Again, a caveat with the successful servicing test is that we did not experience any side loads and the 'free' side was held in place by hand when the joint was re done and the clamp closed
- When holding the 'free' side with the manipulator, it is difficult to position it such that the clamp can close enough to swing the nut back in place (full contact around the gasket difficult)
- 'Closing' the clamp back up if the lines are aligned and flush is very difficult to do with a single manipulator (if the second manipulator is used to hold the 'free' side in place).
- Using an allen key to 'fish' the nut on the clamp when re-doing is useful.
Testing will likely be revisited when we receive the updated clamps, specifically that for the larger, untested, KF joint. |
| Attachment 1: Feb_20_FE_KF_Joint_Clamps.pdf
|
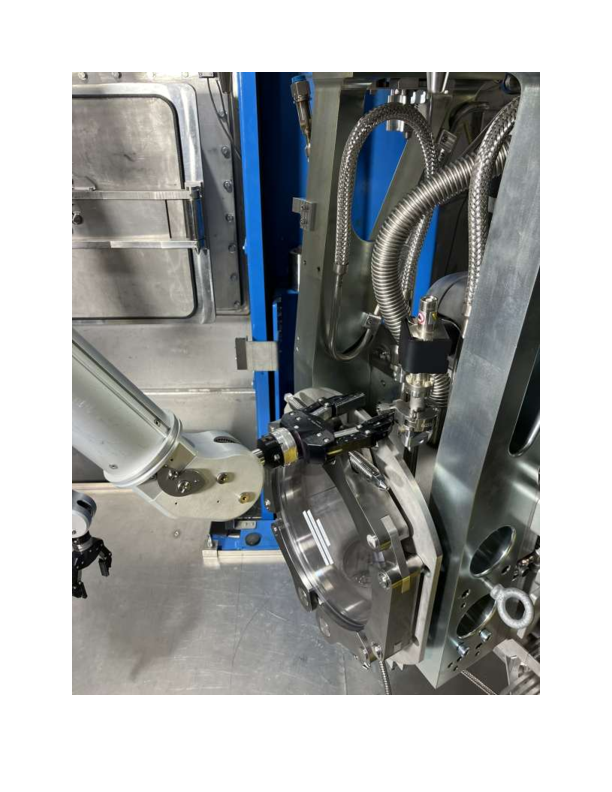
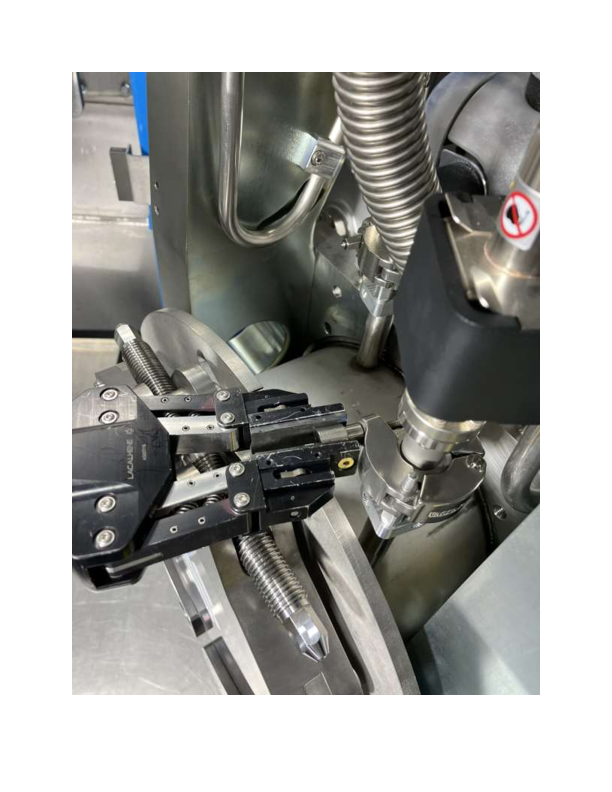
|
|
85
|
Monday, March 10, 2025, 11:35 |
Jason Zhang | Hot Cell 1 | Development | ARIEL Hot Cell PLC Update - 1000kg Crane Travel Zone | Wednesday, March 05, 2025, 13:00
Implemented and tested travel zone restrictions for the 1000kg crane to prevent collision with the manipulator arms. West operator station is currently occupied so testing was done and confirmed functional for the East operator station.
Movement of the crane is restricted and limited to only moving out of the zone in the following coordinates. Referencing the X and Y position to calibrate the encoder will bypass the zone restriction interlocks.
East Operator Station restriction Zones:
3048mm < X < 4601mm
1550mm < Y < 1680mm
Restrict +X When:
3048mm < X < Mid point (3824mm)
1550mm < Y < 1680mm
Restrict -X When:
Mid point (3824mm) < X < 4601mm
1550mm < Y < 1680mm
Restrict +Y When:
3048mm < X < 4601mm
1550mm < Y < 1680mm
-Y is not restricted because it is always a safe operation.
West Operator Station restriction Zones:
(TO BE ADDED LATER) |
|
86
|
Thursday, March 20, 2025, 16:54 |
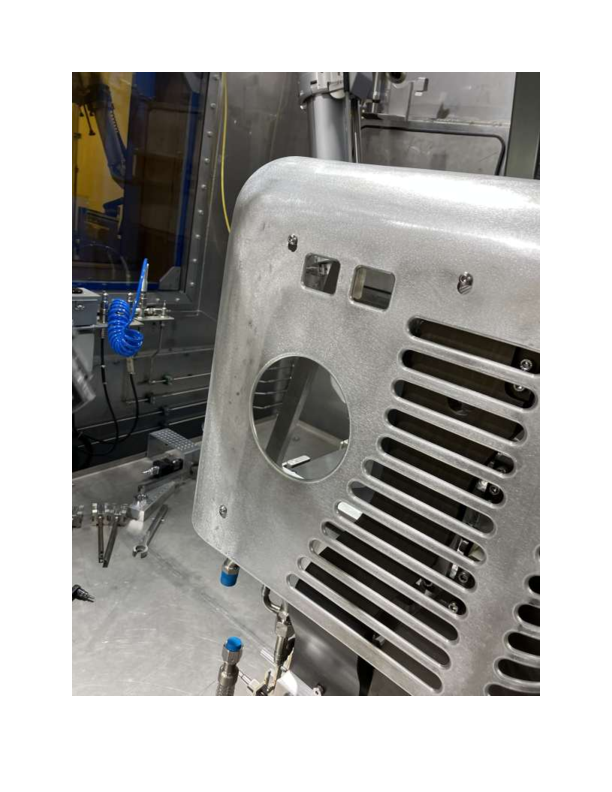
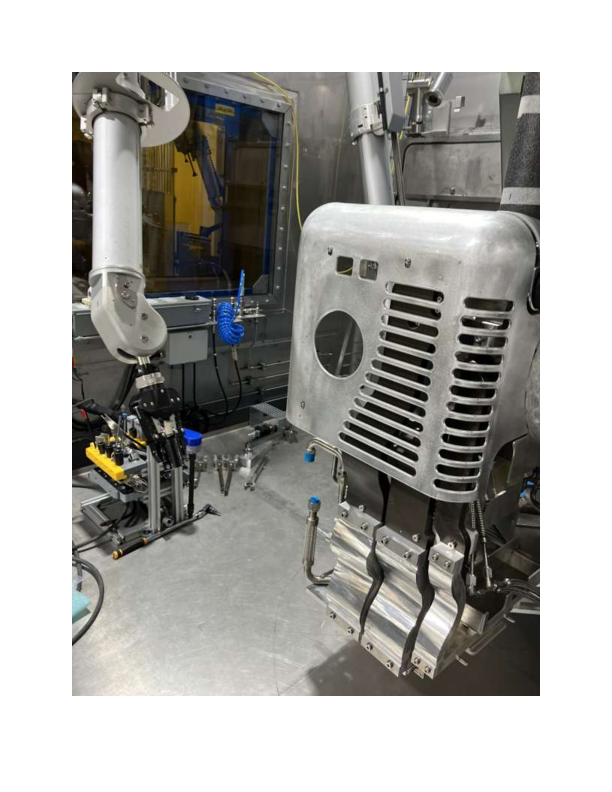
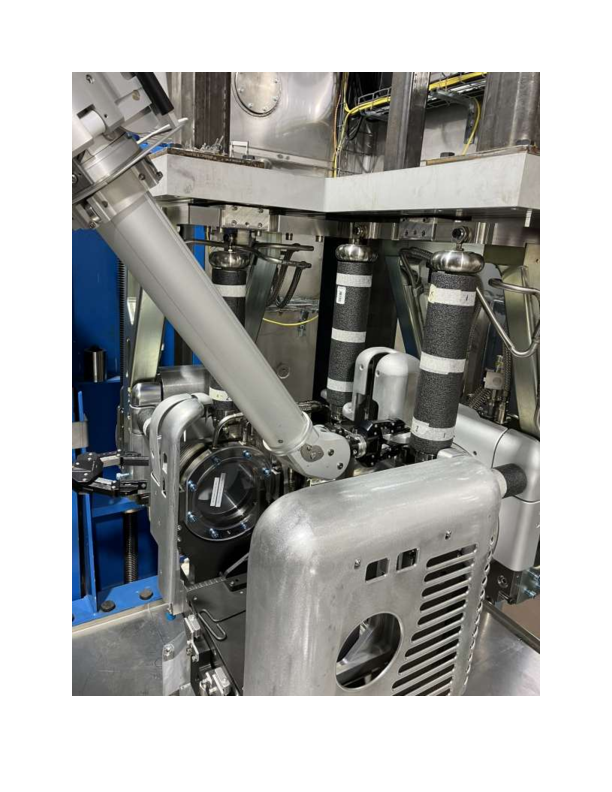
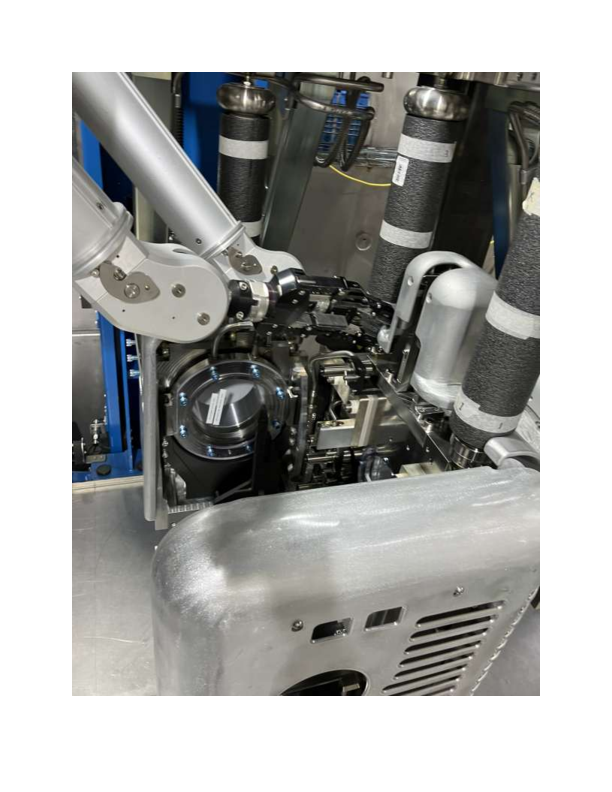
Albert Kong | Hot Cell 1 | Development | APTW Front End High Voltage Shielding Exchange Testing | Photos compiled in pdf, download to view in case ELOG preview truncates.
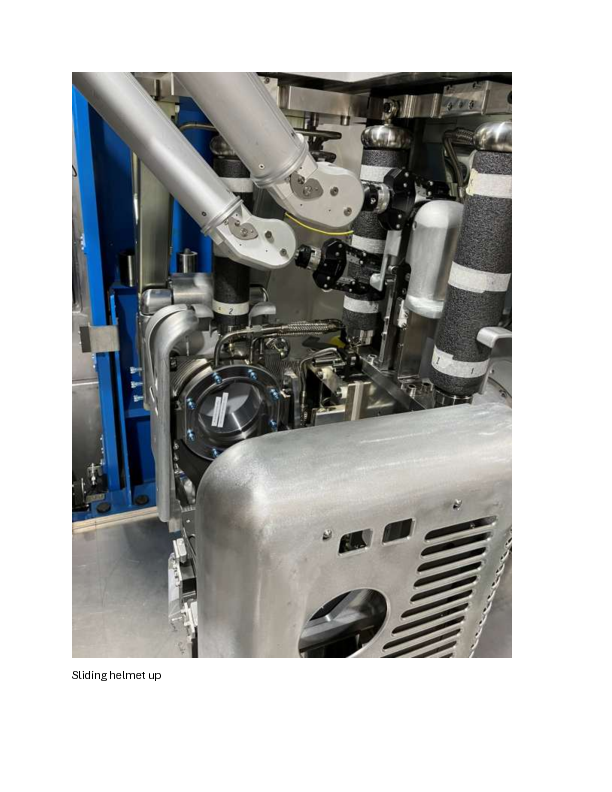
------------------
The HV shield covering the beam dump, on the peripheral side of the FE plate was taken off an on successfully with the manipulators:
- The operation was completed without reorienting the FE towards the HC window and we were still able to perform the removal/installation operations.
The 'helmet' shield on top of the FE plate was successfully exchanged:
- Rough steps: pull the helmet up and back to release from its seated position
- Both manipulators used during operation
- The threaded hole to install grabbing features has 'fine pitch' threads
- Fortunately we were able to replace this shield without the need for additional handling features
- We moved the helmet out towards the gamma dump direction, but to prevent scraping against ceramic standoffs it may be a good idea to pull out the helmet shield from the other direction, though there's an elevated dropping risk (drop onto service tray) and the manipulators will have to reach farther in
- The exchange test was completed with the FE plate facing parallel with the HC window, in practice we would like to reorient the FE maybe 15 degrees CW from this orientation
- Rotating the FE slightly will help with some interference between the left manipulator arm and the shield plug (see photo)
- Adjacent VCR lines may interfere with reinsertion if not done up
HVFT shield was picked up successfully with two manipulators without much issue:
- Found that the manipulator handling cutout on the shields was a bit too large, a smaller gap across the width of the fingers will make is less necessary to grip tightly to keep the shield in line with the gripper
- The above observation applies generally to all HV shielding cutouts
- captive screws where possible on the HV shielding is generally a good idea, the screw on this shield could be captive
The HV shield obstructing exchange of a VCR gasket on the driver side was removed with issues:
- Access to button head screws obstructed by ceramic cylinder, risk of damaging cylinder when accessing these screws with tool, to prevent damage should move position of screws farther away
- Far screw difficult to see from operator window
- Raising the turntable/FE up helps with access
- Remote camera view helpful but due to location, difficult to get head on view of the screws for checking key engagement
- Caveat: ceramic standoffs that would have further obstructed the screws were not installed (final picture)
- Changing design to incorporate slots into the screw holes, similar to the gamma dump HV shield would be greatly beneficial
- Alternatively mount to standoffs to a different plate or add an intermediate adapter plate to make removal and installation of this HV shield easier.
Service tray HV shield on multi-pin connector cable side was tested:
- Existing shield has protrustion that prevents engagement with threaded standoffs and cannot be installed
- Some change required for this HV shield
We did not test the HV shields by the KF clamps for the extraction electrode, we will assume that the KF joint will be made serviceable without needing to remove the shielding and that the VCR joint by that area will never need to be serviced.
Testing on other HV shields to resume in following session.
------------------
UPDATE April 09:
We ran into some issues turning the East and West turntables.
We tested mounting the service tray shielding by hand and foresee no issues.
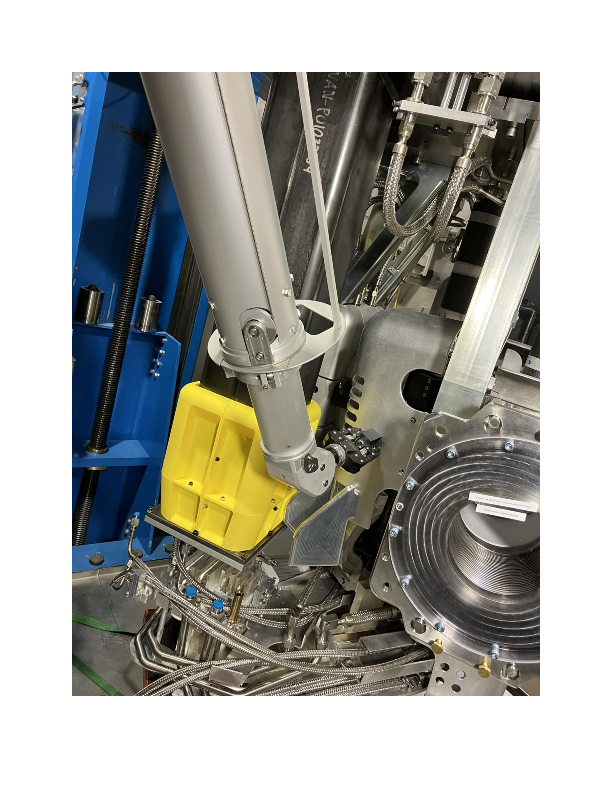
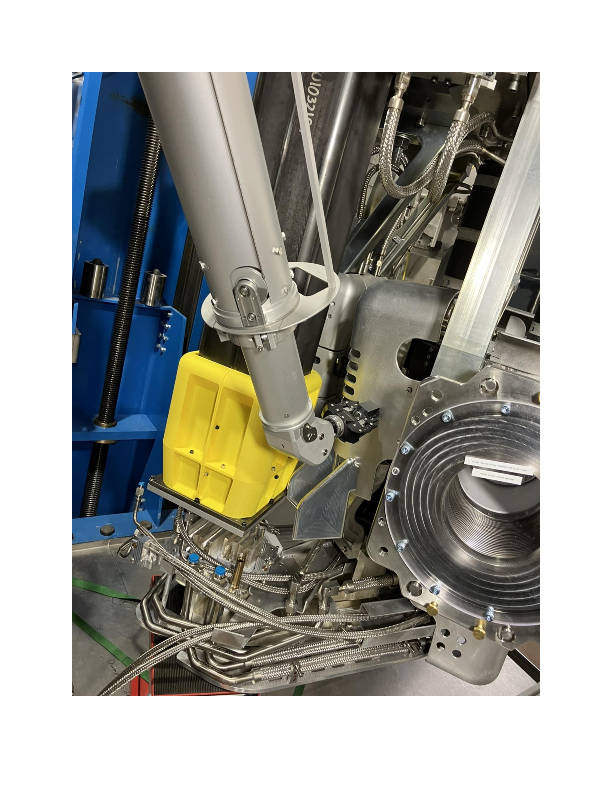
The shielding covering the rear busbar connection with ribbon connector by the water service lines to the HTV was tested by hand:
- There are no locating features to position this shield where it needs to be screwed down.
- The mounting screws (mount to FE) should be made captive. or employ a similar approach as the ionization dump shielding (slots in and keeps the shielding in place)
- The threaded holes for mounting grabbing features could be improved by adding additional locating features to 'clock' the grabbing features in the desired orientation, without needing to torque down the screw.
- The above recommendations apply to all shielding as appropriate.
------------------
UPDATE Apr 20:
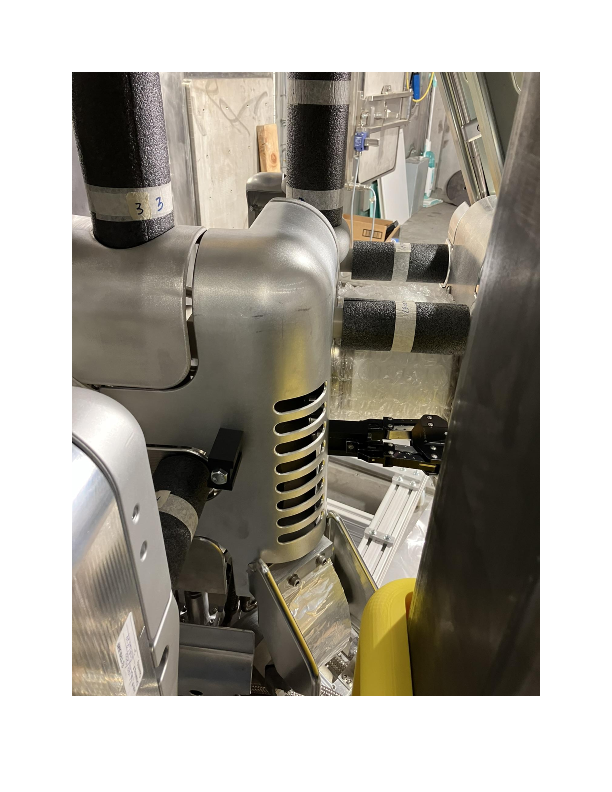
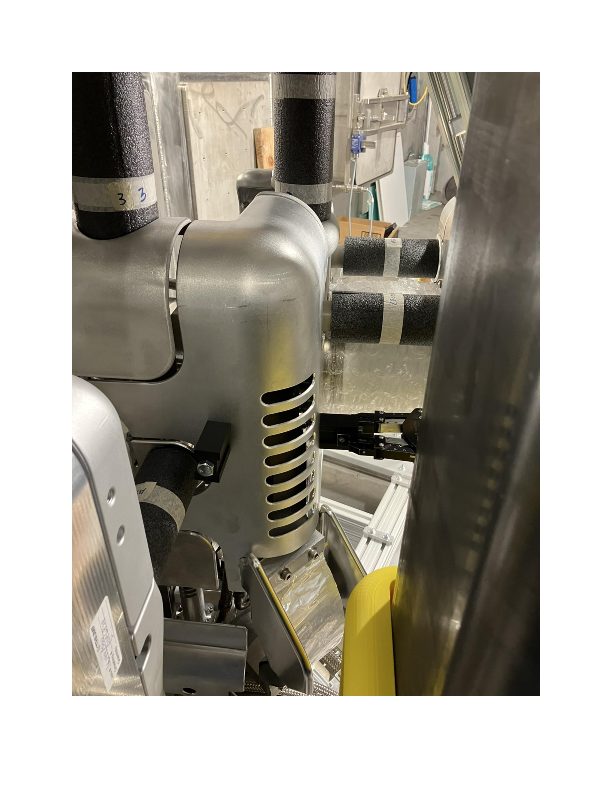
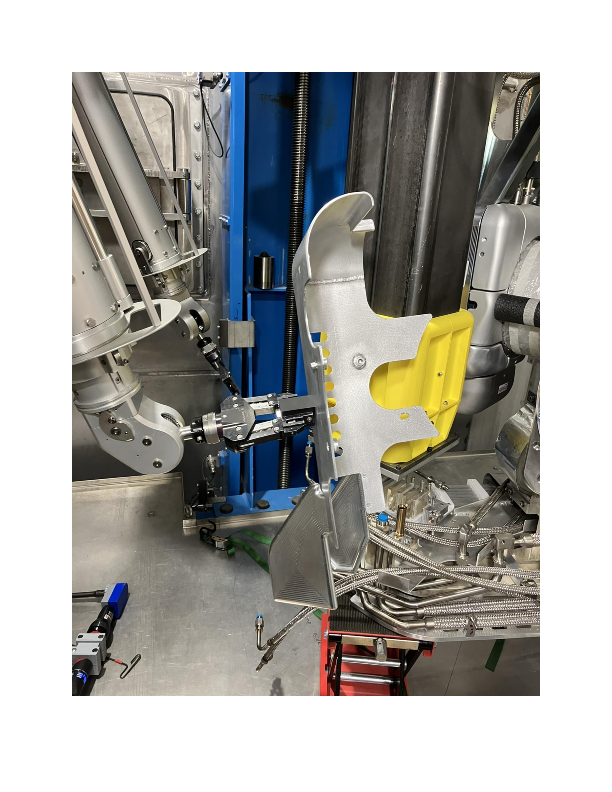
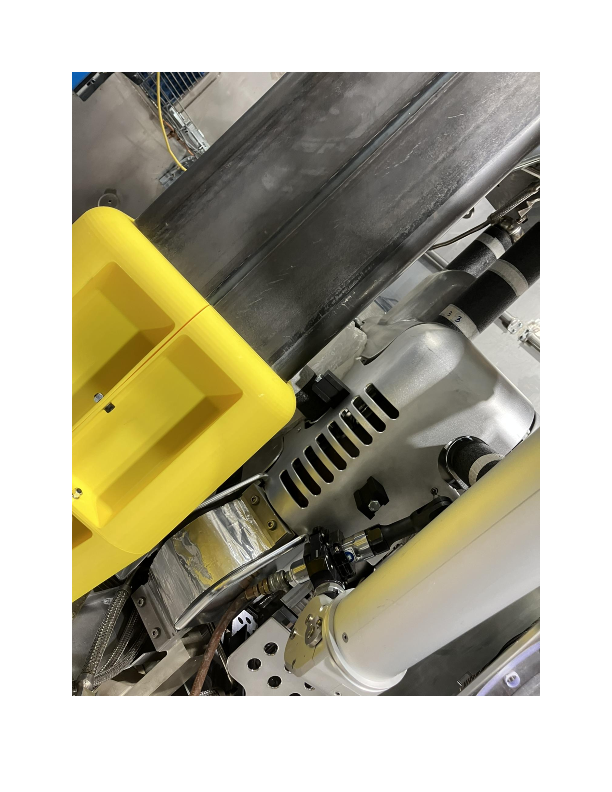
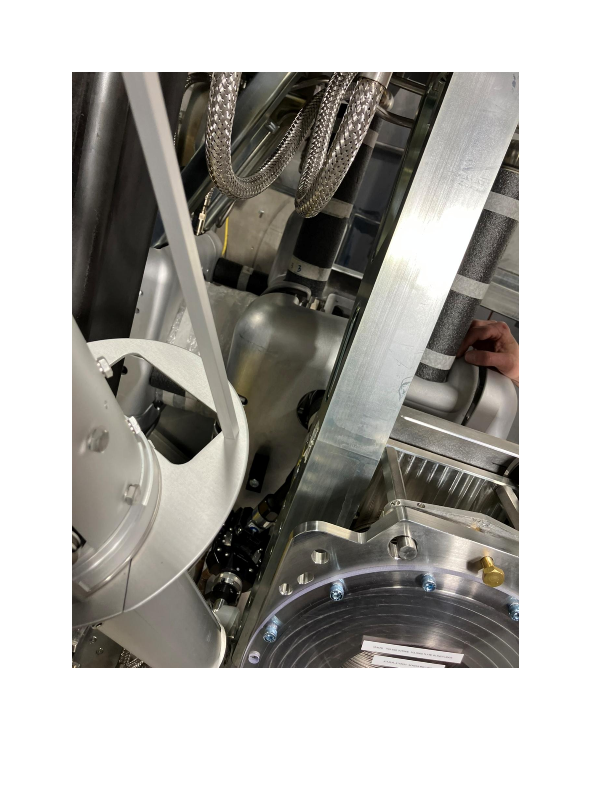
After the East and West turntables were fixed, we were able to test the removal and replacement of the HV shield covering the rear busbar connection (ATA3540).
- 3D printed H-handles were attached to both grabbing feature holes on the shield
- The H-handles rotated with ease despite the screws being moderately tightened, making rotational positioning of the shield difficult
- It may also be a good idea to add a slight angle to the H-profile on the handles to better clear the manipulator wrist from interfering with other FE structures (see photo)
- The air ratchet was used with a short socket key to remove the screws on the shielding
- FE rotated such that the non-gate valve side opening faces the hot cell window
- The FE was not raised far enough and prevented the left manipulator from accessing the second 3D printed h-handle on the gate-valve-side opening
- When removing, there was no need to keep the shielding retained since it could not 'drop' and damage anything
- When returning, it was difficult to tell whether the shield was seated properly, may
- The shield does not stay engaged on the mating nubs on the FE without the screws tightened
- Returning the shield onto the FE will likely require two manipulators: one to keep it in place, another to reinsert the screw
- We would strongly recommend changing the screws on this shield to be captive since dropping a screw in this location will cause it to be stuck deep in the service tray
- Also, if the mounting design could be modified such that the shield stays put when in place and does not drop, it would be a great help
- some ideas: substituting One of the screws with a pin, having the slot design that's present on some of the other HV shields, or adding more locating features in the mating interface
- When doing-up the screws, with the air ratchet (or smaller electrical tool in the future), it was relatively easy for the tool to slip and turn onto the ceramic components.
- In the real deal, it is imperative for protective impact covers to be placed over the ceramics first.
We tested removal and returning the patch panel shielding by hand:
- the main thing to note would be that the manipulator handle to be installed may need to be made horizontal with side access
|
| Attachment 1: HV_Shield_Testing_Mar_20.pdf
|
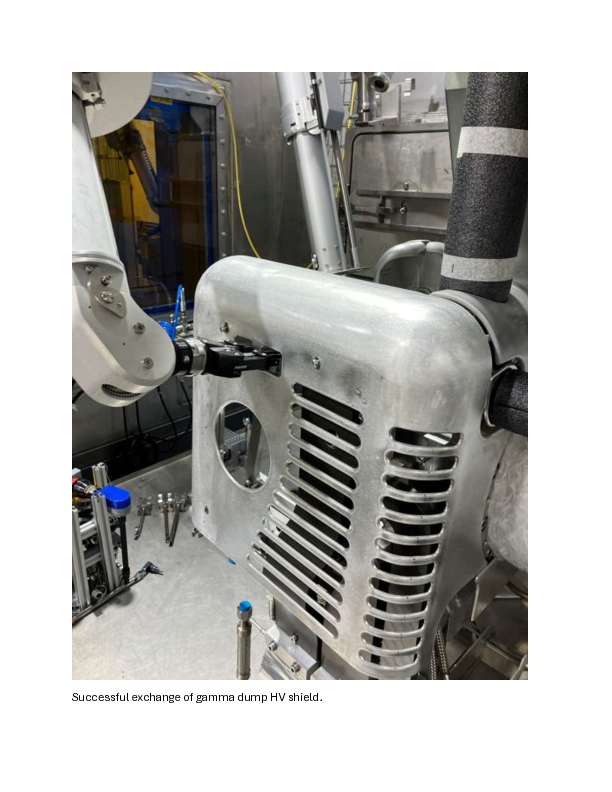
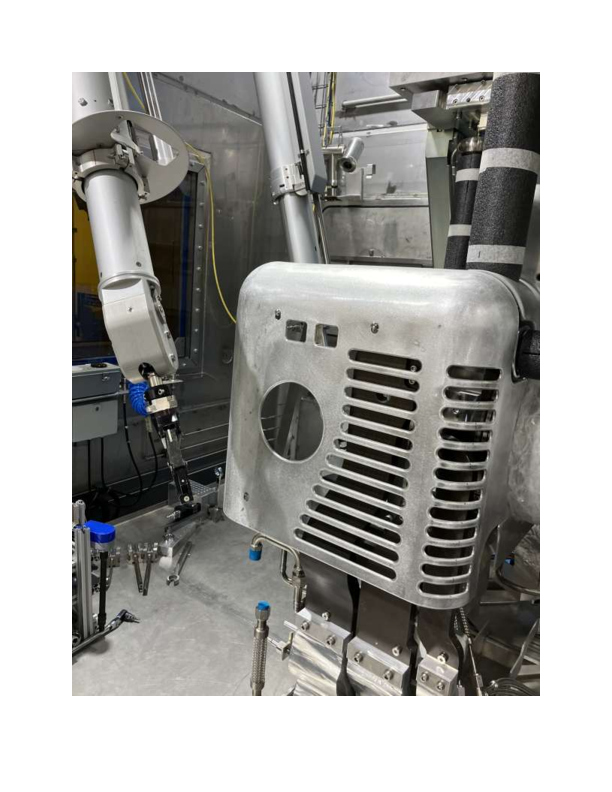

|
| Attachment 2: April_16.pdf
|

|
|
87
|
Wednesday, April 09, 2025, 15:31 |
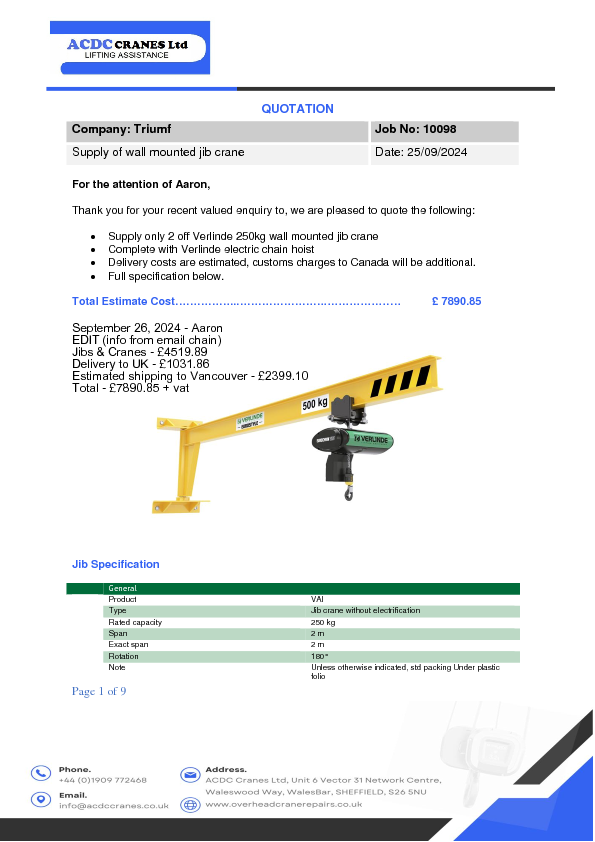
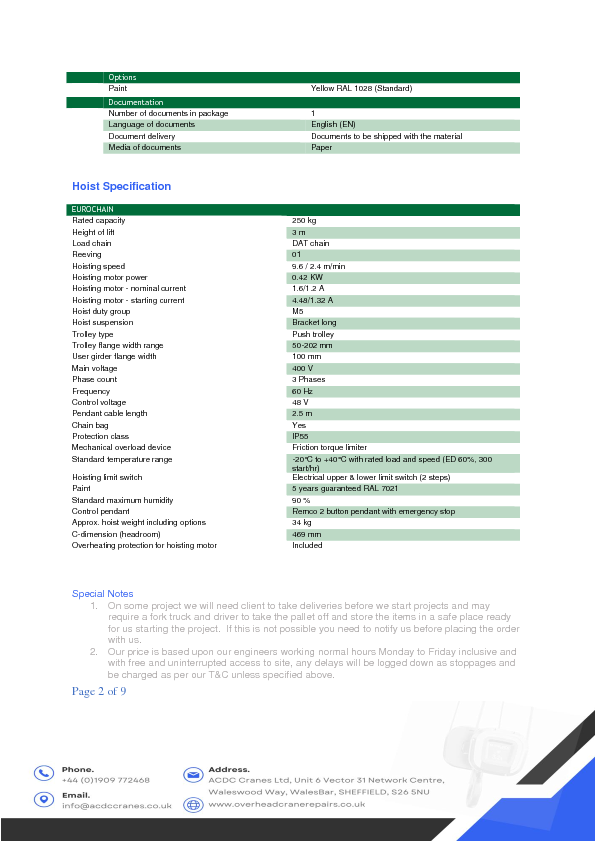
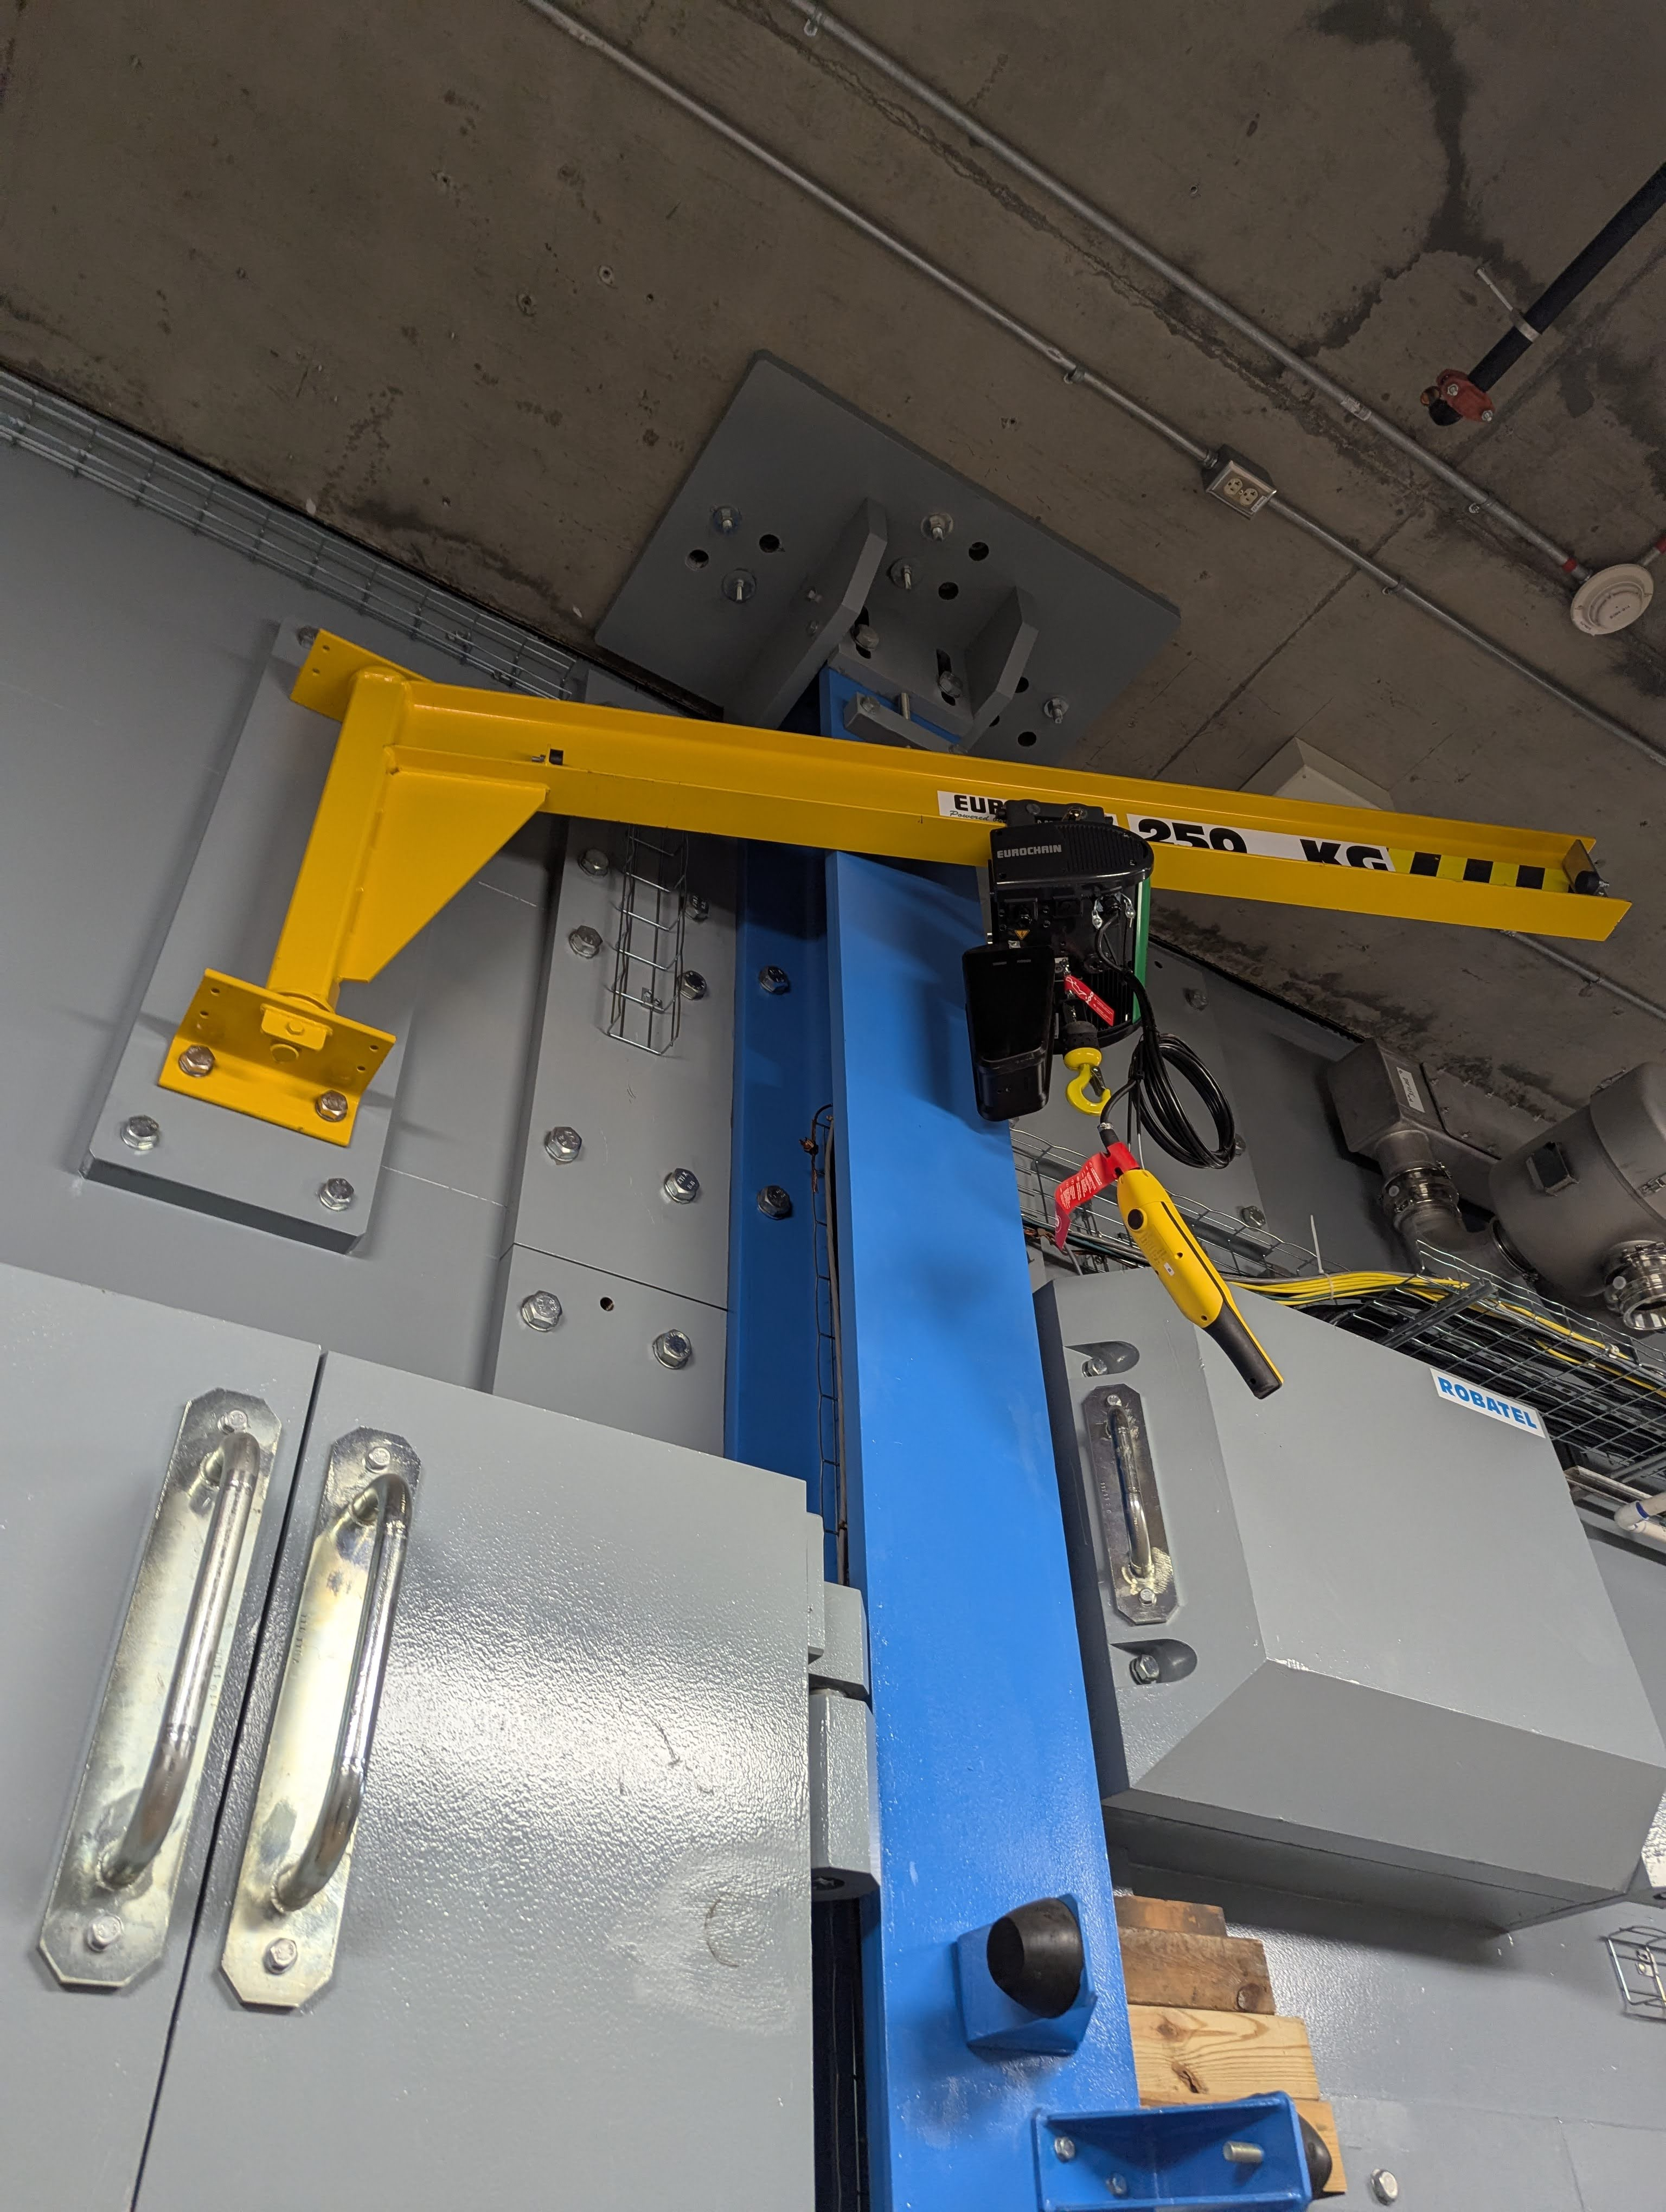
Adam Newsome | Hot Cell 1 | Development | Two jib cranes installed | Two externally mounted jib cranes were installed on the ARIEL hot cell - one on the West side above the tool port, and one on the North side above the tool port. These cranes are supplied by AC DC Cranes (see attached quote for info). They are 250 kg WLL, 2 m span, powered hoist, manual pivot. They were mounted using M24x3 x 50mm bolts.
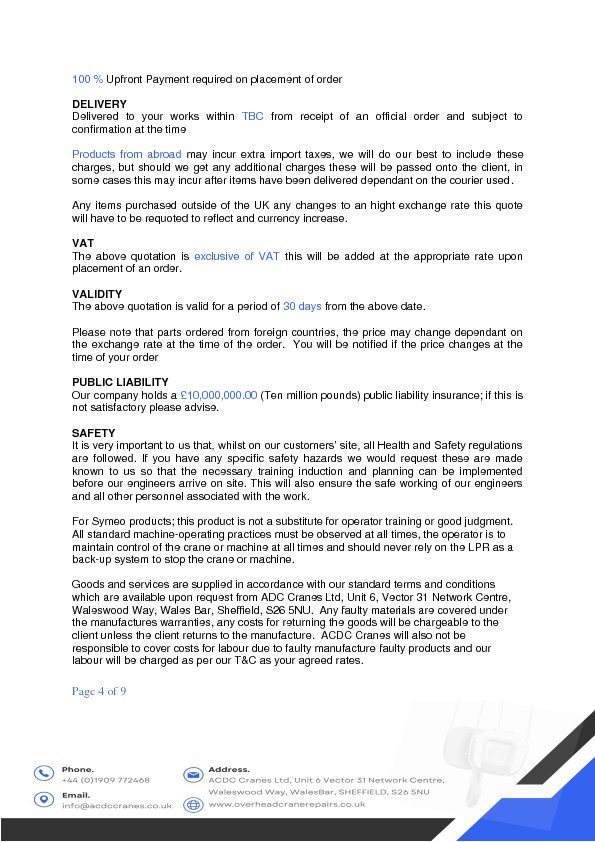
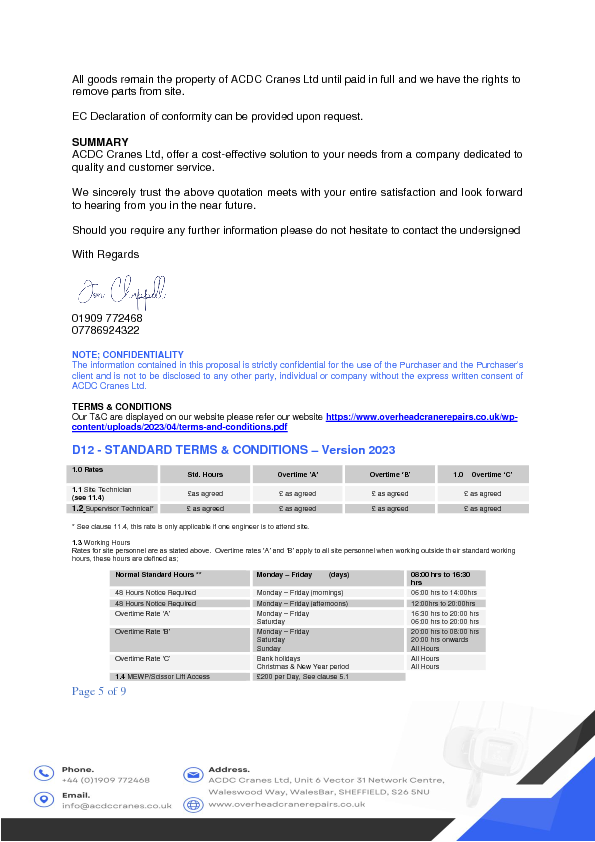
Engineering analysis and BC P Eng sign off for the design of these cranes has been handled by ROBATEL Industries as part of the ARIEL hot cell contract. TRIUMF scope of work included procurement and installation of the cranes.
At the time of writing this e-log, the cranes have not been powered and therefore have not been tested. They are not considered commissioned and operational at this point and must not be used. Facility coordinators have been informed.
Future work (to be done by A. Newsome): coordinate electrical services to supply power to the cranes, perform initial functionality and load testing, add cranes to calibration/inspection index, and include the logbook and list of qualified operators down in the hot cell area. |
| Attachment 1: ACDC_CRANES_3500_Job_10098_General_Quote24_2.pdf
|

|
| Attachment 2: PXL_20250409_175712902.MP.jpg
|

|
| Attachment 3: PXL_20250409_175730905.MP.jpg
|
|
|
88
|
Tuesday, April 15, 2025, 10:35 |
Riley Sykes | Hot Cell 1 | Repair | North Roxtec Hinge and door. | Repairs were done on the North door that would not close. Due to the weight on the hinge pintle and gudgeon repairs were only possible with a Hydraulic power pack and ram to lift the door into position. Door is held closed with single Stainless bolt as top bolt hole would no longer line up. If the door is needed to swing open, recommendation is to use Hydraulic power pack to take some of the weight to facilitate ease. See attached bolt hole photo for misalignment reference. |
| Attachment 1: Image_(7).jfif
|
|
89
|
Wednesday, April 23, 2025, 13:40 |
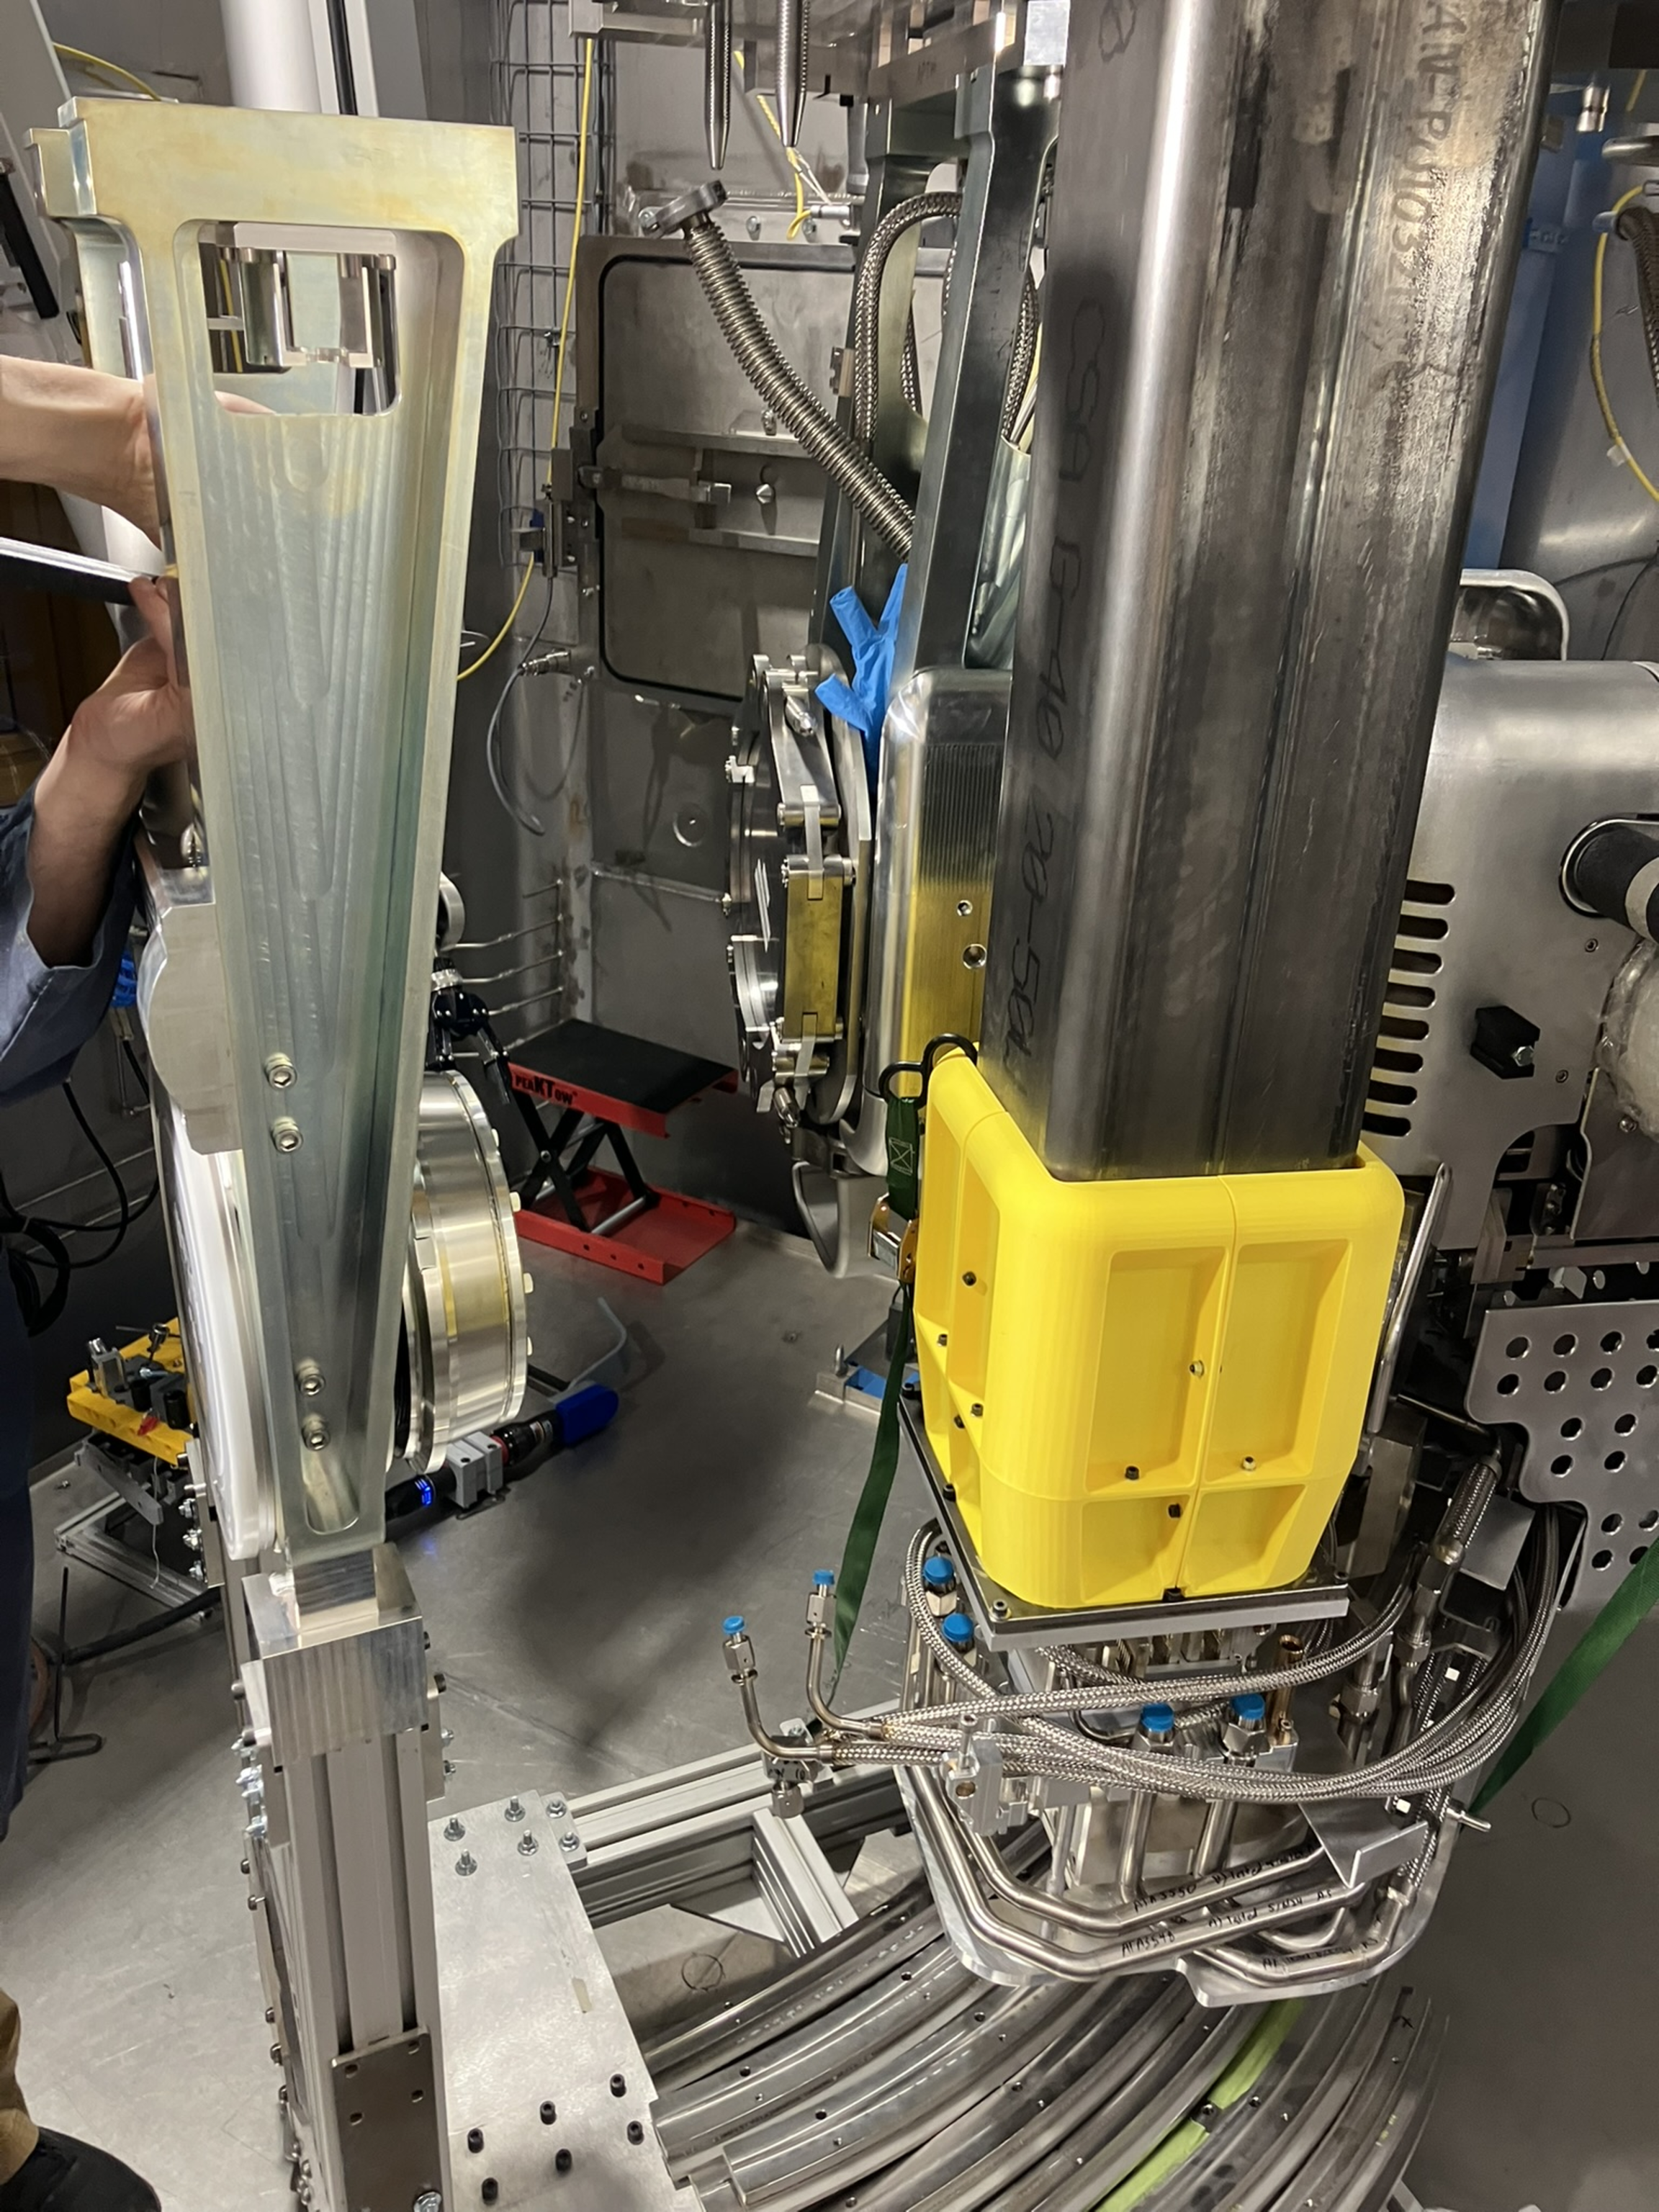
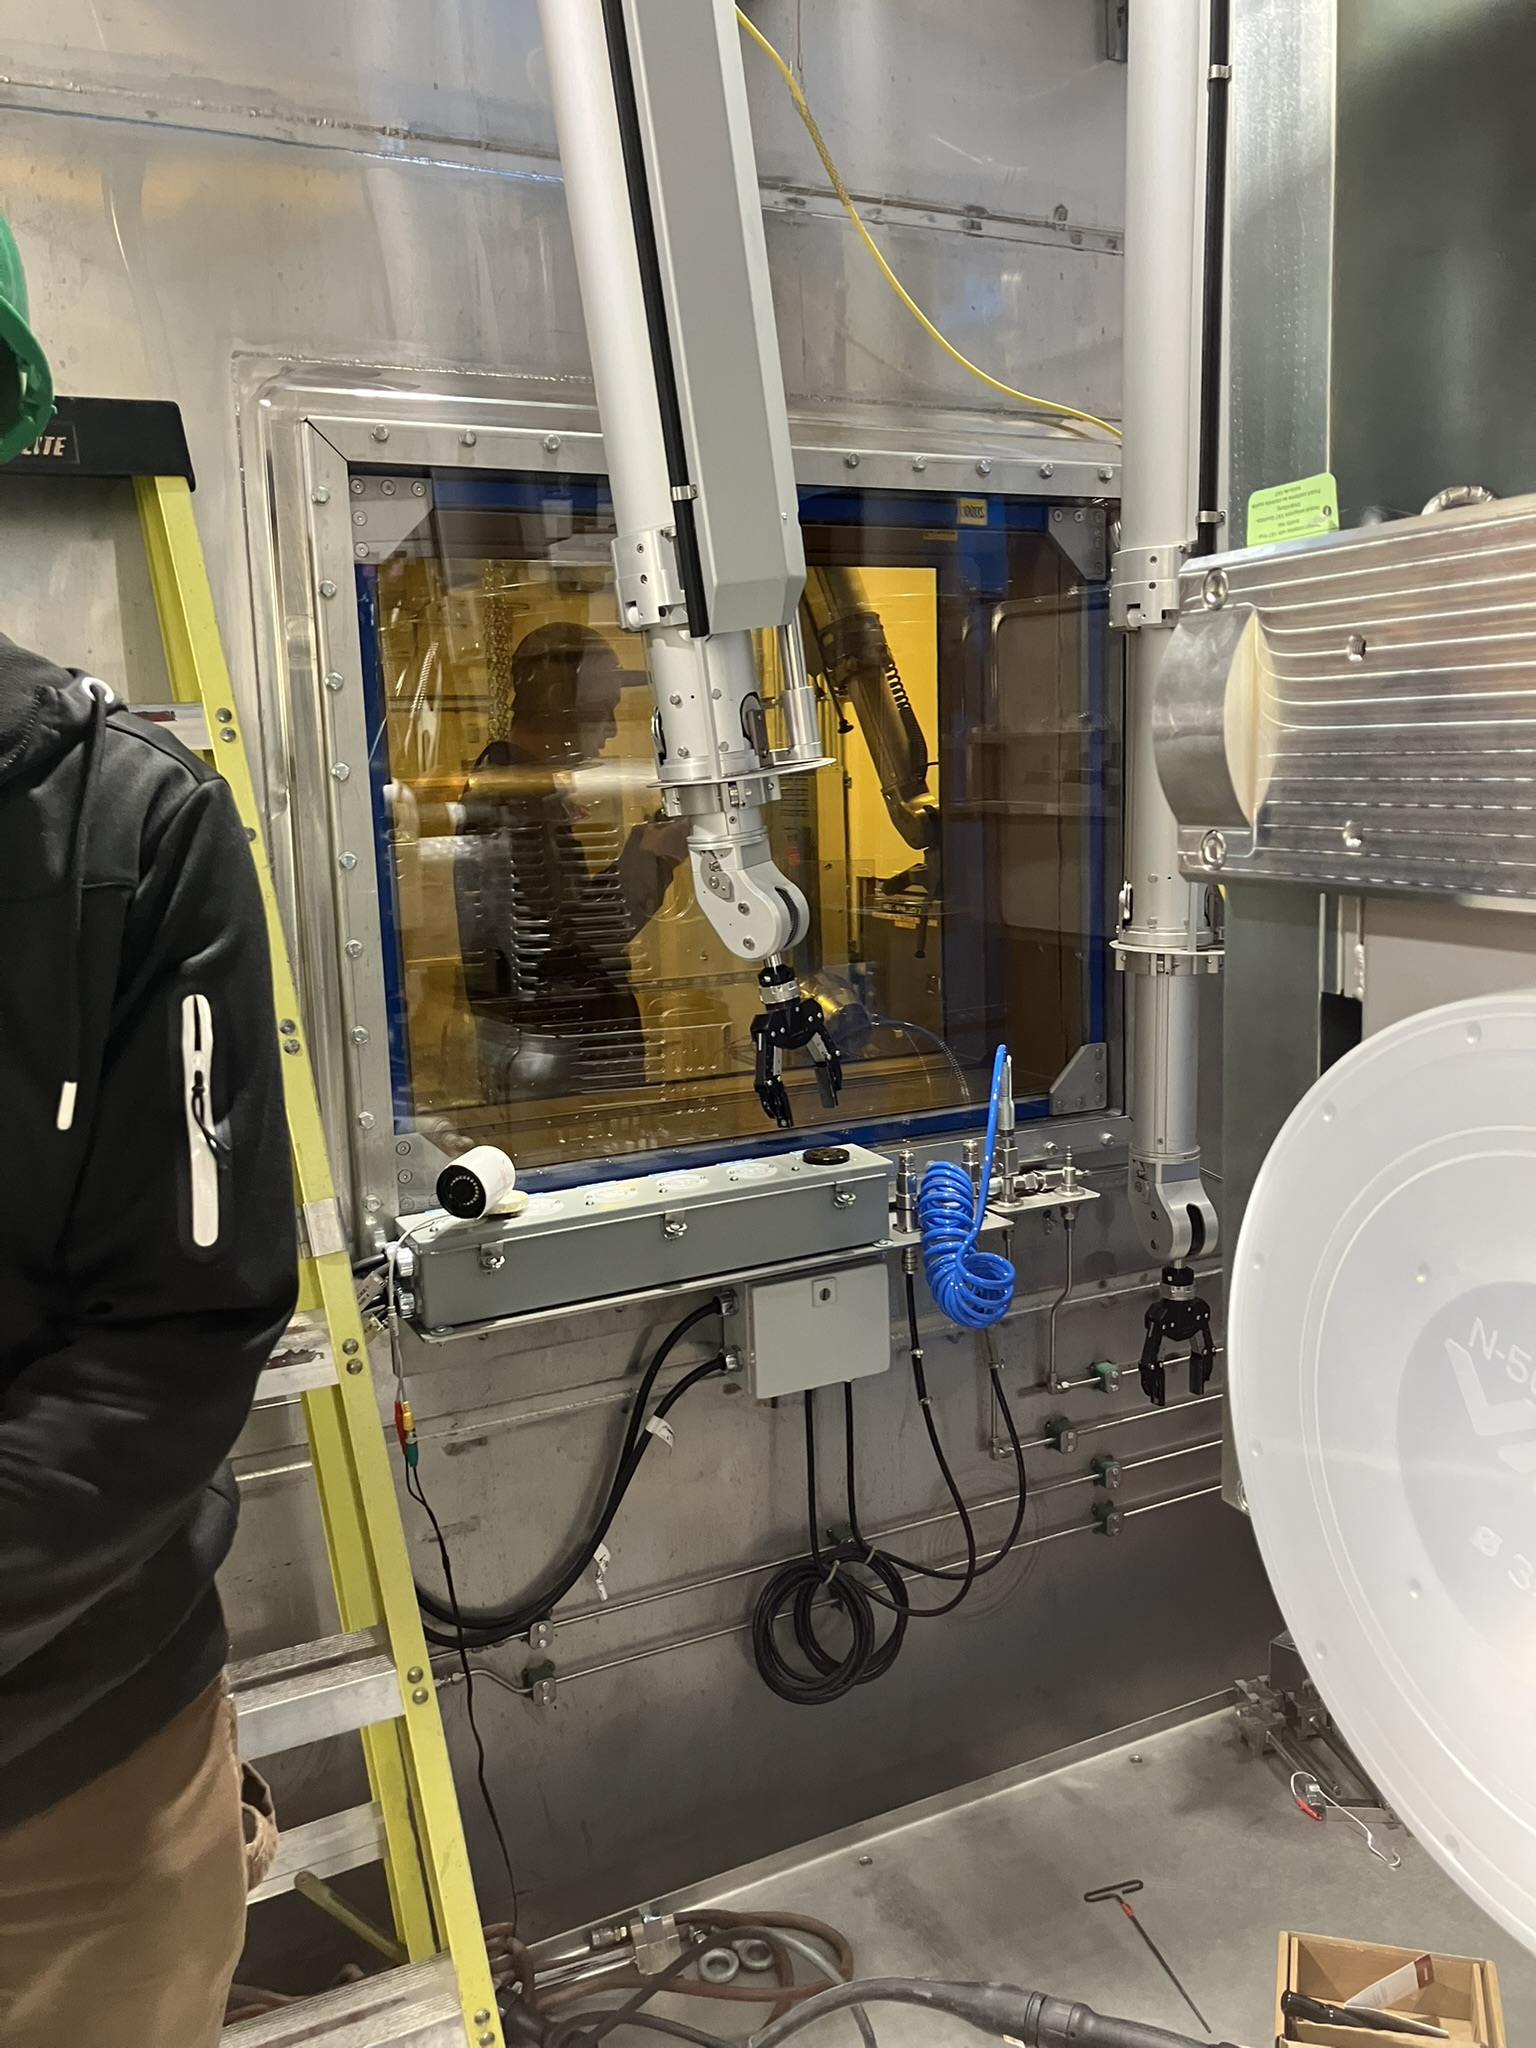
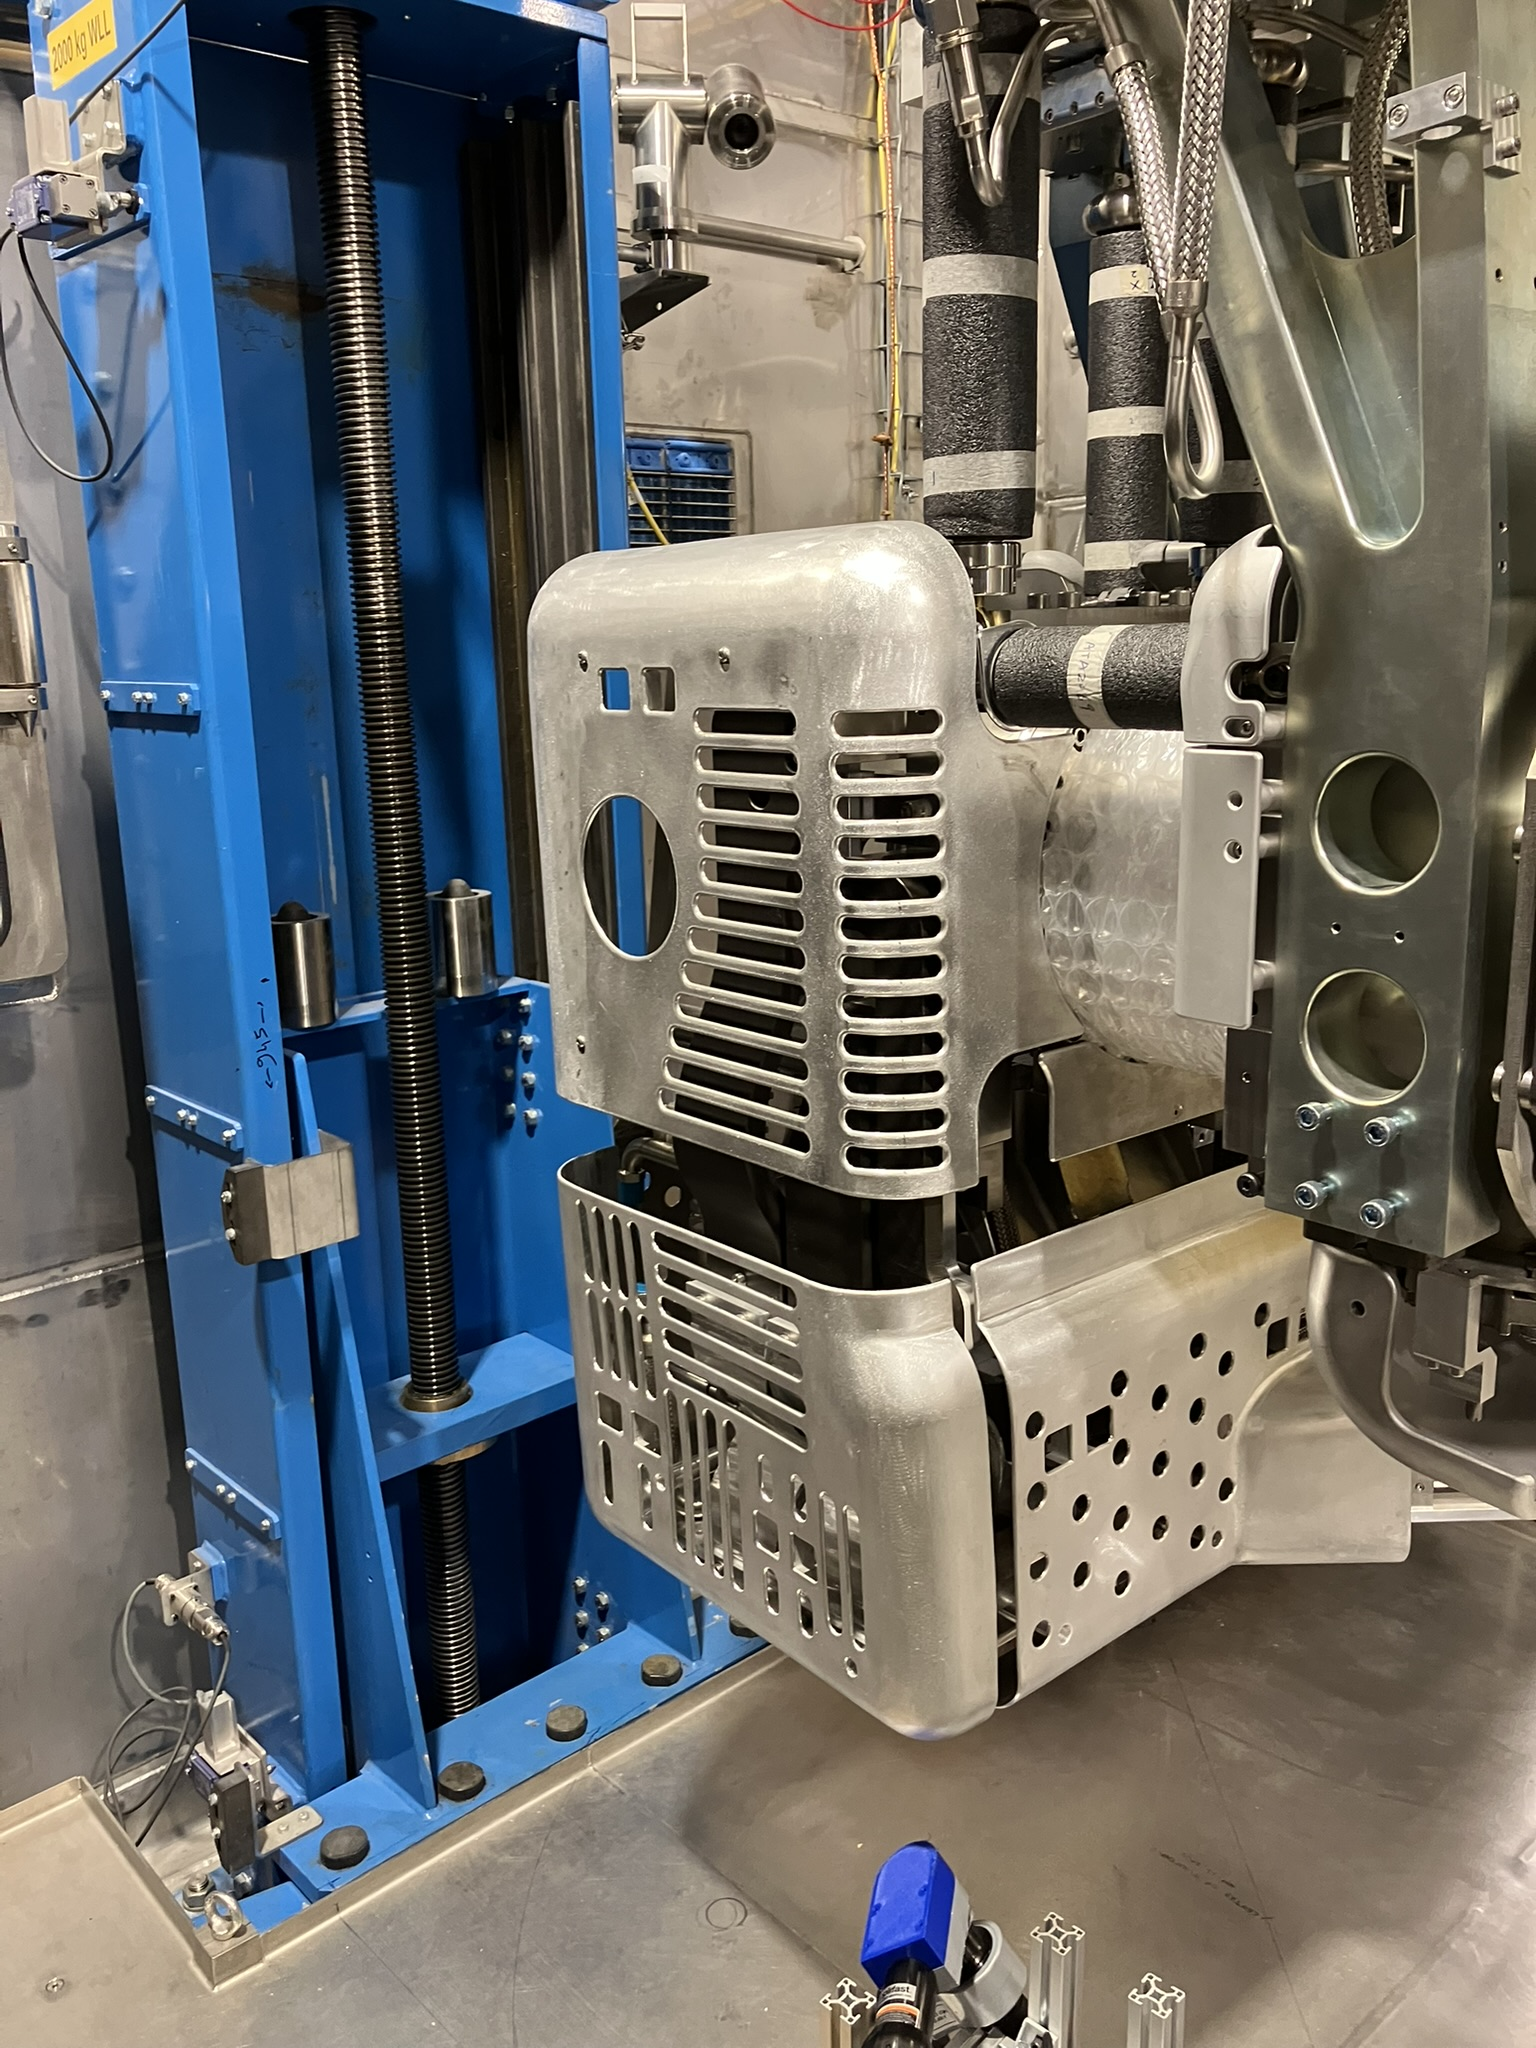
Aaron Tam | Hot Cell 1 | Development | APTW Front End Gate Valve Assembly Installation | Previously prepped - A. Kong, S. Liu, A. Tam
- Gate valve assembly put together
- All bolts torqued to >=55Nm
- Gate valve Cart moved into hotcell
----------------------------------------------------------------------------------------------------------------------------------------------------------------------------------------------------------------------------------------------------------------------------------------------------------------
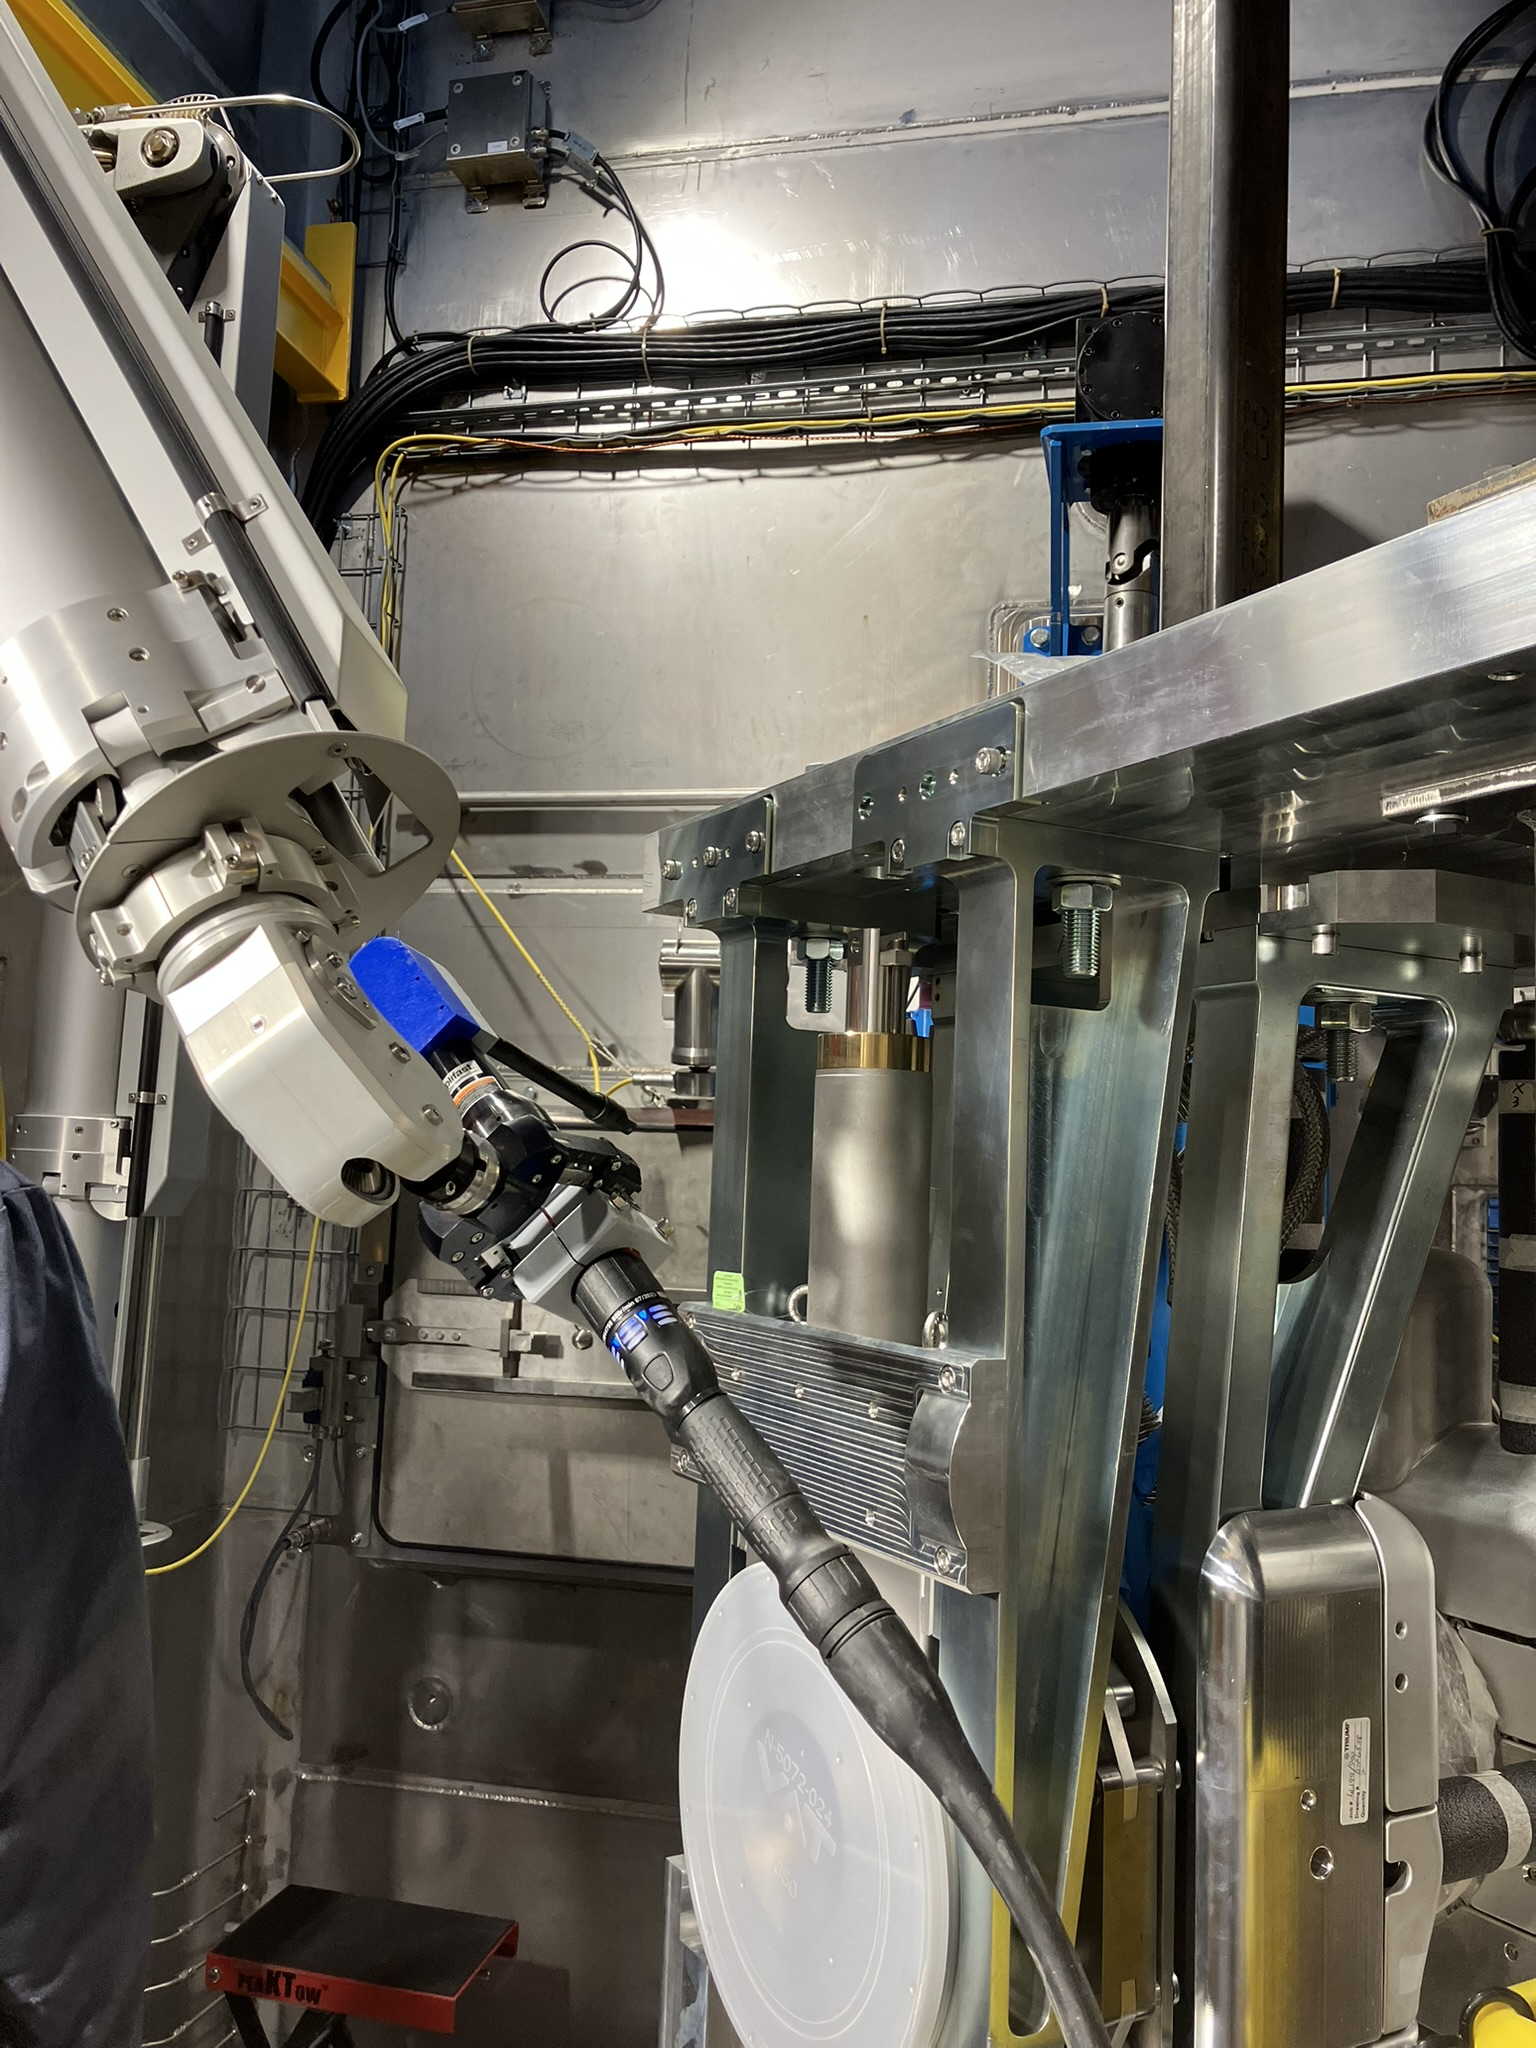
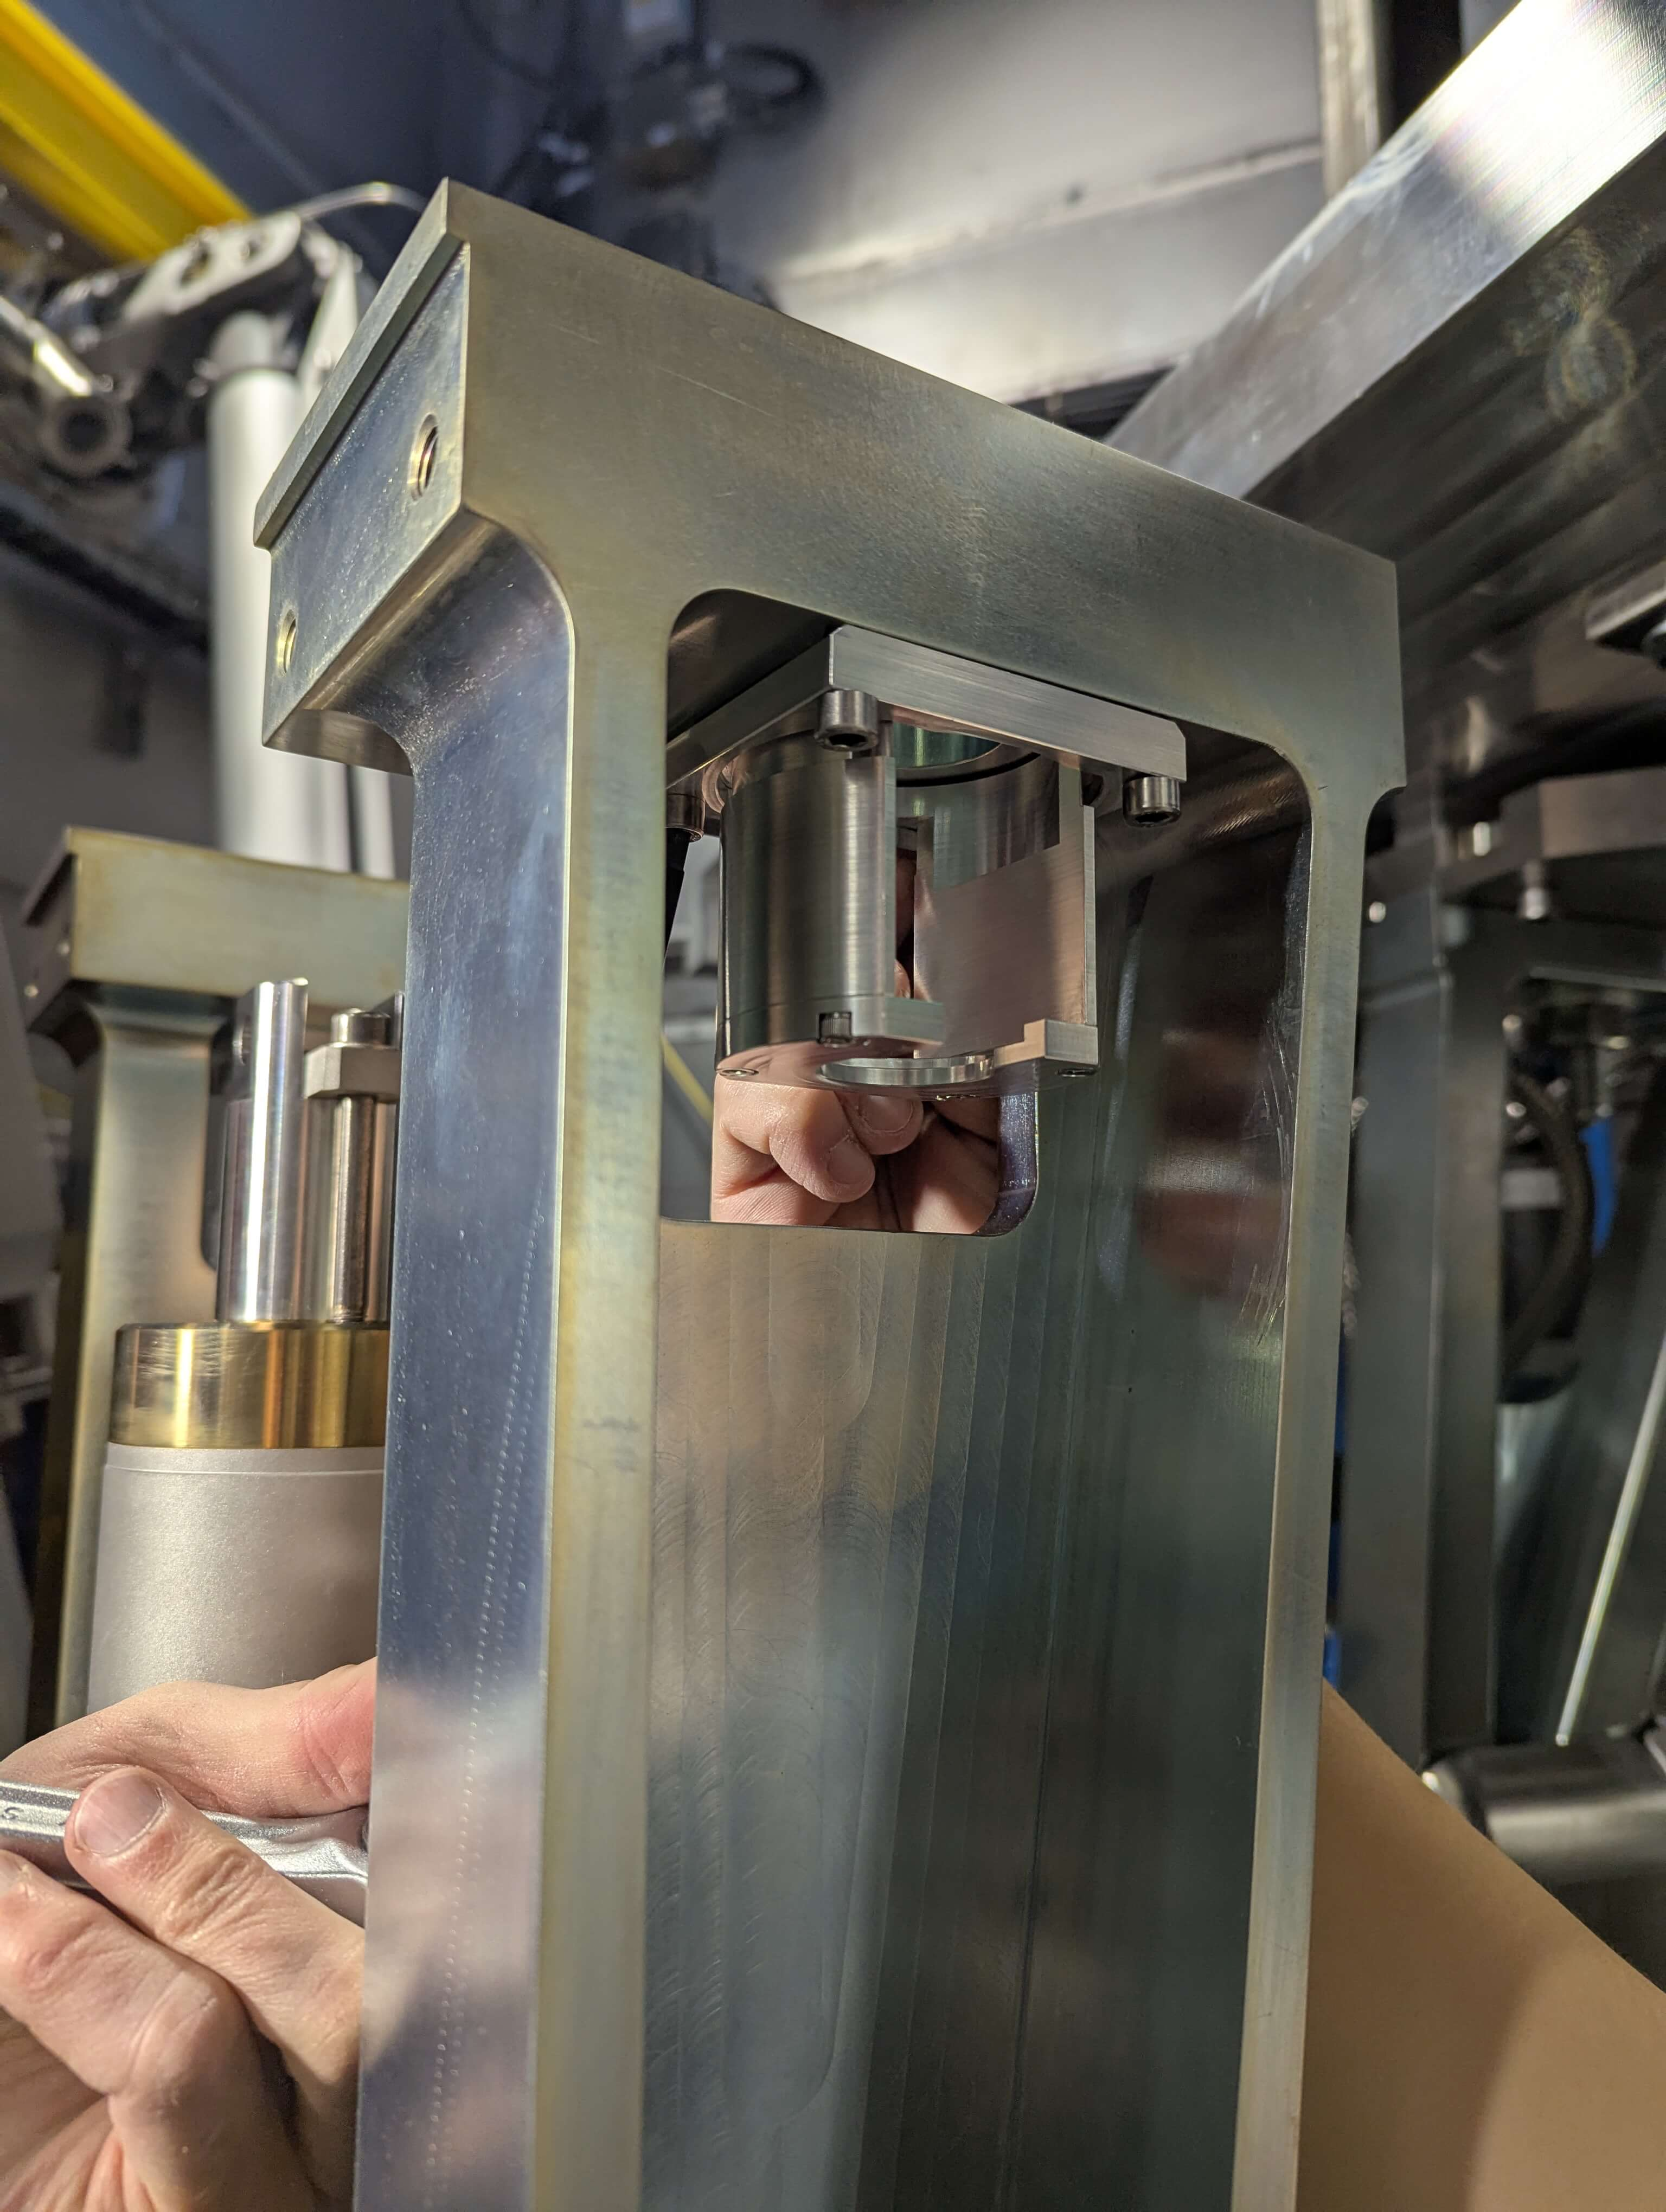
April 23, 2025 - A. Kong, C. Fisher, S. Liu, M. Genix, A. Tam
- Moved standoffs to the taller position on the cart
- Weight added to cart to bring CG towards centre of cart.
- Cart rolling away and hitting lip of lift table could tip (especially with gate valve in higher position)
- Gate valve moved onto cart via 1000kg crane
- Sling used between openings in gate valve assembly frame members
- Complete gate valve assembly with hard stop and bellows movement retainer
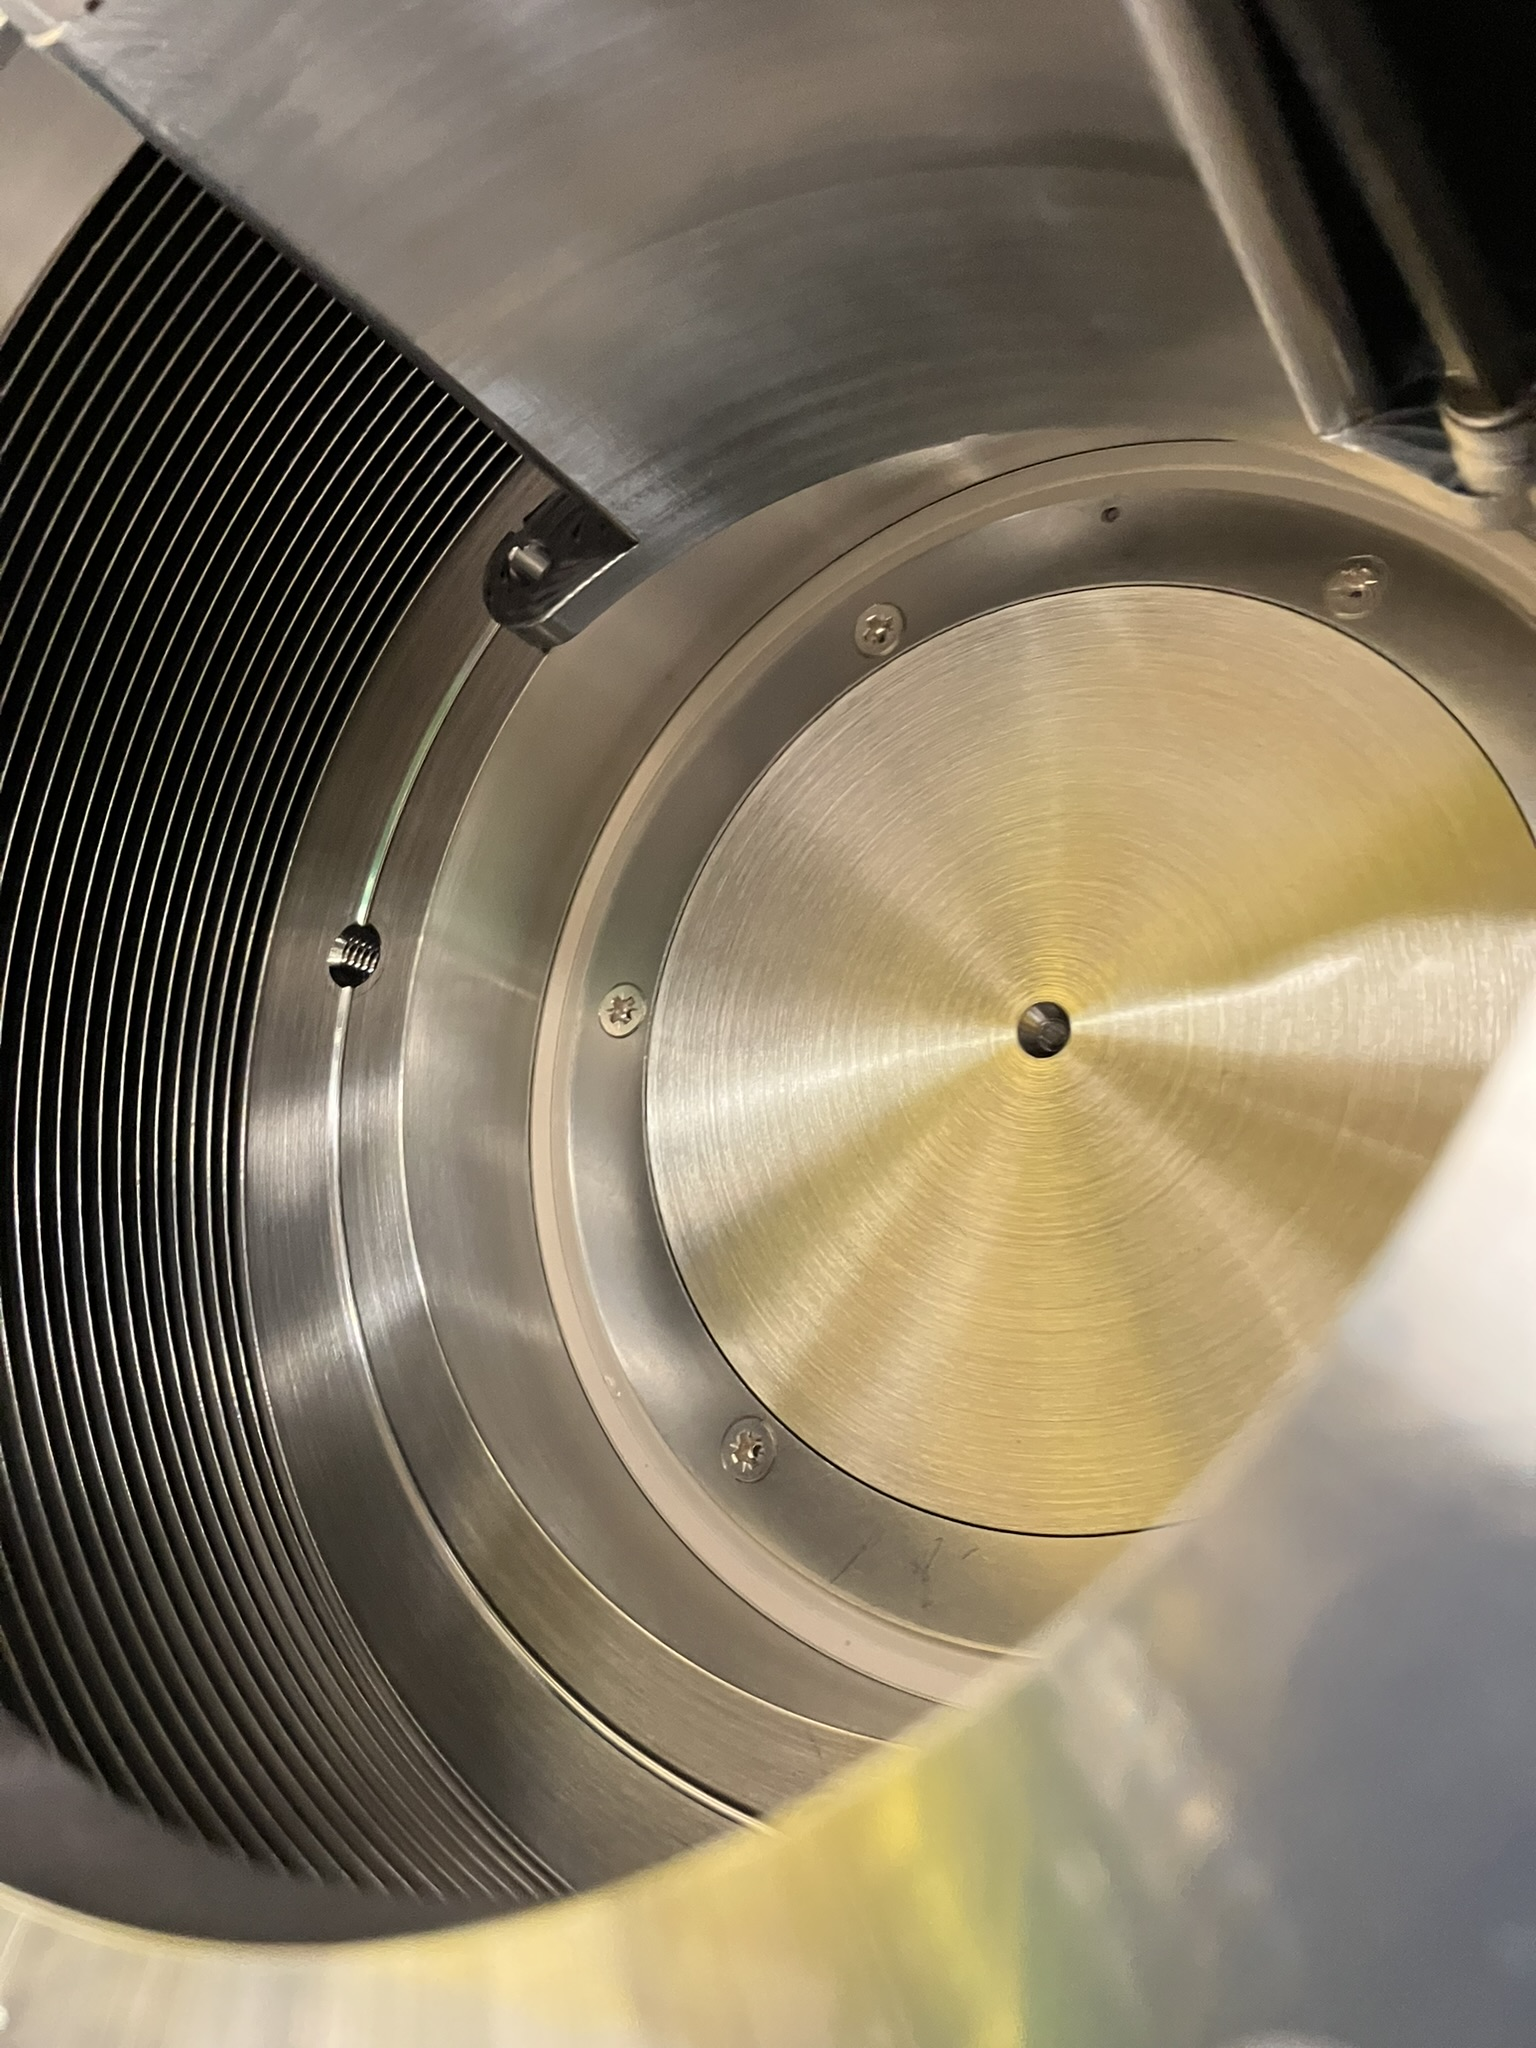
- Dust cover removed, sealing (o-ring) flange removed,
- vacuum and sealing surfaces cleaned,
- hard stops (gate valve – shield plug) installed, bellows limit brackets installed
- Bagged all items removed to keep them clean
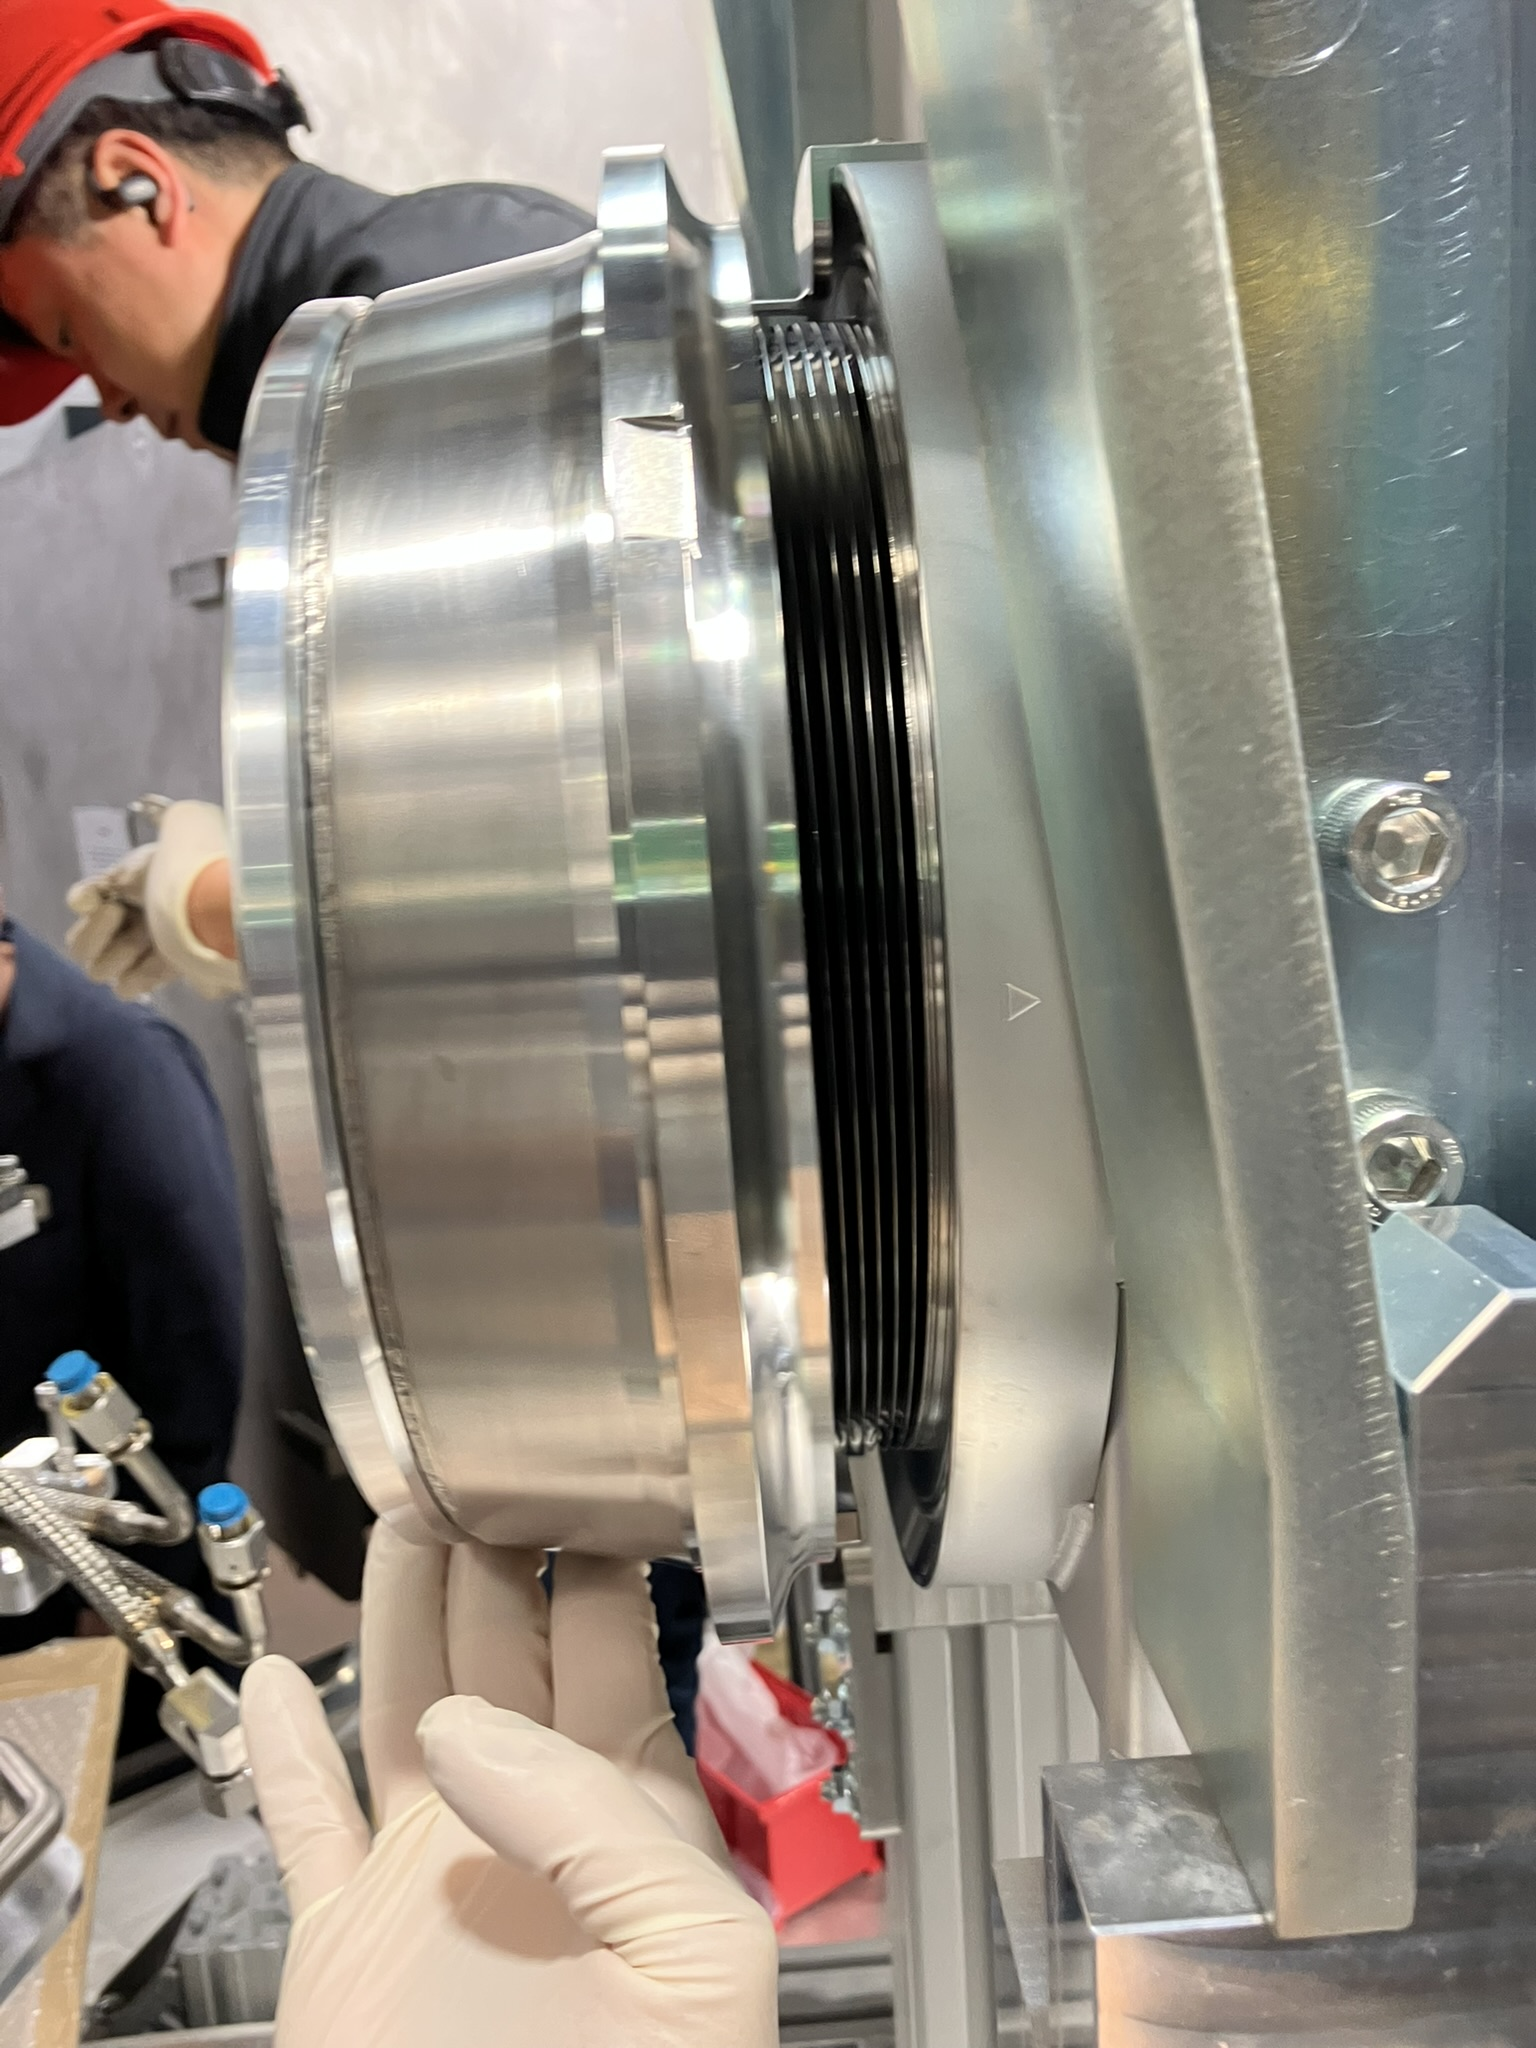
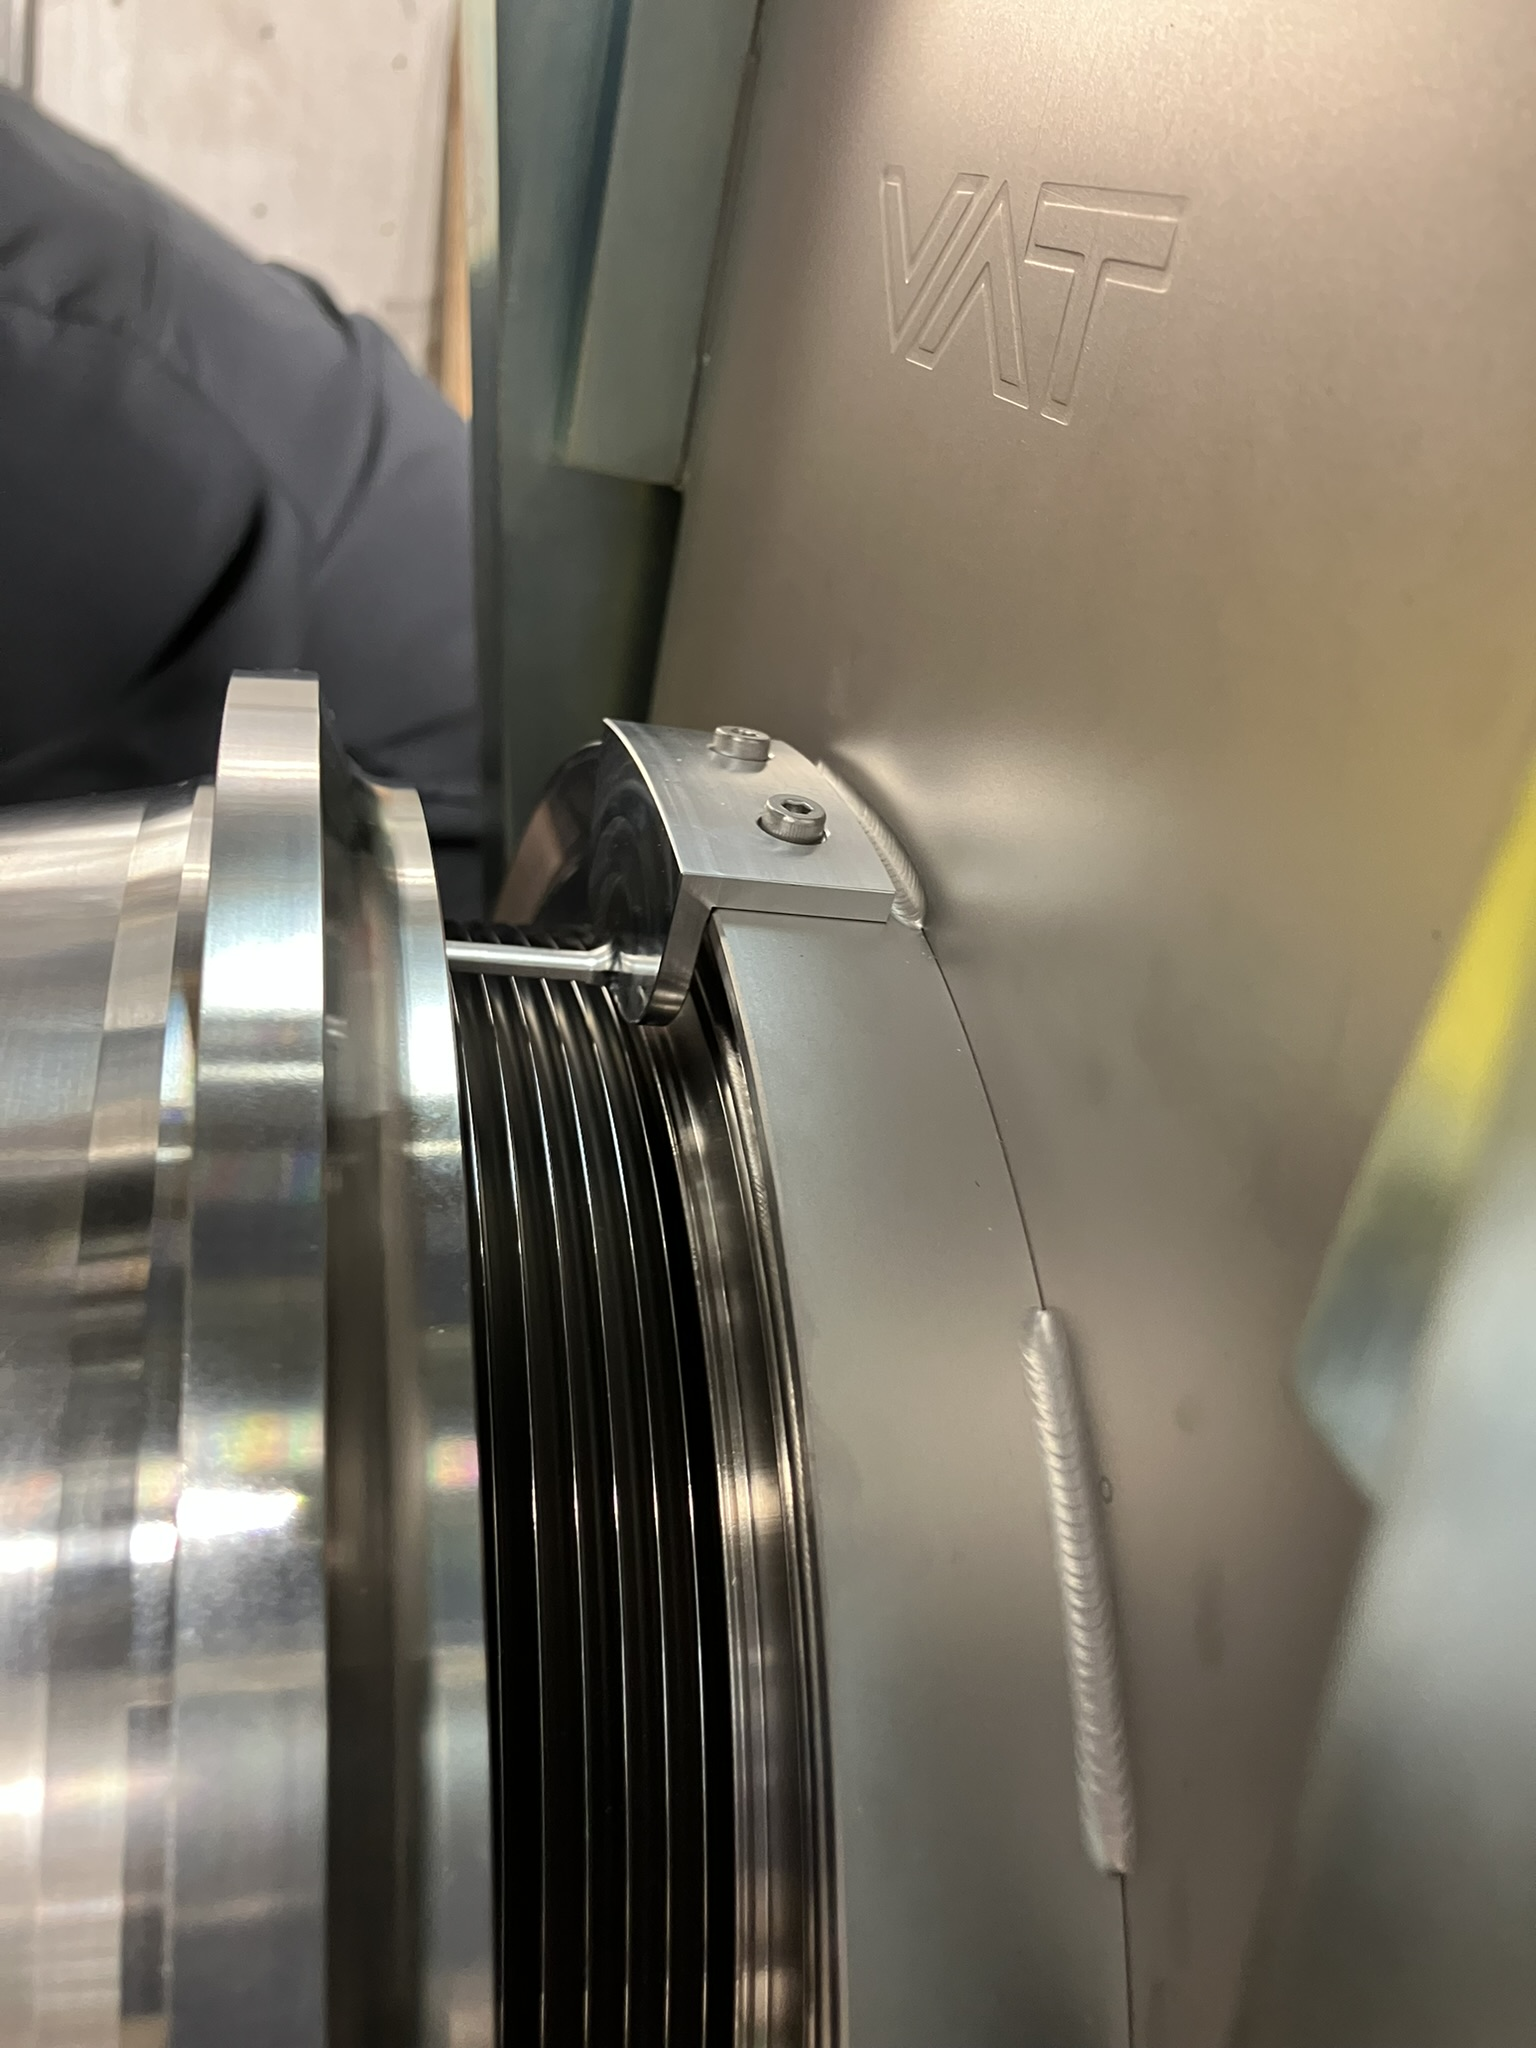
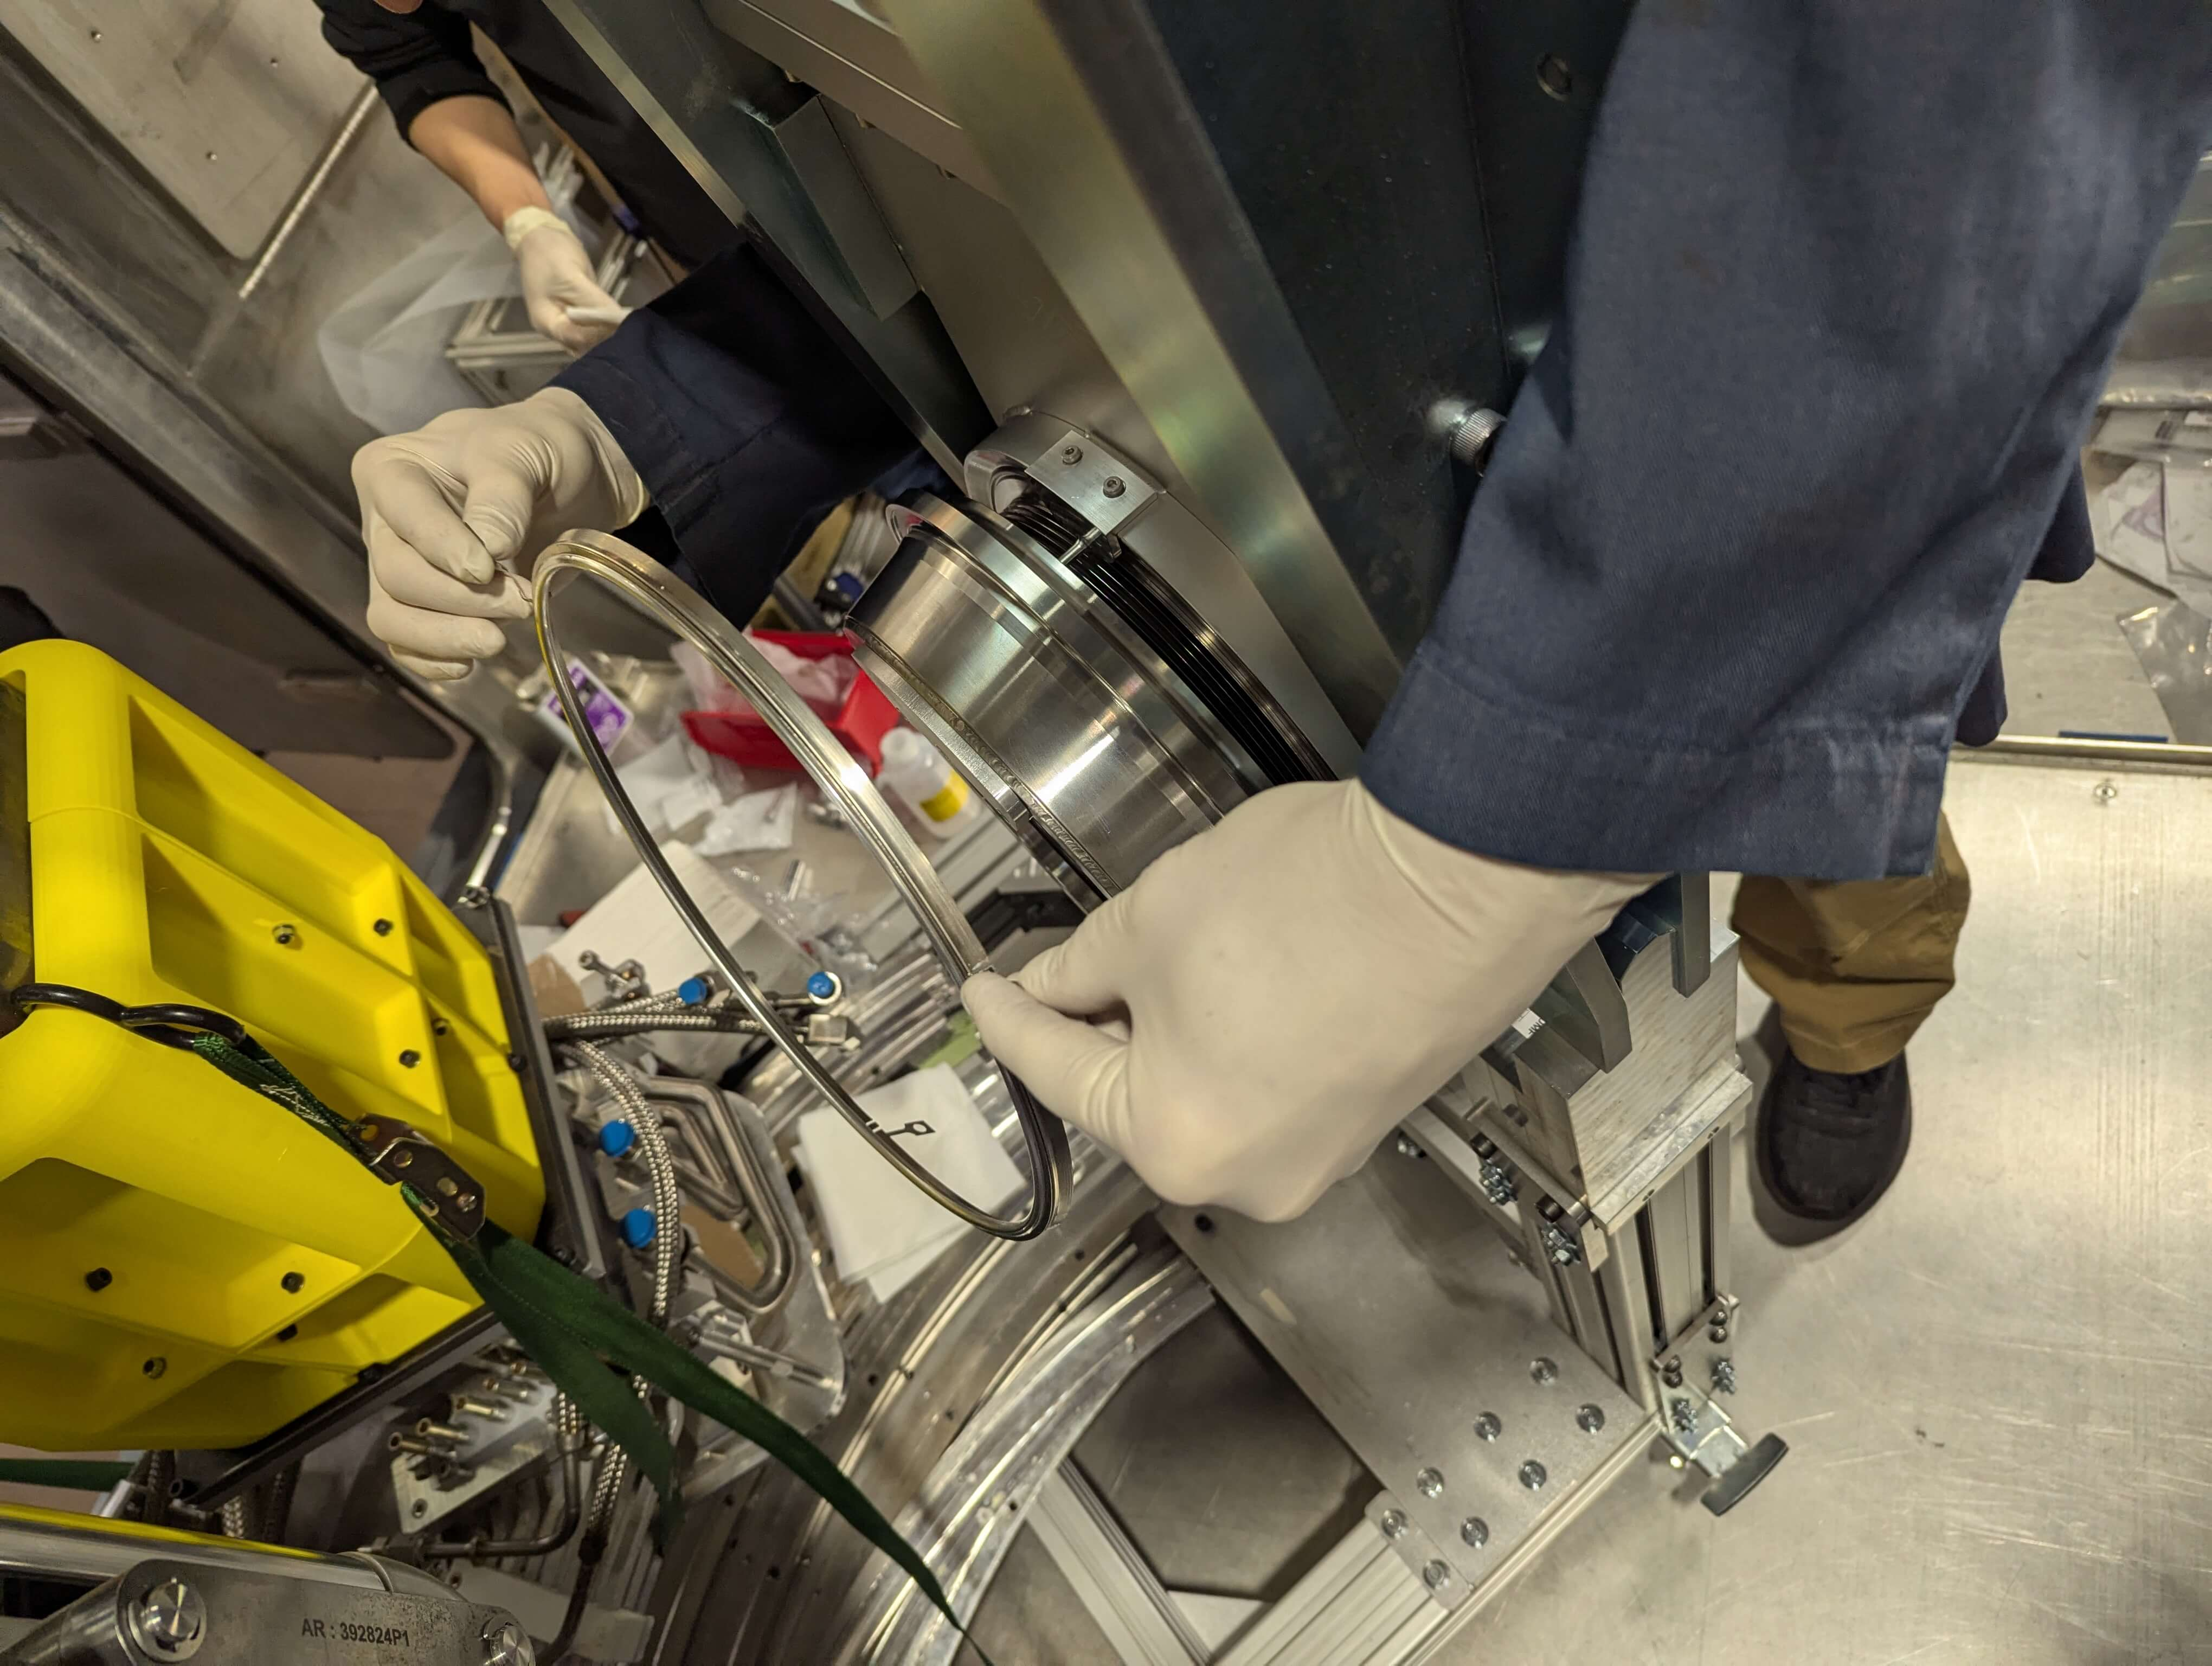
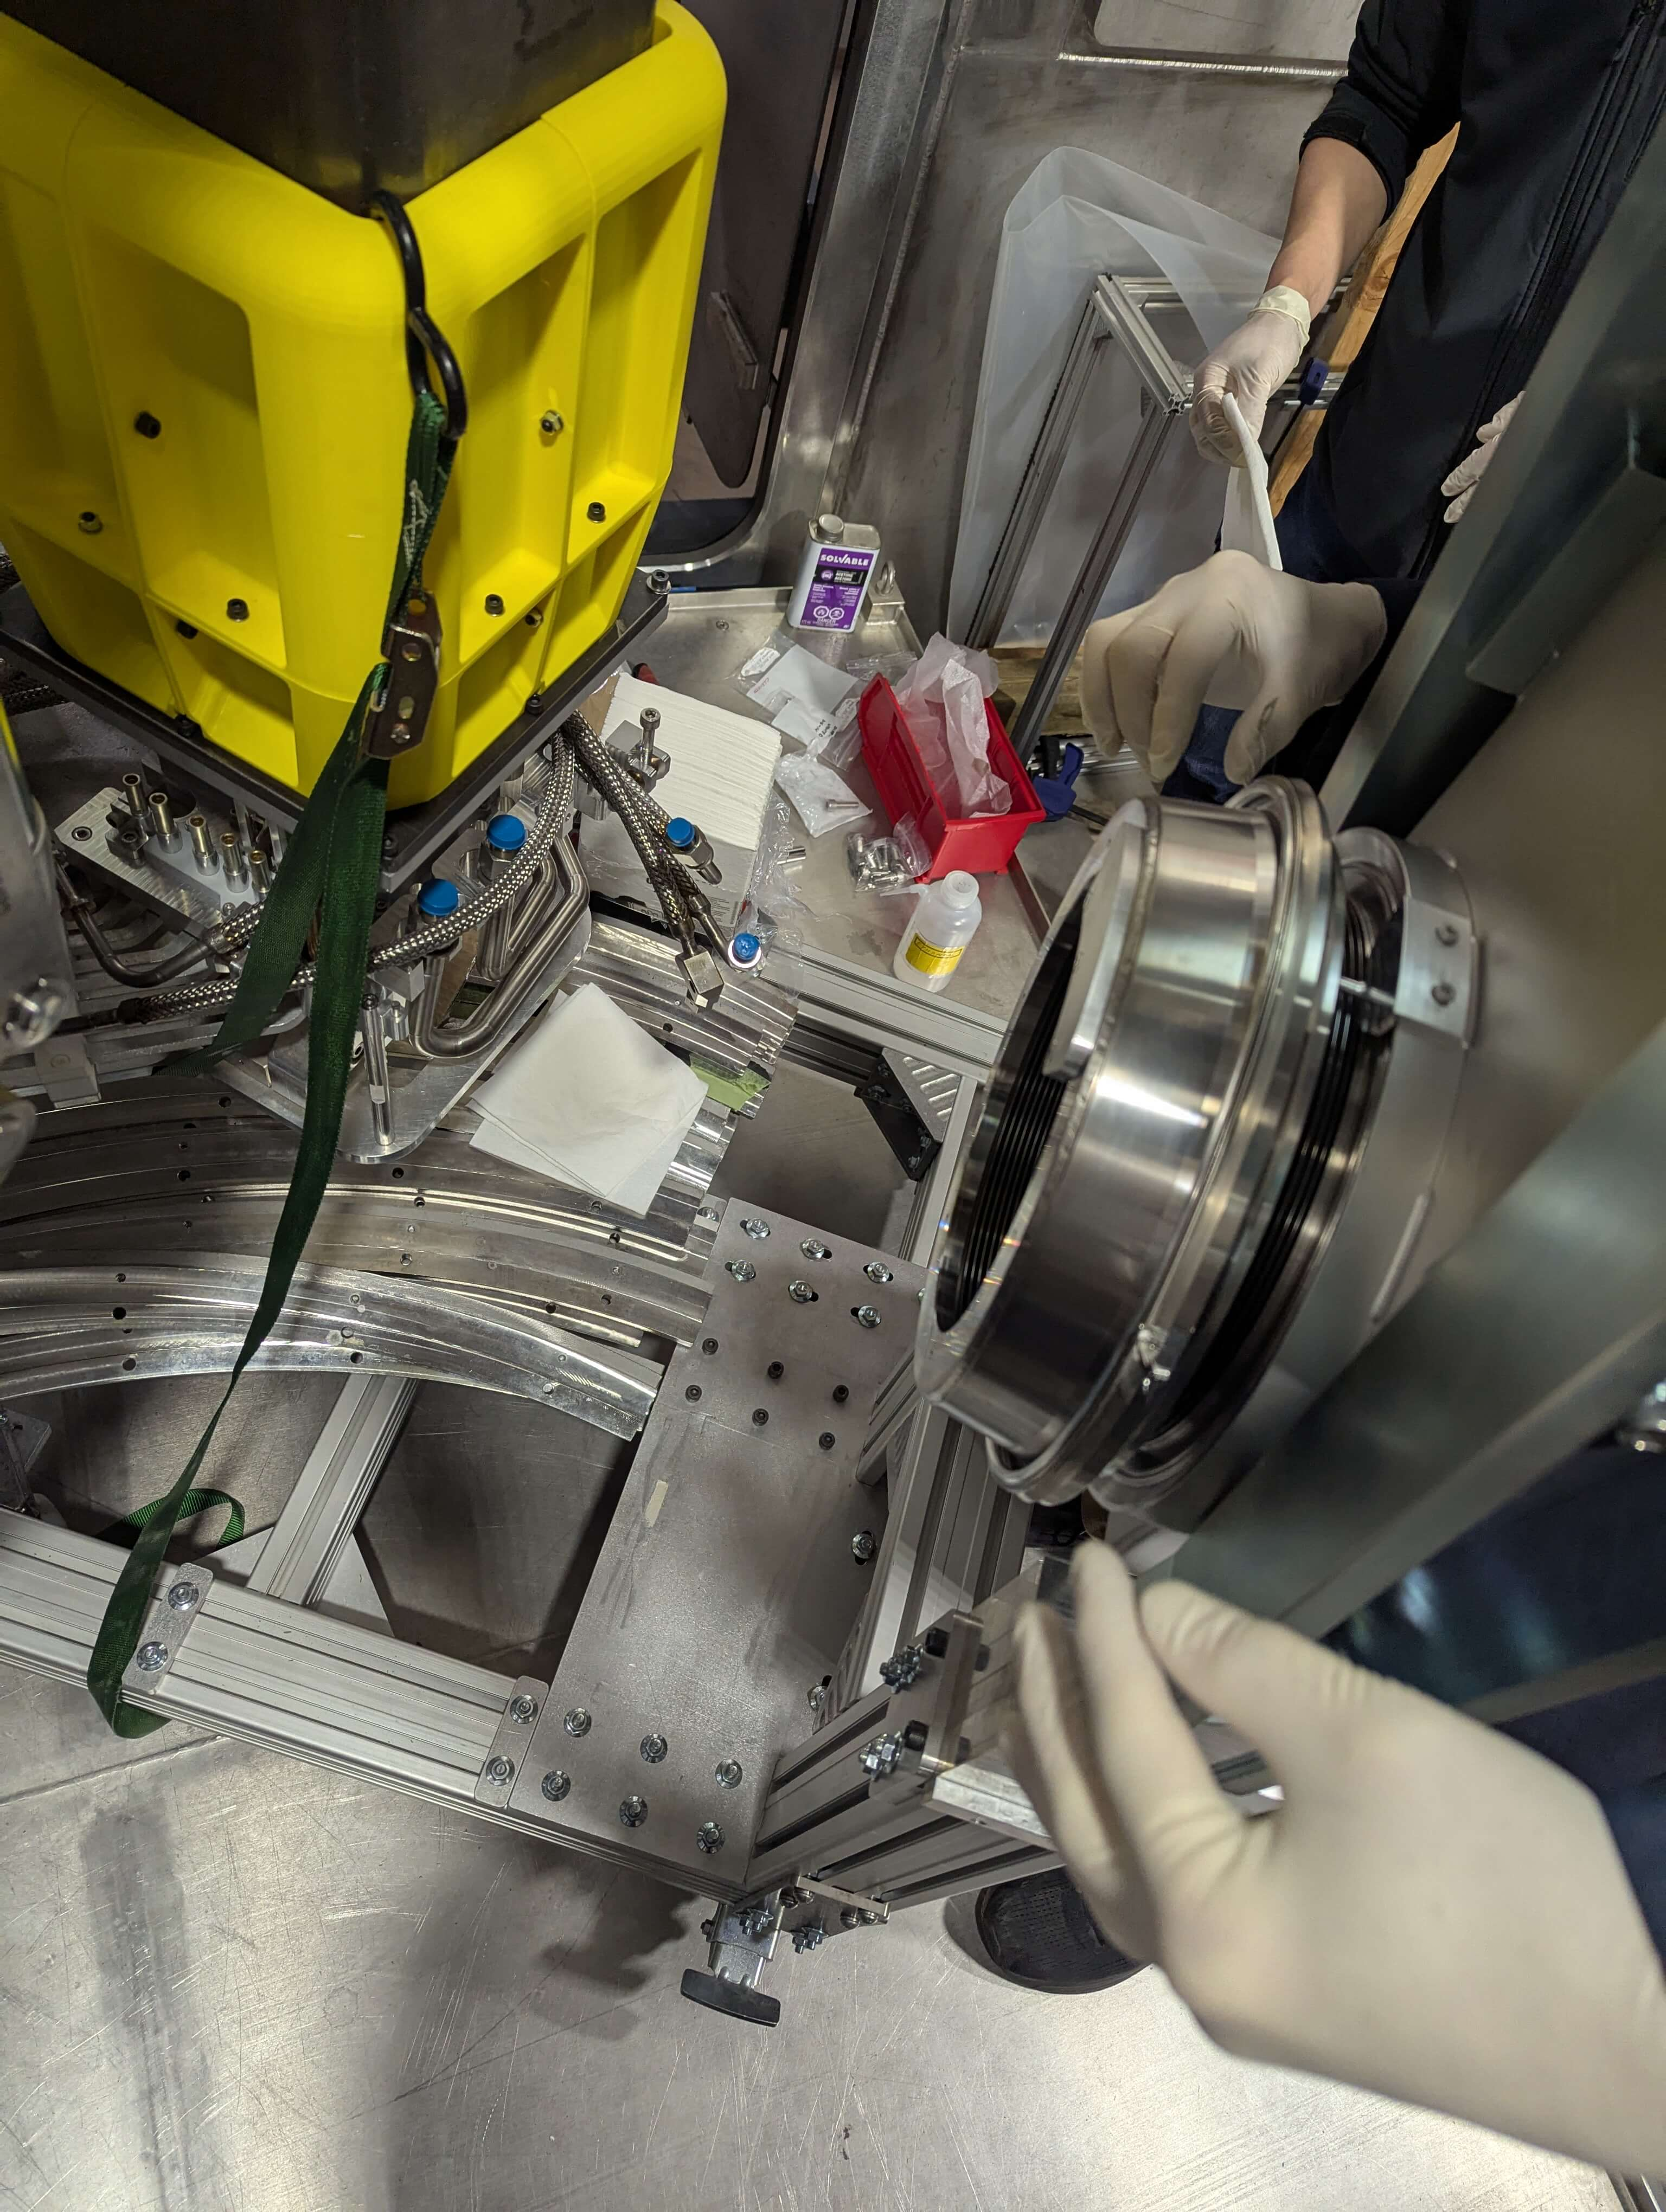
QDS seal installed BY HAND onto gate valve tapered flange
- Seal tabs align with a cutout feature on the flange (3 tabs, 120O spacing @ 10:00, 2:00, 6:00)
- These cutouts allow the tabs to bend towards the flange without obstructing sealing surfaces
RH Assumptions (UNTESTED)
- in the situation of a gate valve assembly replacement:
- Seal should be pre-installed onto gate valve flange using soft jawed clamps (bought, designed, modified)
- Assembly should come bagged and bag removed at the point of installation to reduce contamination on vacuum and sealing surfaces
- if seal replacement on its own (eg. during extraction electrode replacement)
- Seal should arrive on a clean stand through tool port and oriented in installation position
- two manips to place seal onto flange; grabbing top two tabs (UNTESTED but confident because of taper on seal retainer)
- clamps are TBD (bought, designed, modified)
Installing gate valve assembly proposed sequence of operations:
- Using Hotcell lift table, raise gate valve assembly so that Shield-plug-to-gate-valve screw can engage, leaving ~1/8 inch between Shield-plug and gate-valve-assembly
- Slide gate-valve with cart into rough x-y position (use camera views for alignment)
- Start thread on shield-plug-to-gate-valve screw, until weight is released from cart.
- Release gate valve from cart by unscrewing 2 bolts holding it
- Torque shield-plug-to-gate-valve screw fully to align hard-stop threaded holes
- Lightly install hard-stop screws
- Crack loosen the shield plug-gate valve screws
- Final torque on hardstop screws
- Final torque on shield plug-gate valve screws
Additional Notes:
- Tested manipulator access/reach to the hard-stop screws)
- (better access may be achieved by lowering torque tool handle)
- Nut housing for shield plug to gate valve assembly screws/nuts not used as final bolts will react differently than test shield-plug
To be tested:
- Gate valve seal chain clamp using torque multiplier and reaction arm.
------------------------------------------------------------------------------------------------------------------------------------------------------------------------------------------------------------------------------------------------------
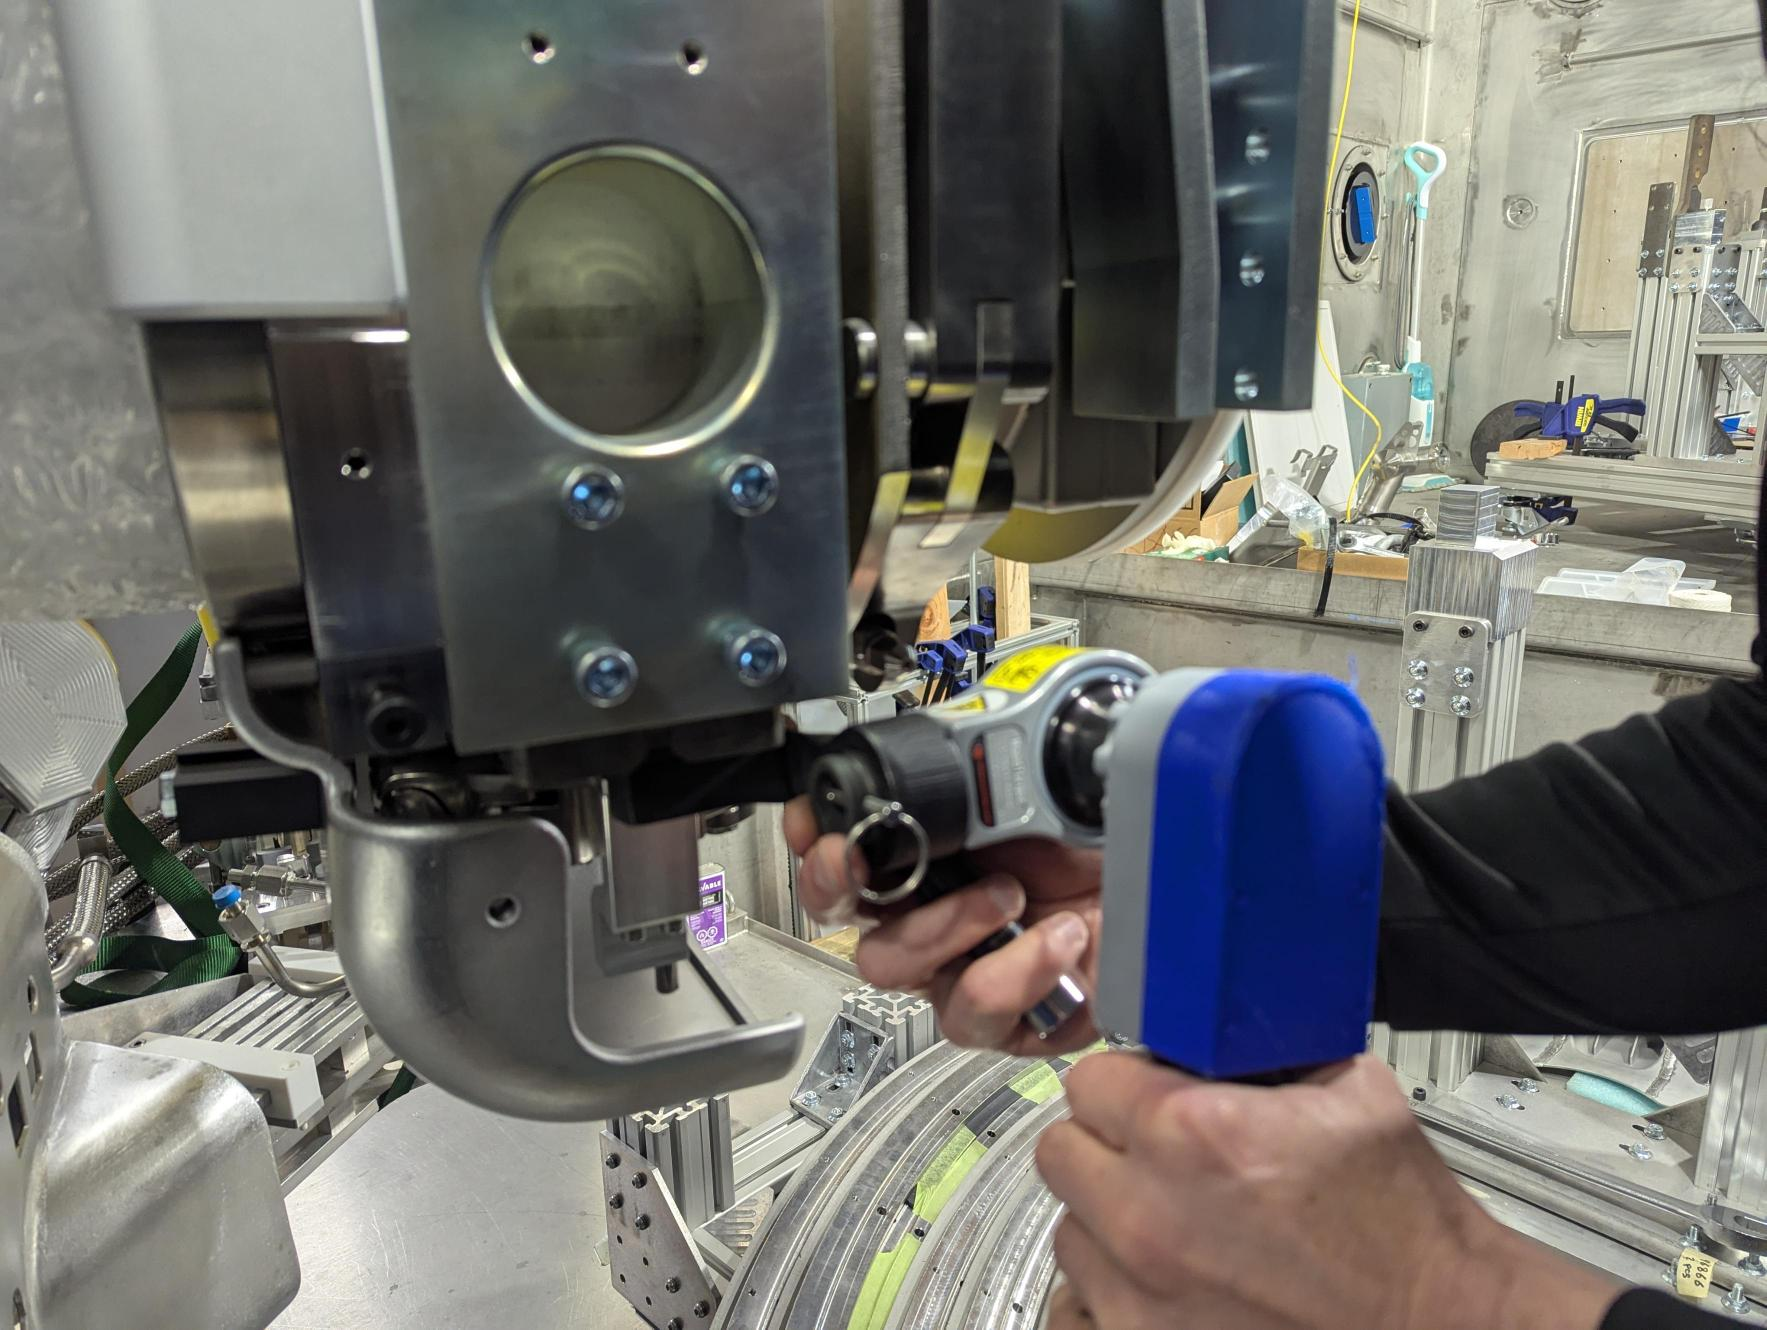
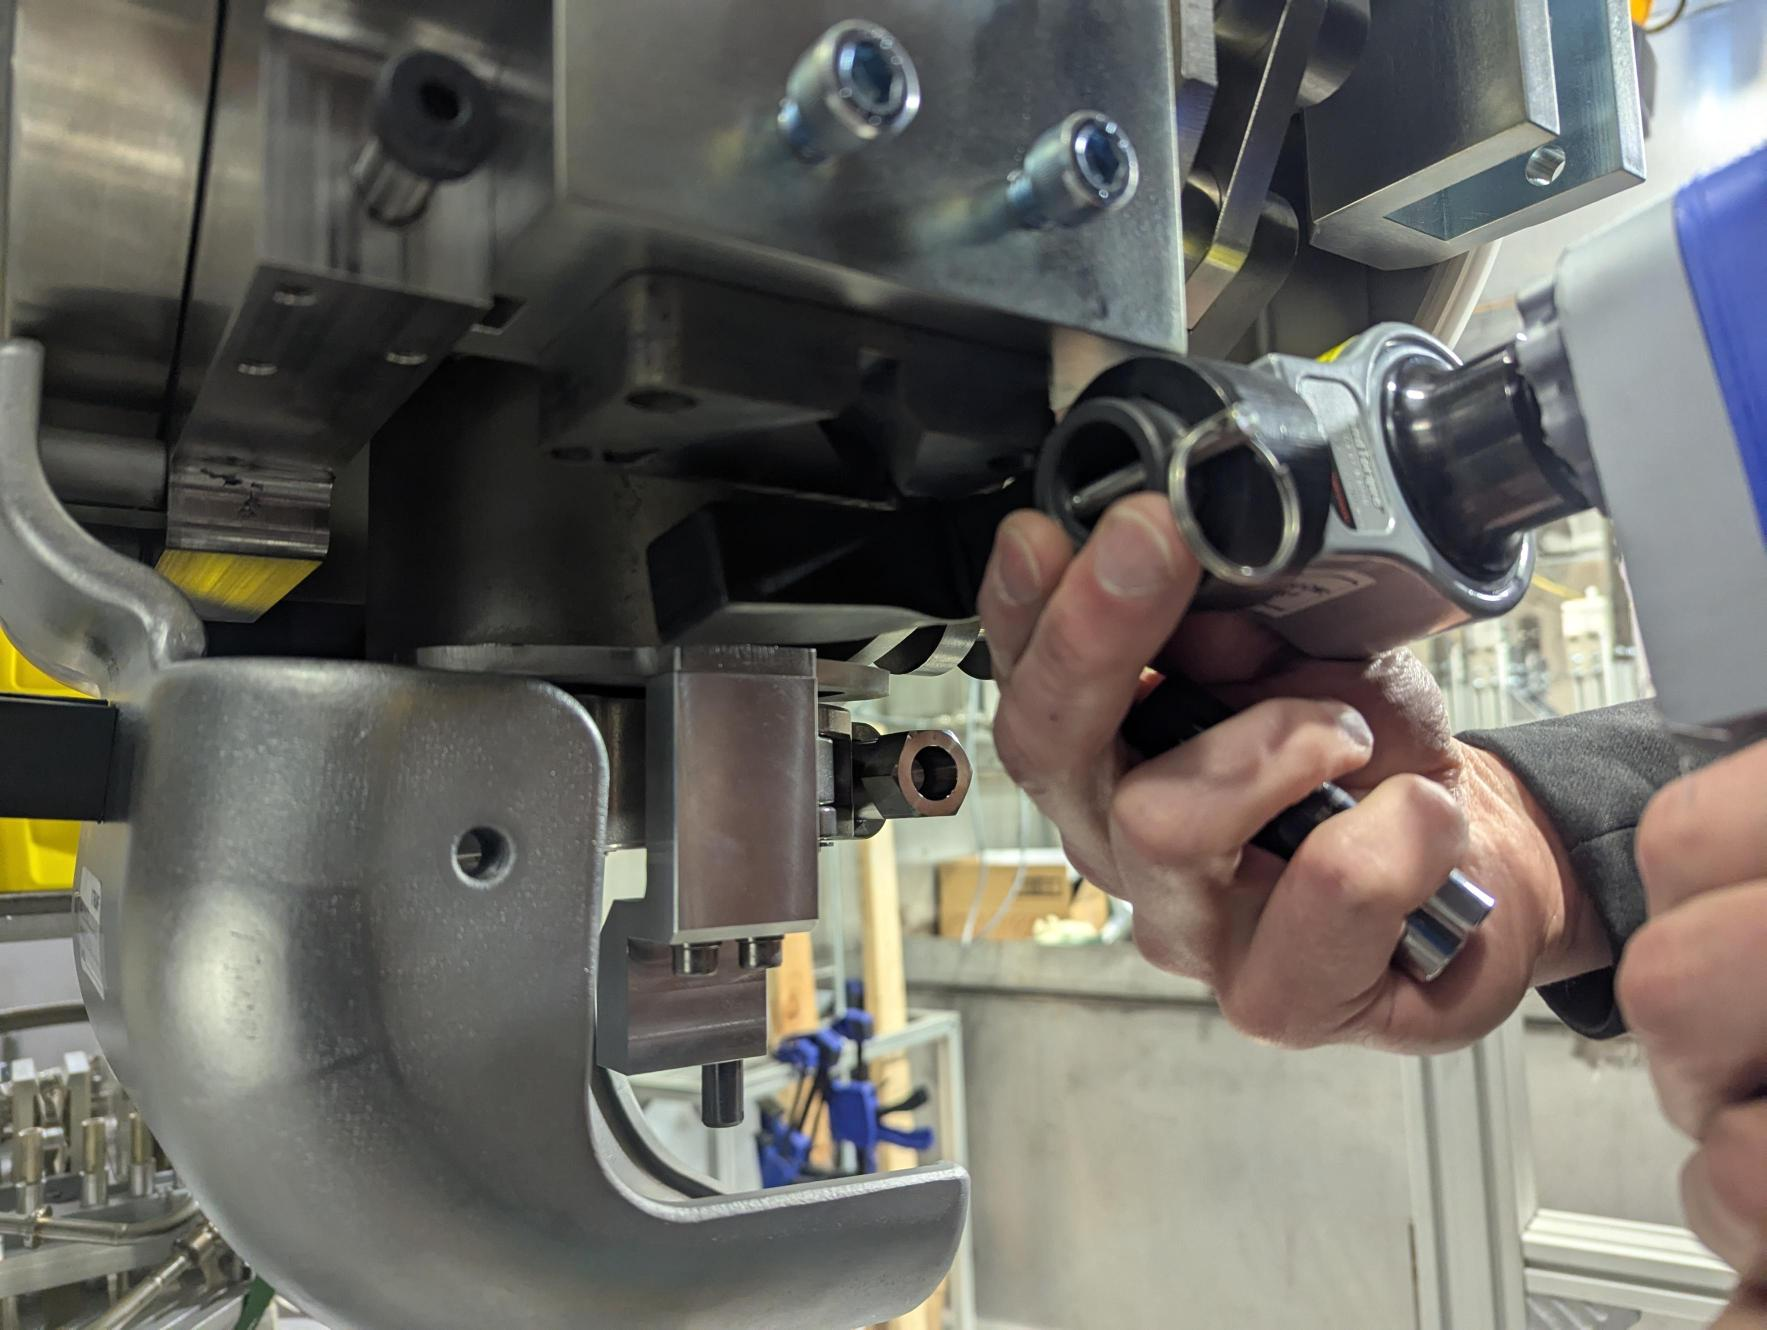
April 30, 2025 - C. Fisher, A. Kong, K. Ng, A. Tam
Preparations:
- Chad programmed 4 torque ratchet wrench settings in CW (12 Nm & 24 Nm) and CCW (12 Nm & 24 Nm)
- Chad had procured and dry fit Norbar HT3-1000 torque multiplier for this operation
Chain Clamp Sealing/Tightening procedure:
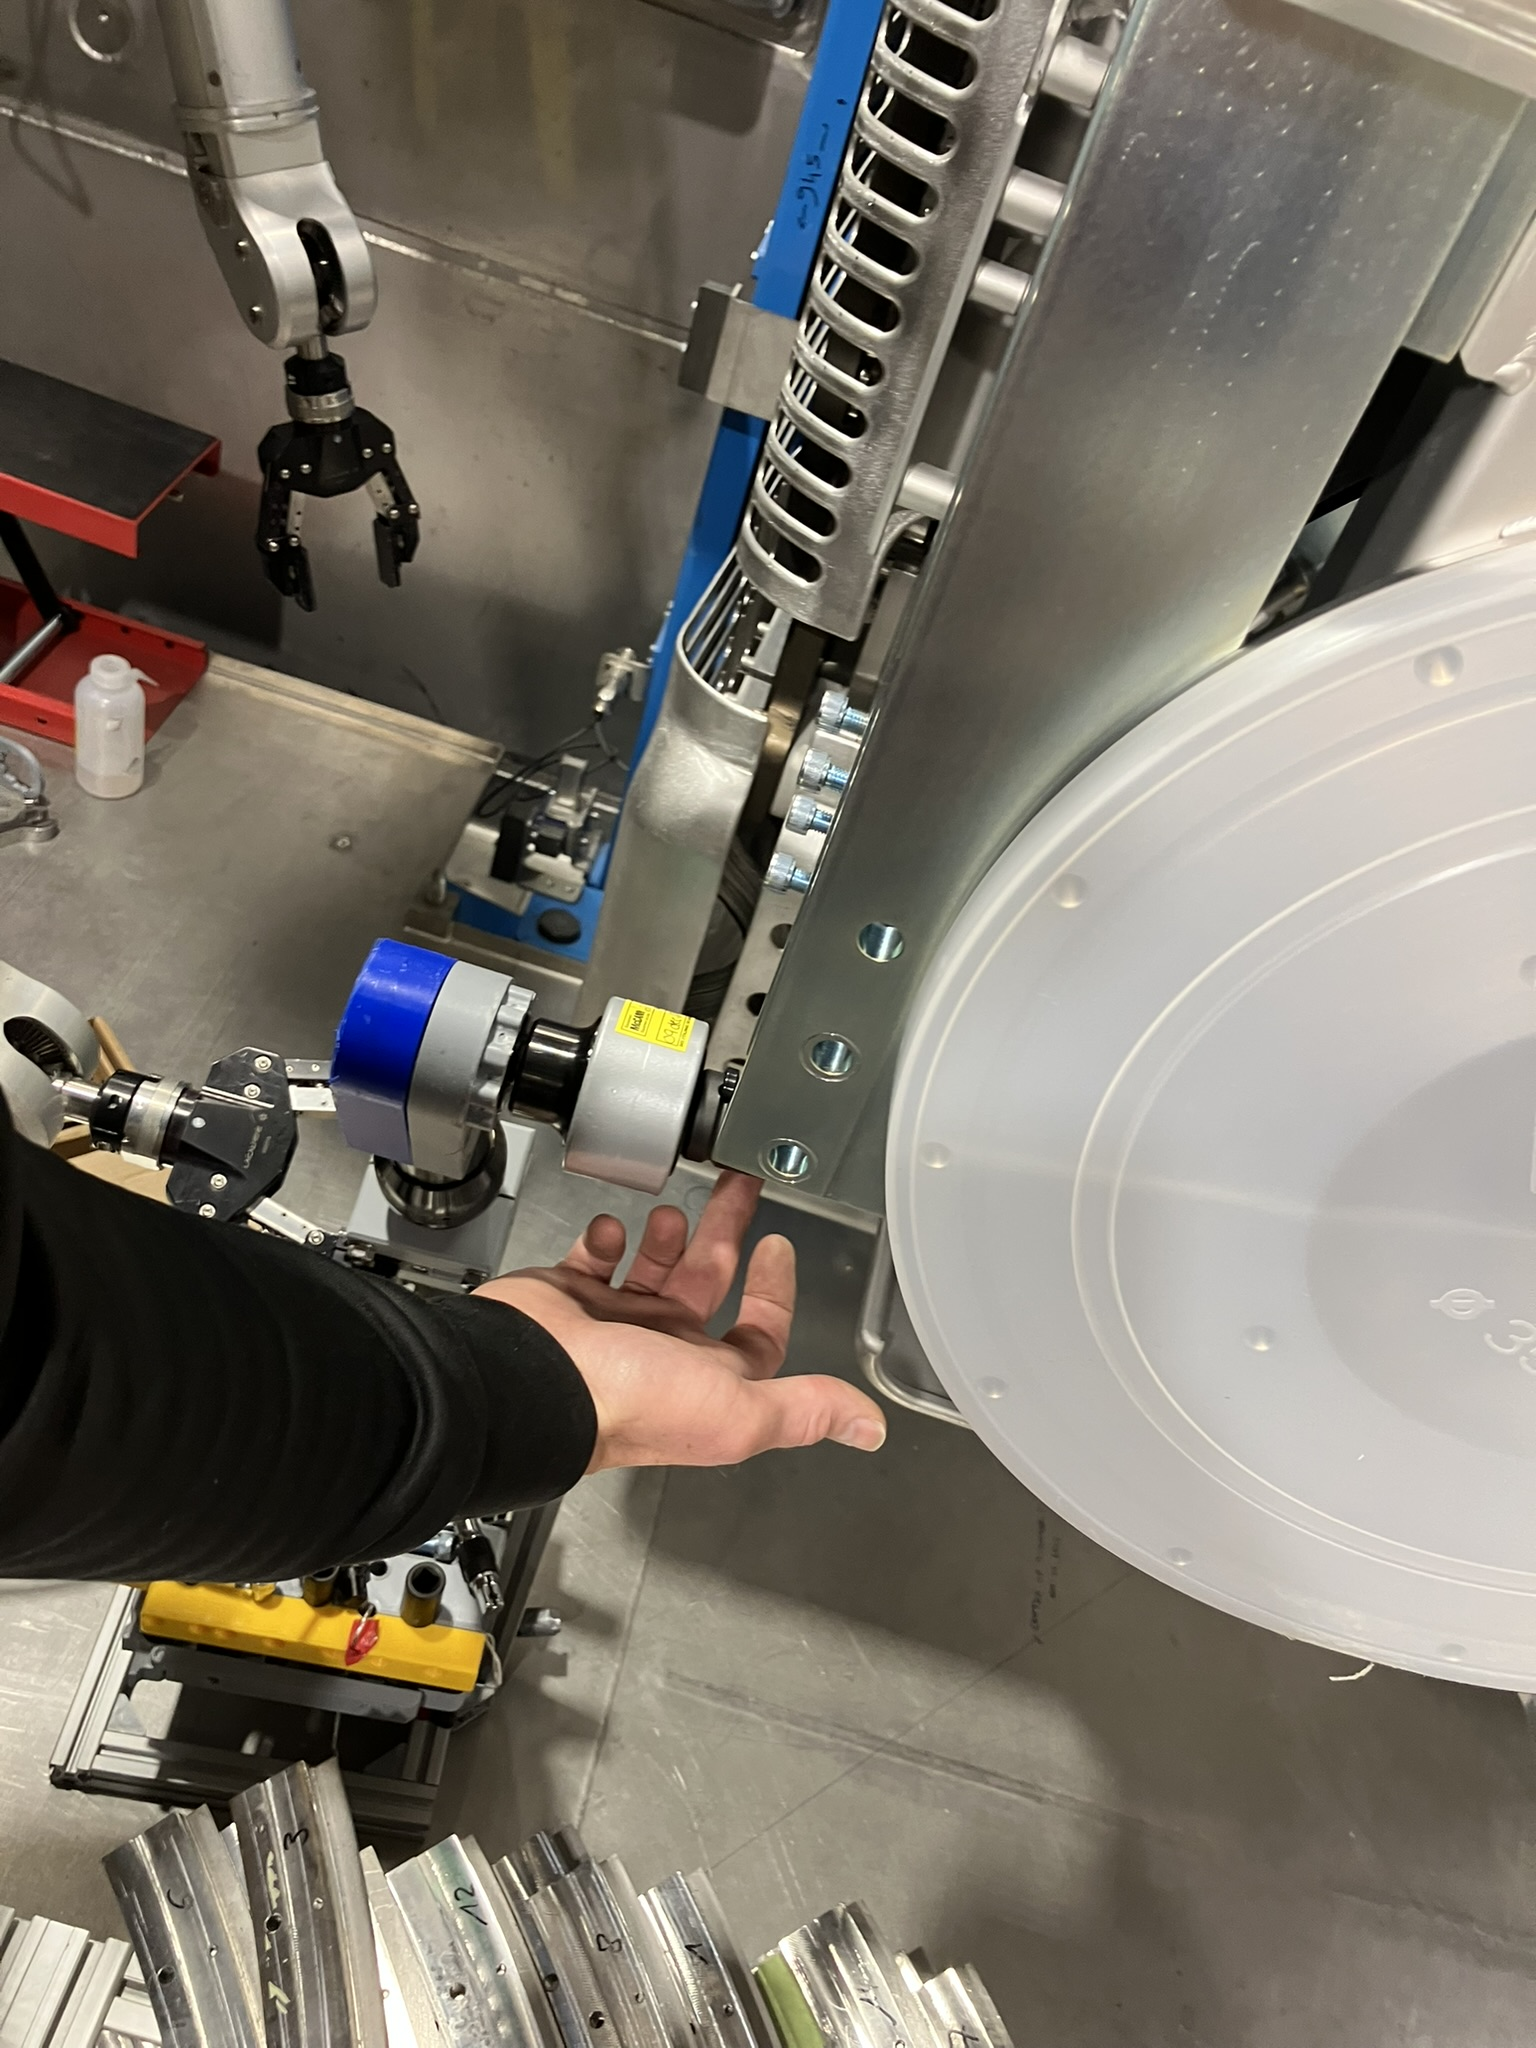
- Shielding on the outside of the RIB side structure needs to be taken off to allow QDS reaction head tool to have access to structural components
- Chain clamp brought together lightly by turning turnbuckle screws lightly by hand (this would be done with a smaller air or electric ratcheting wrench in the future)
- Using several camera angles to verify that the bellow flange is engaging properly within the chain clamp
- A soft tipped tool held by one manipulator can be used to push the flanges together, while the other manipulator starts cinching down on one of the chain clamp turnbuckle screws
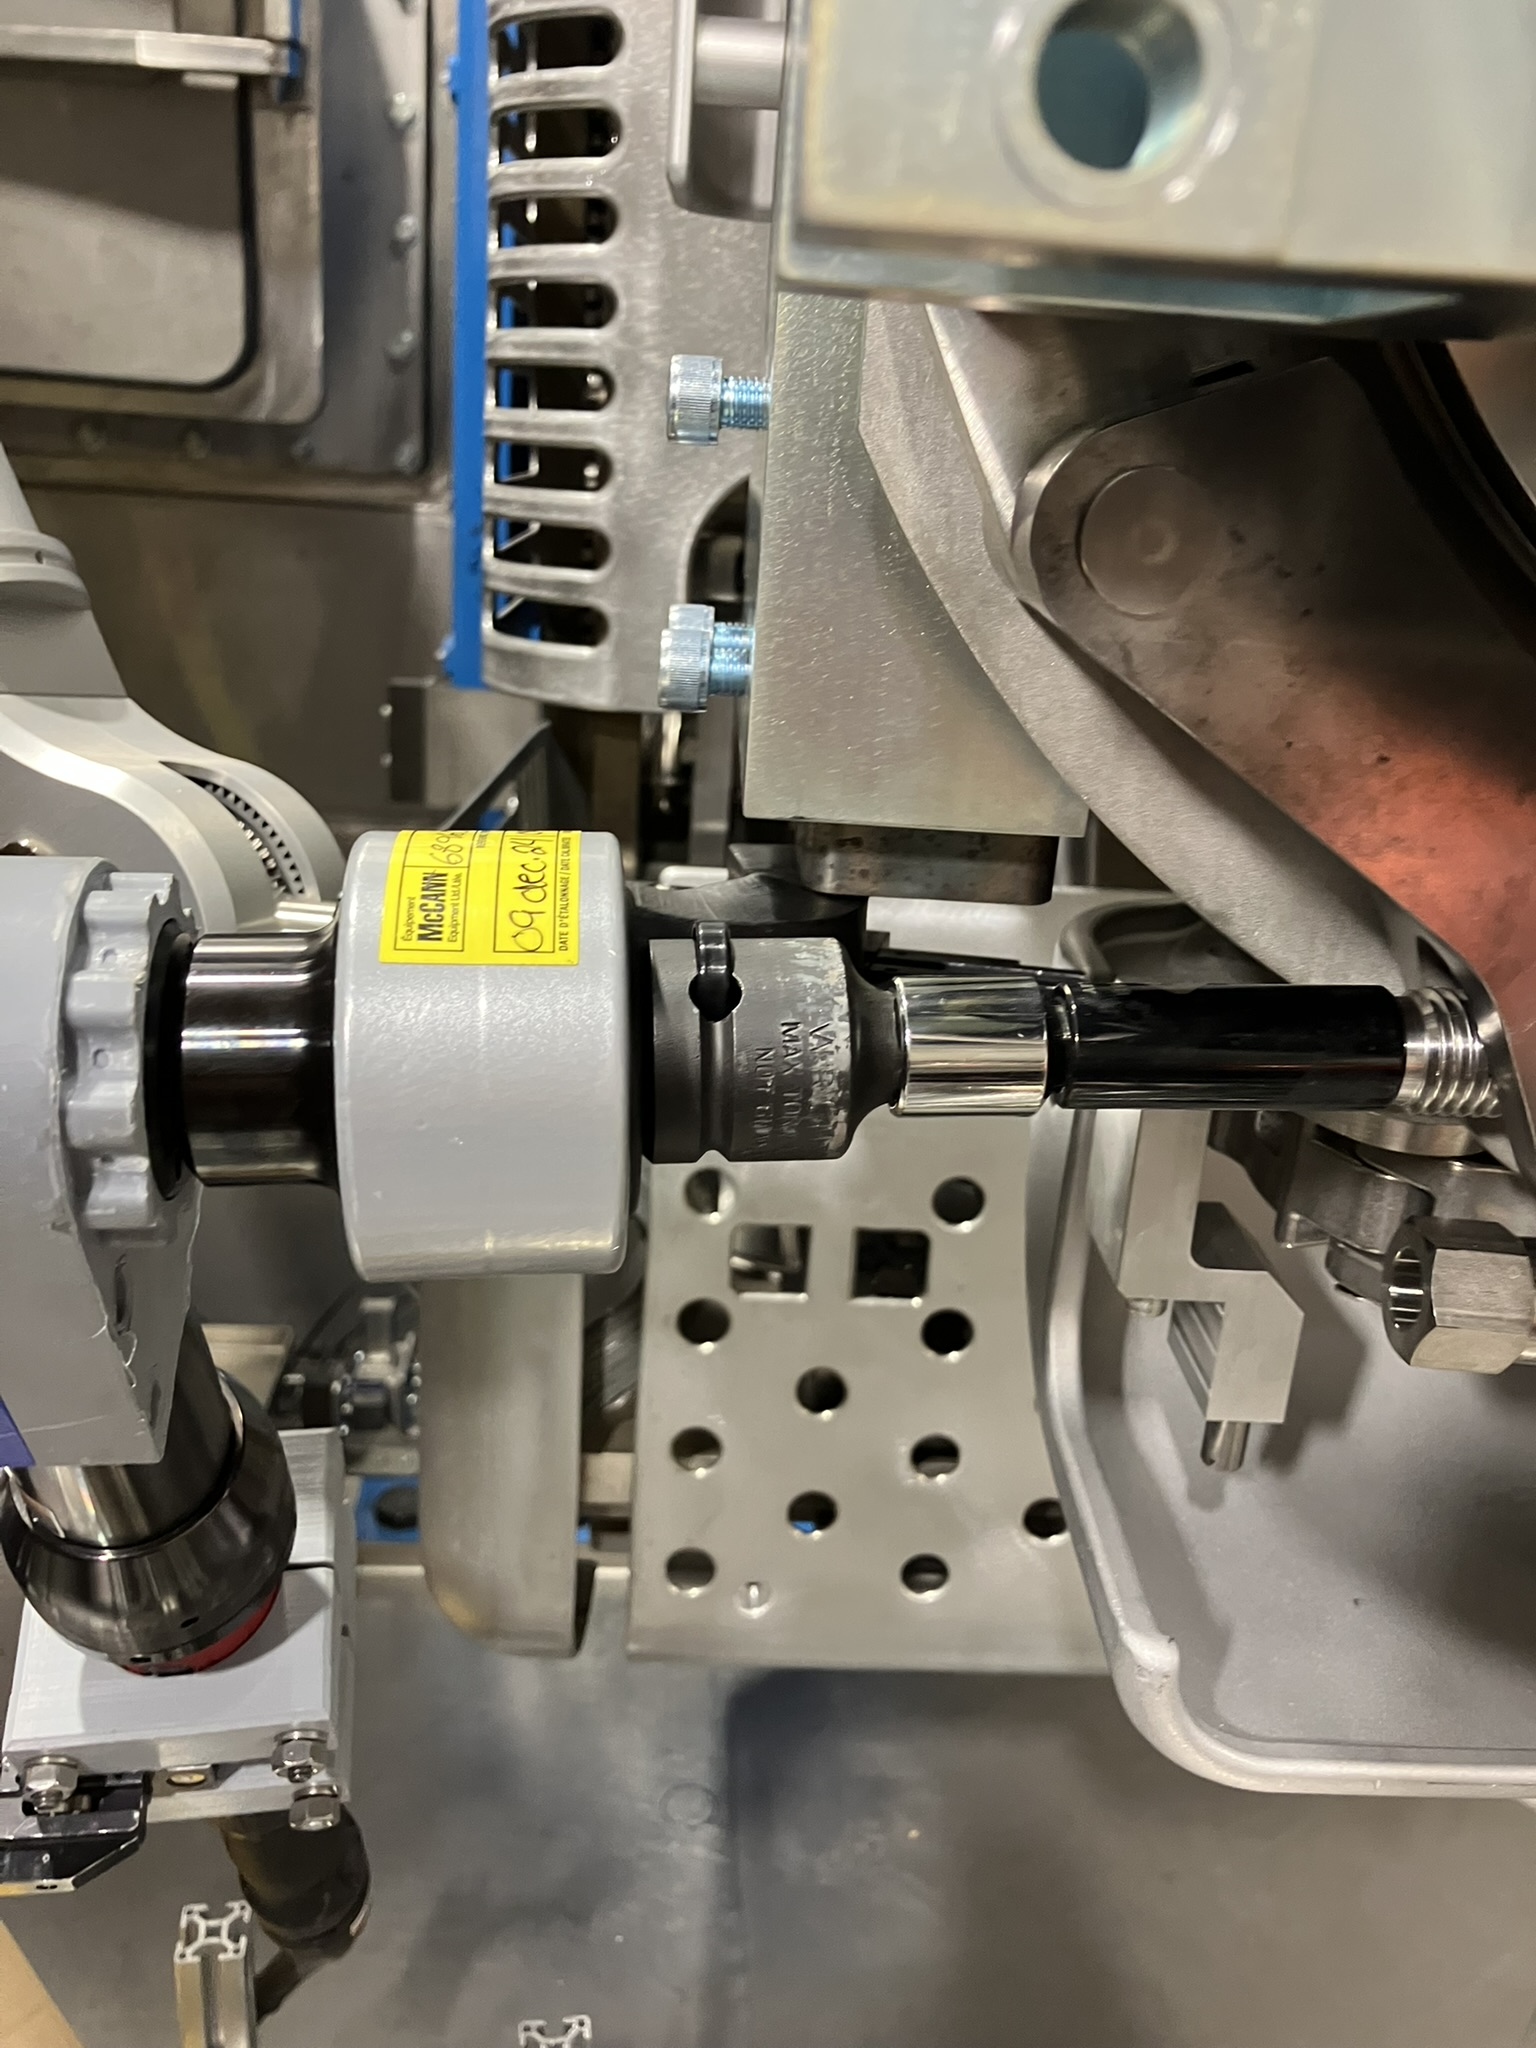
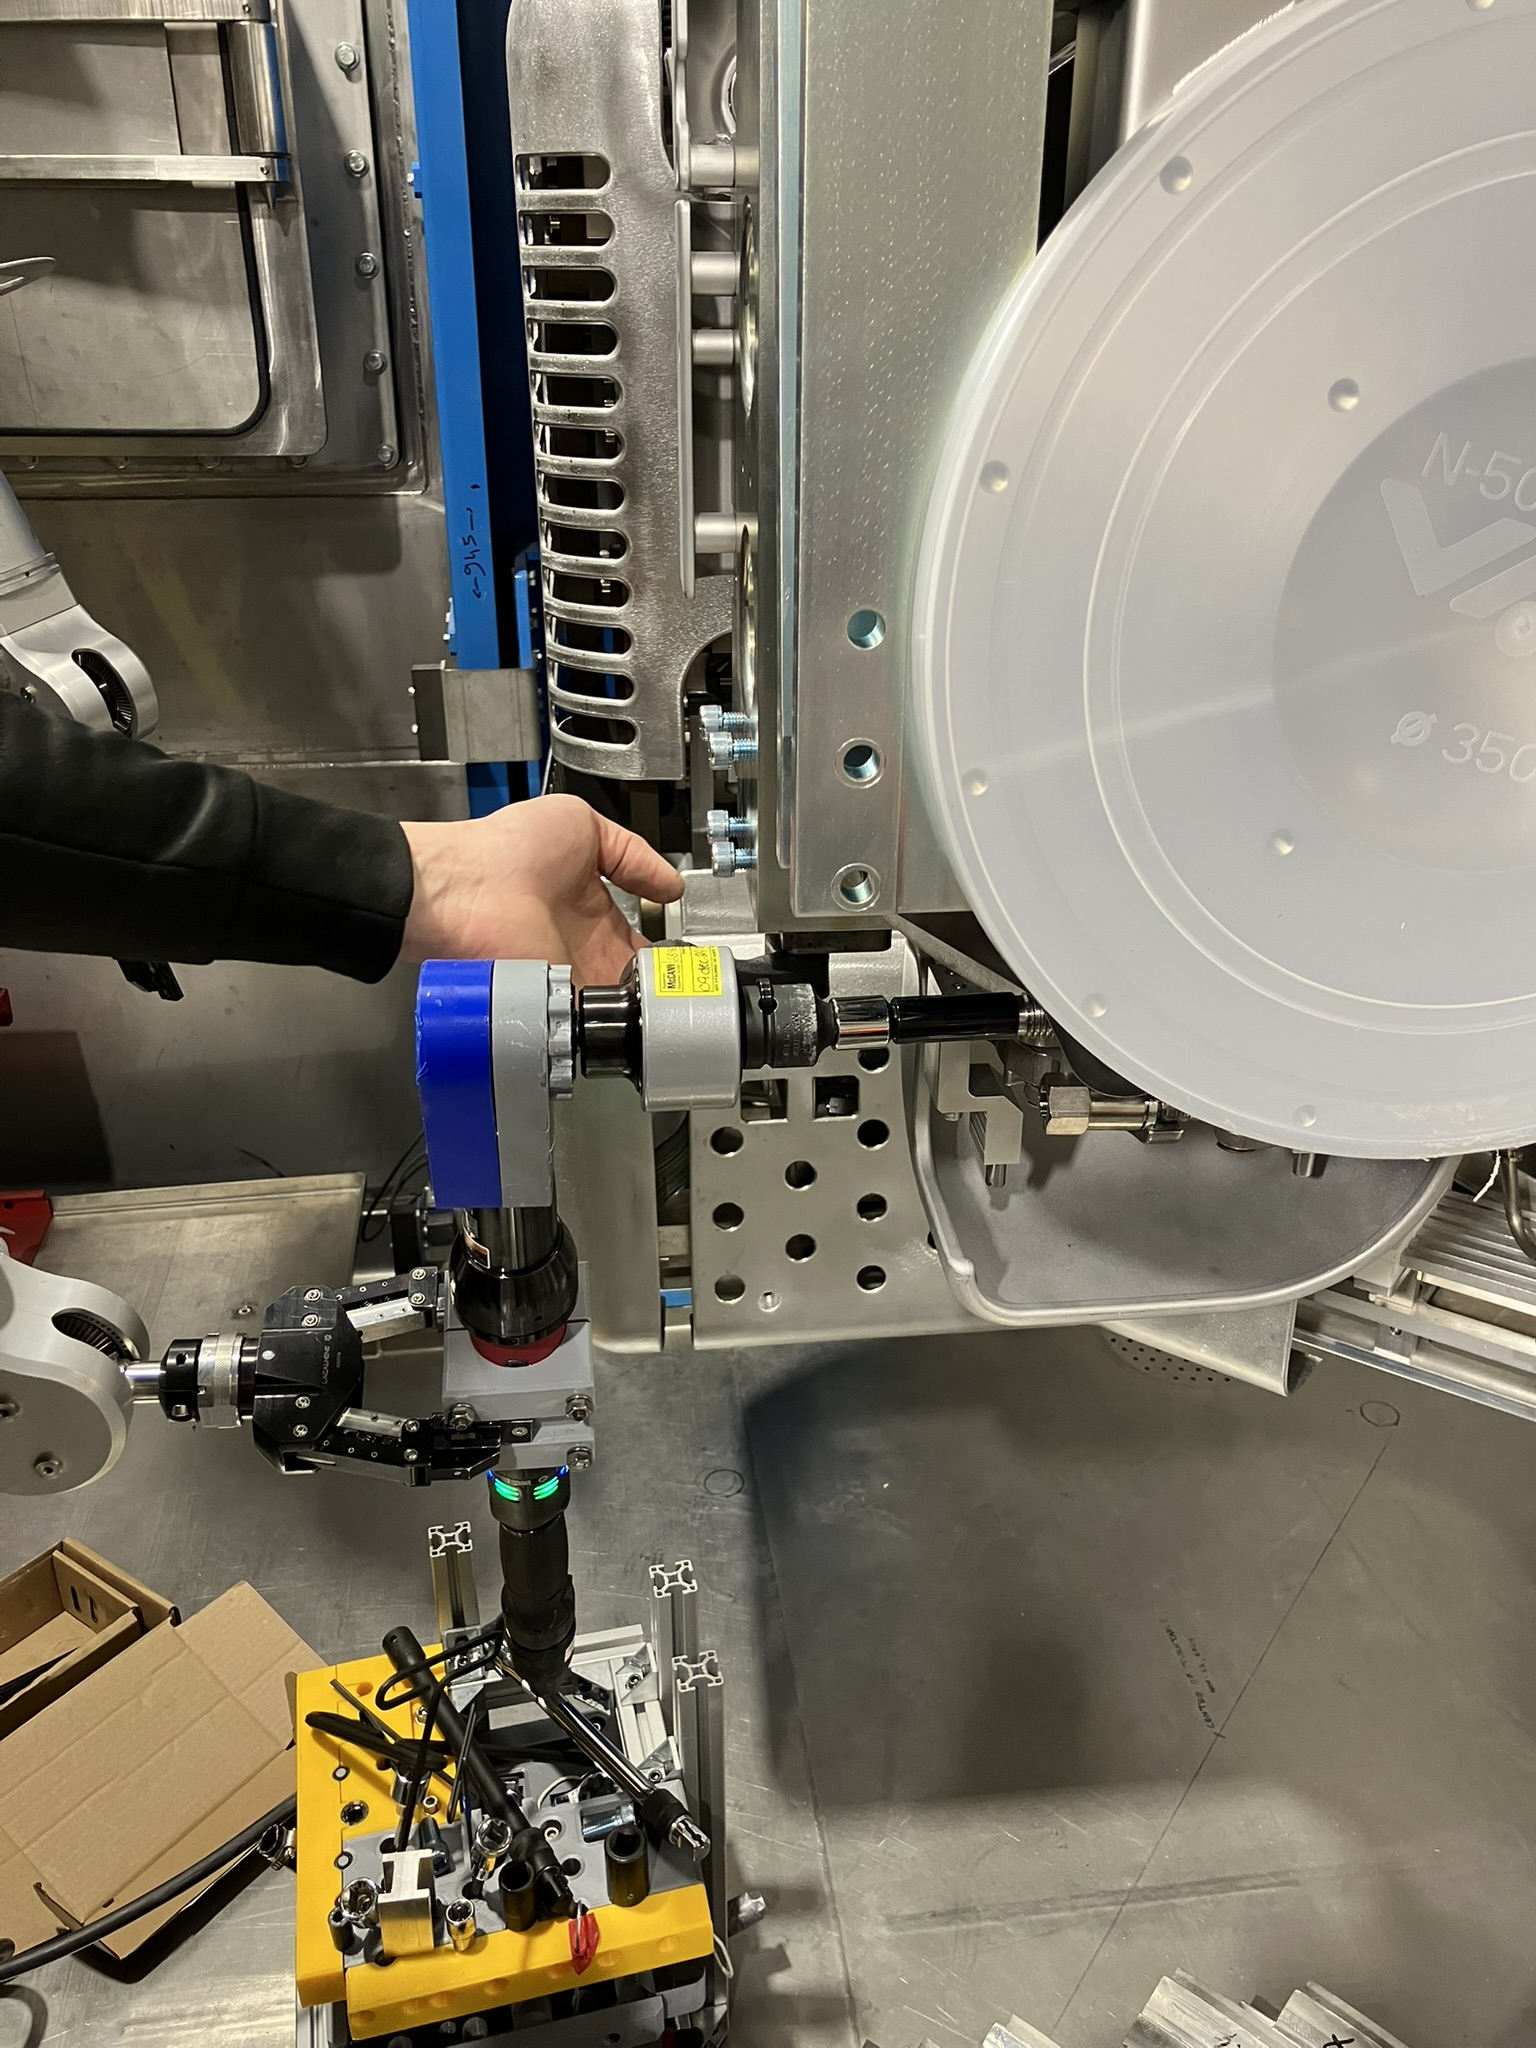
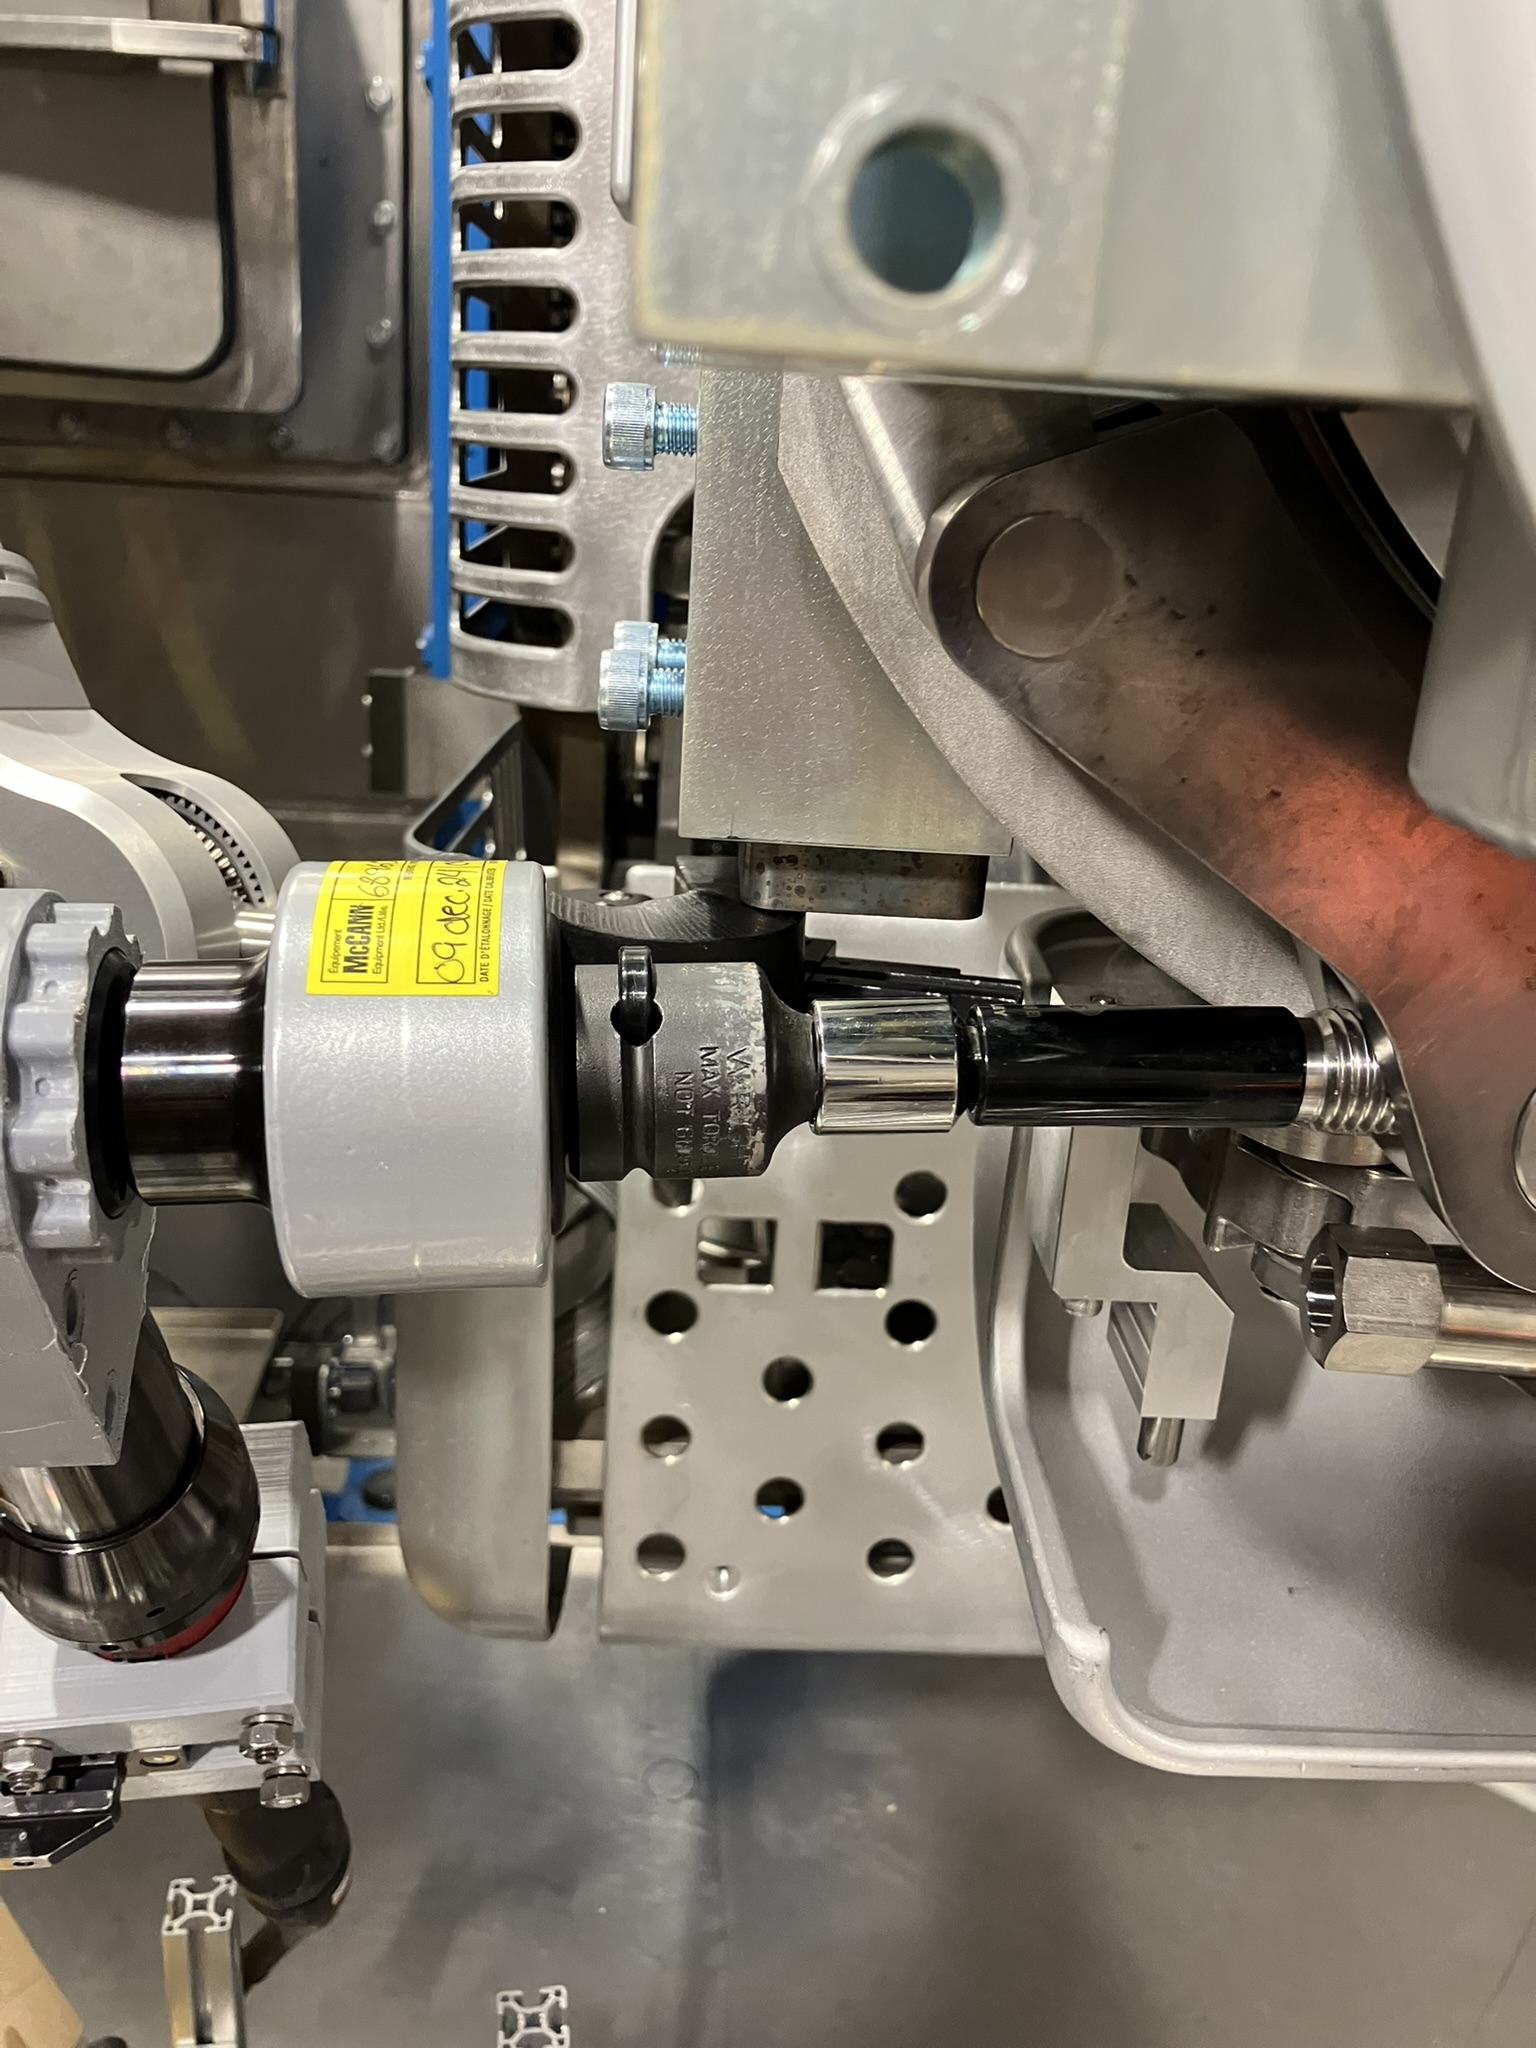
- Once positioning had been confirmed, turnbuckle screws were tightened on the first 12 Nm program with the the Norbar HT3-1000 torque multiplier to achieve ~60Nm
- With the torque multiplier, the right manipulator held onto the torque ratchet wrench and the left manipulator brought the reaction head into contact with structural components on the FE
- Bottom screw reaction against FE kinematic mount, top screw reaction against RIB side of gate valve bracket.
- Once both screws have been tightened to ~60Nm, they were both tightened to their final 120 Nm (24Nm on the electric torque ratchet wrench)
Notes:
- torque multiplier is heavy, may be a good idea to use a tool balancer with the torque tool
- Stepping up the torque in a more increments may yield a more even clamp for the gasket to seal
- As a check, a 20-200Nm click style torque wrench was used to verify that approximately 120Nm was reached
- 110 Nm - 120 Nm was required to continue tightening the turnbuckle screws
|
| Attachment 1: IMG_1757.JPEG
|

|
| Attachment 2: IMG_1754.JPEG
|
|
| Attachment 3: IMG_1755.JPEG
|

|
| Attachment 4: IMG_1756.JPEG
|

|
| Attachment 5: IMG_1758.JPEG
|

|
| Attachment 6: IMG_1758.JPEG
|
|
| Attachment 7: IMG_1759.JPEG
|
|
| Attachment 8: IMG_1760.JPEG
|
|
| Attachment 9: IMG_1761.JPEG
|

|
| Attachment 10: IMG_1762.JPEG
|

|
| Attachment 11: IMG_1763.JPEG
|
|
| Attachment 12: IMG_1764.JPEG
|

|
| Attachment 13: PXL_20250423_162248763.jpg
|

|
| Attachment 14: PXL_20250423_162303013.jpg
|

|
| Attachment 15: PXL_20250423_162810876.jpg
|
|
| Attachment 16: PXL_20250423_164508543.jpg
|

|
| Attachment 17: PXL_20250423_170928423.jpg
|
|
| Attachment 18: PXL_20250423_170932751.jpg
|
|
| Attachment 19: PXL_20250423_171017723.jpg
|

|
| Attachment 20: PXL_20250423_172017347.jpg
|

|
| Attachment 21: PXL_20250423_172722112.jpg
|

|
| Attachment 22: FE_V_Operator_position.JPEG
|
|
| Attachment 23: FE_vs_Lift_table_Position.JPEG
|
|
| Attachment 24: Reaction_bar_positioning_2.jpg
|
|
| Attachment 25: Reaction_bar_positioning.jpg
|
|
| Attachment 26: Tool_engaged_2.JPEG
|
|
| Attachment 27: Tool_engaged_3.JPEG
|
|
| Attachment 28: Tool_engaged.JPEG
|
|
| Attachment 29: Tool_engeaged_4.JPEG
|
|
|
90
|
Wednesday, April 23, 2025, 15:59 |
Adam Newsome | Hot Cell 1 | Standard Operation | Safety Walkaround Complete - Hot Cell area | A safety walkaround was completed for the ARIEL Hot Cell area.
The resulting spreadsheet can be found on DocuShare as Document-242733.
No major deficiencies identified. |
|
91
|
Friday, April 25, 2025, 09:39 |
Riley Sykes | Hot Cell 1 | Development | Fire detection wire | Ariel fire detection wire installed on cable tray, ready for junction box connection and electrical tie in. |
|
92
|
Wednesday, May 07, 2025, 13:50 |
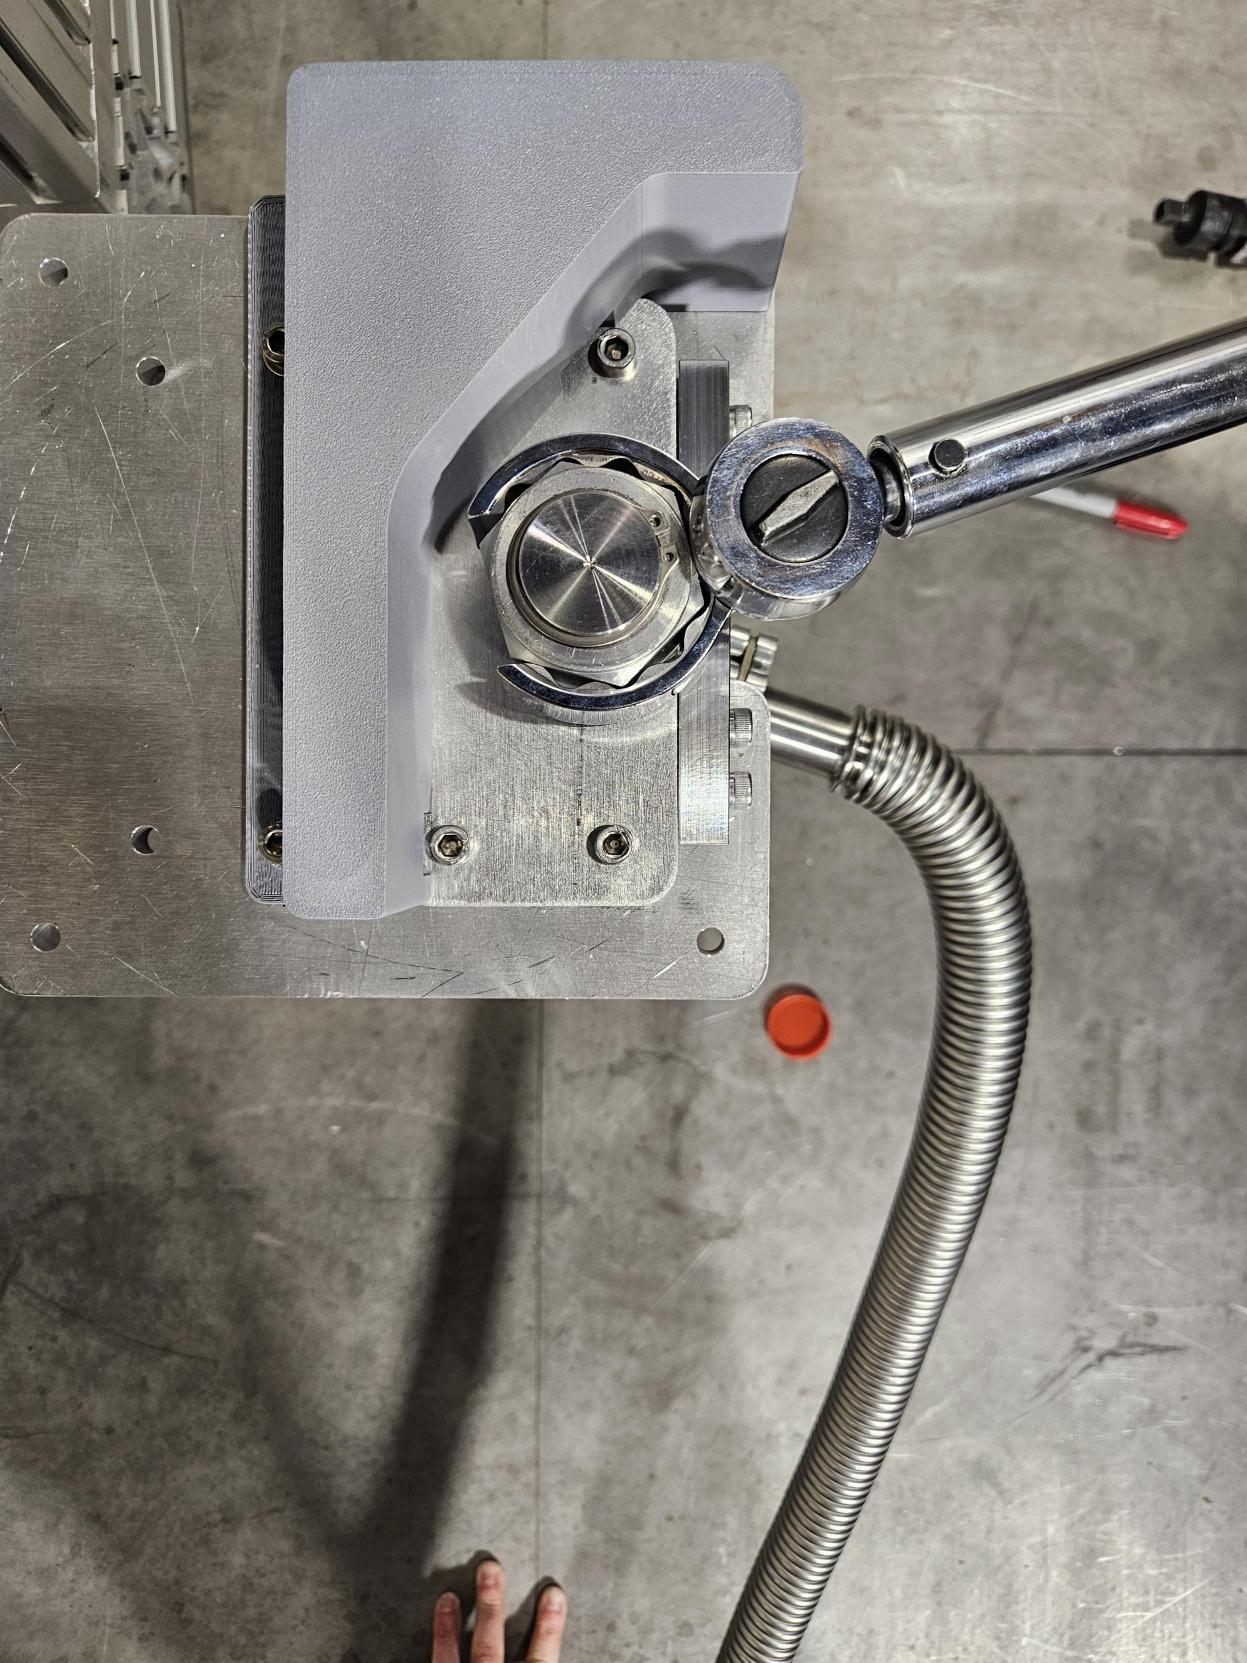
Isaac Earle | Hot Cell 1 | Development | Prototype testing of APTW beam dump module water connections | Test jig ATA6060 was used to evaluate the 1" VCR connections on the APTW Beam Dump Module (ATA5900). The test jig accurately mimics the space constraints on the real module. This testing was prescribed as an action item from the design review for the module due to concerns that very high force would be required to make the connections. The test jig was installed on the east shelf in the hot cell.
Preliminary test:
- 1" VCR seal installed by hand; Nut turned finger tight, position marked
- Using a crow foot on a 3/4" drive 18" long breaker bar, the nut was turned almost 1/8 turn by hand (not with the manipulators); The effort to do this was relatively light
- Vacuum was pulled on the test jig, reaching 1.4E-9 Torr*L/s in ~1m
- Helium was applied on the joint and a response registered on the leak detector
- The nut was turned further until fully at 1/8 turn past finger tight
- Leak check was repeated with no response from helium spray
- Torque on the joint was measured to be approximately 88 N*m
Manipulator test:
- New gasket installed
- Nut turned finger tight, position marked
- Using manipulator, nut turned to ~1/8 turn with same tool; This again required a relatively light effort (as reported by CF)
- Vacuum pumped down to 0.0E-10 Torr*L/s (but slower than previous)
- Helium sprayed: very small response
- Tightened slightly more (again, not a huge effort required)
- Helium sprayed: no response
- Removed nut with manipulator; Roughly equivalent effort as when torquing
Conclusion: There were no issues in accessing the VCR joint with the tools used. Effort required by the hot cell operator was not prohibitive. No changes to the design are required.
|
| Attachment 1: Media.jpg
|
|
| Attachment 2: Media_(1).jpg
|
.jpg.png)
|
| Attachment 3: Media_(2).jpg
|
.jpg.png)
|
|