 Thursday, March 07, 2019, 13:59, chad fisher, South Hot-Cell, Repair, TM2, , Polishing Thursday, March 07, 2019, 13:59, chad fisher, South Hot-Cell, Repair, TM2, , Polishing
|
Polishing of the water block sealing surfaces has commenced. First attempt was on block B with low nap brown polishing pad (the least aggressive pad prepared) and isopropyl for 30 seconds. This cleaned a little but did not remove the "ring" which I believe is water scale. I will step up to 2000 grit wet sand paper and iso next. |
Friday, March 08, 2019, 14:10, chad fisher, South Hot-Cell, Repair, TM2, , Water block polishing .jpg")
|
After trials with 2000 grid wet paper I have moved up to "red" scotch brite. This seems to have worked the best so far although it took two minutes to remove the ring that the other materials could not remove (see picture).
I have moved to next circuit. Currently at 3 minutes and 30 seconds with scotch brite but significant ring remains. |
|
Monday, March 11, 2019, 14:34, chad fisher, South Hot-Cell, Repair, TM2, , Water Block Polishing status
|
Stage 1 polishing (water scale and at least 99% of visual indium removed) has been achieved on all 2 seal water blocks that will be used (Ground electrode has not been polished). Process required 3-4 3minute cycles of the tool using scotch brite pads with the tool running at approximately 75 psi. |
|
Tuesday, March 12, 2019, 09:13, chad fisher, South Hot-Cell, Repair, TM2, , Water Block Polishing status
|
Stage 1 polish has been achieved on all single seal water blocks using the single pad tool run at 75 psi, 2 3 minute cycles per block using red scotch brite. |
|
Thursday, March 14, 2019, 10:25, chad fisher, South Hot-Cell, Repair, TM2, , Water Block Polishing status
|
Phase 2 (intermediate) and Phase 3 (Final) polishing is complete on all water blocks on TM2 (minus ground electrode circuit which has only had a cursory cleaning). Phase 2 with 2000 grit wet sand paper and isopropynol for 1 minute with tool at 75 psi, Phase 3 with Veltex polishing cloth for 1 minute with tool at 75 psi. |
|
Monday, March 18, 2019, 07:23, David Wang, Conditioning Station, Repair, TM2, , TM2 window line helium test
|
New seals with a blank off cap are installed on TM2 window line water block. The seals are checked at TCS with 70 psi helium for 5 minutes with LD at 0.0xE-9atm/cc.sec. No response on LD during test. Seals are good. |
|
Monday, March 18, 2019, 07:25, David Wang, Conditioning Station, Maintenance, TM3, , TCS vacuum pumps have been stopped.
|
The TCS will be vented soon for TM2 move. |
|
Thursday, March 21, 2019, 09:56, chad fisher, South Hot-Cell, Repair, TM2, , Tray insertion
|
This morning new water block fasteners and gas line capture nut fasteners were inserted into the hot cell. Window waterline blank off was removed from TM2, surfaces inspected and given a polish with Veltex (30 seconds, 70 psi) as there was a small bit of c seal residue. Transfer try with new source tray has been latched to the module. |
|
Monday, March 25, 2019, 10:11, Aaron Schmidt, South Hot-Cell, Repair, TM2, , LP-FEBIAD Test Target (empty)
|
Link to previous target information: https://elog.triumf.ca/TIS/RH-ISAC/1039
Monday, March 25, 2019, 10:00: Target electrical checks (See Attachment 1)
Tested for TM2 |
|
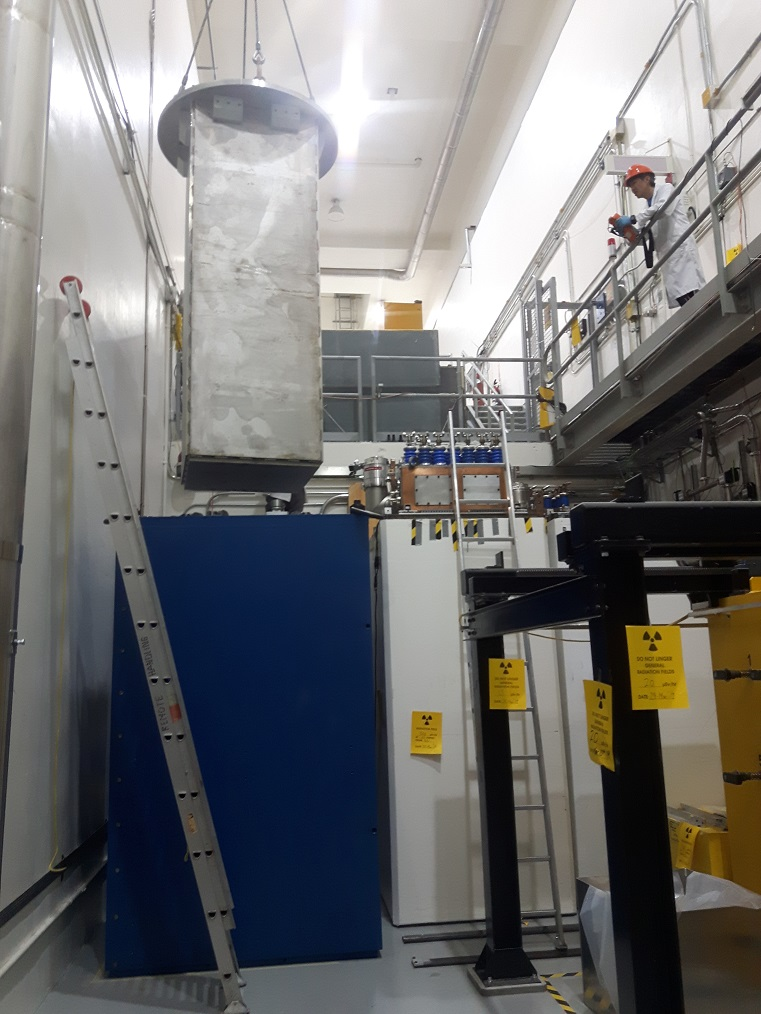
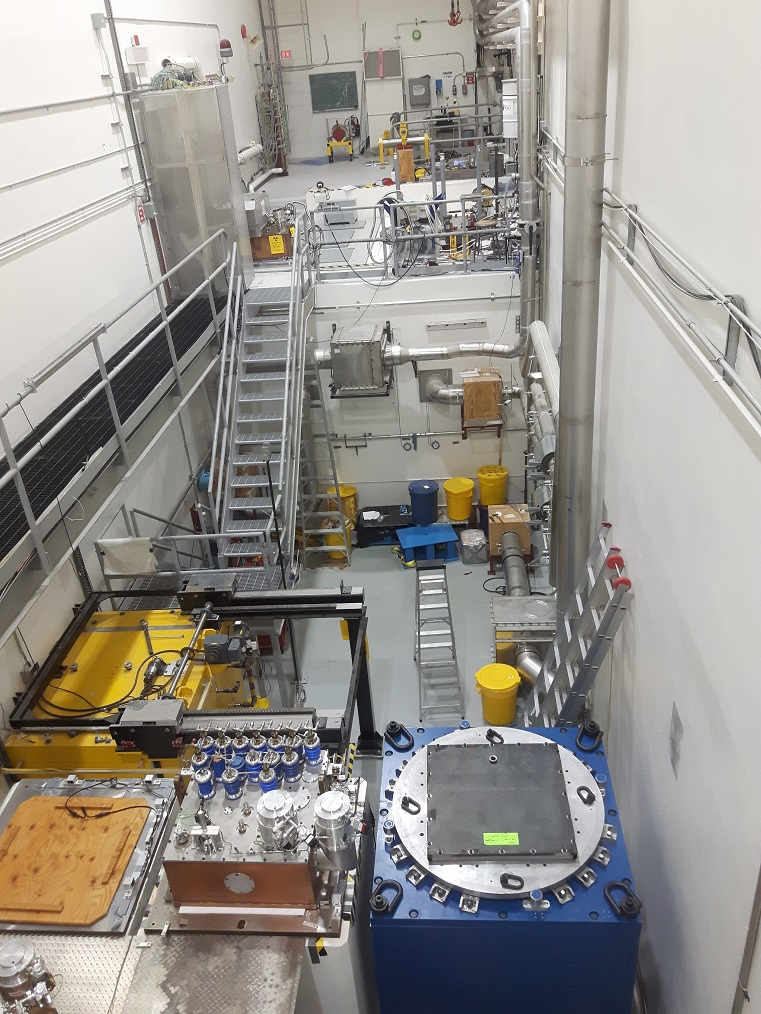
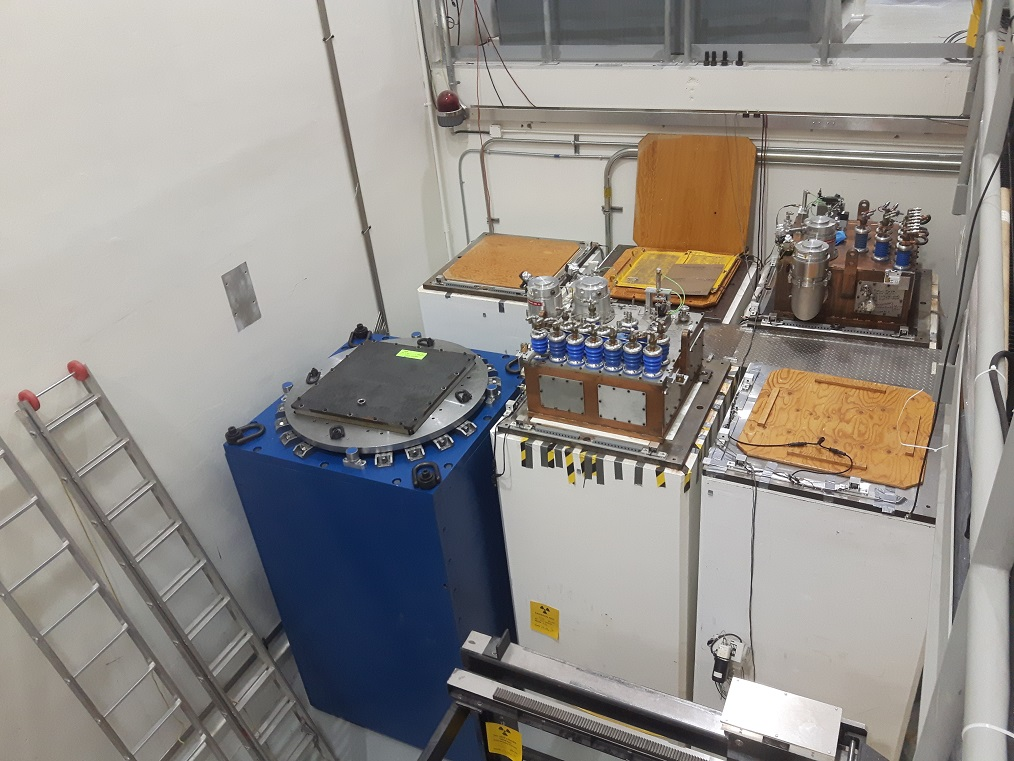
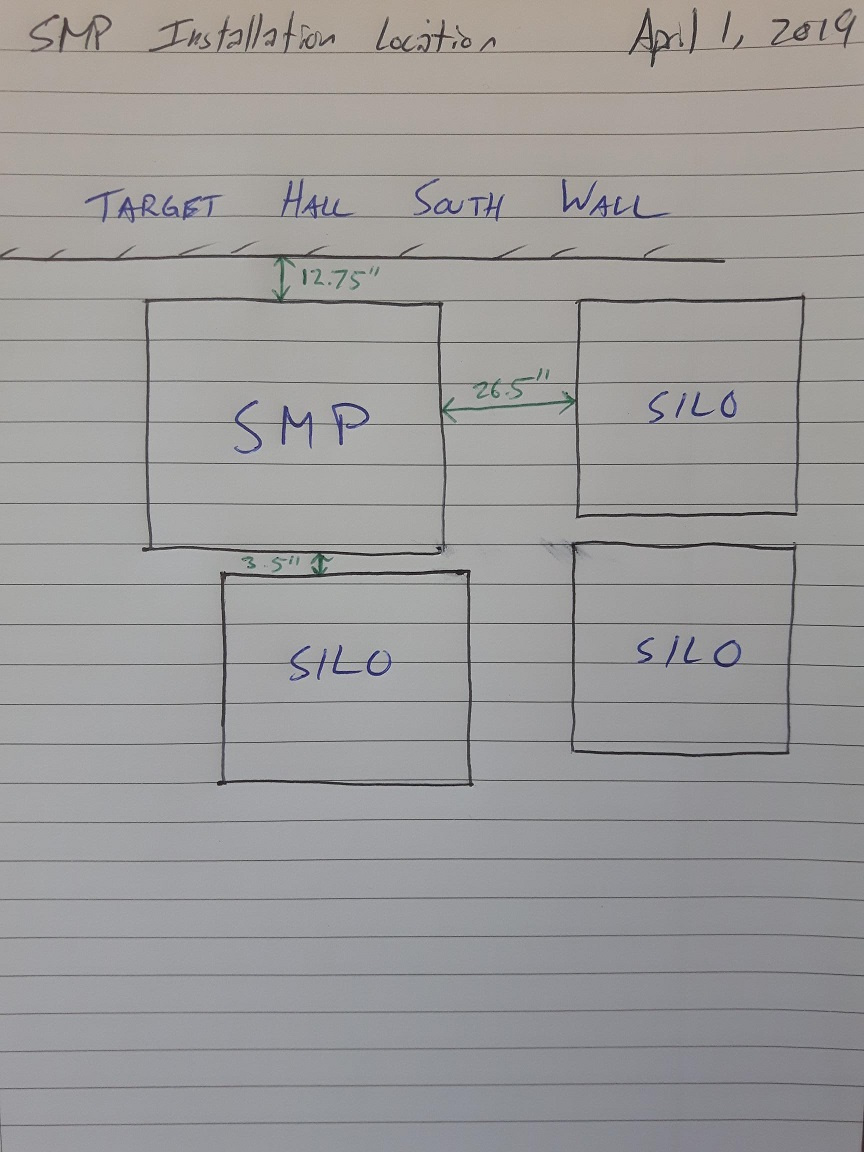
Monday, April 01, 2019, 14:56, Isaac Earle, Safe Module Parking, Development, , , SMP shield box and vacuum vessel installed in final location
|
Last week drilling of the additional required holes in the SMP shield box was completed in the Target Hall. This morning the shield box (IRH1675) was moved to its final installation position in the silo area on the B2 level. The vacuum vessel (IRH1806) was then installed inside the shield box. The center of the vacuum vessel is 2-3" north of the south travel limit of the crane. Photos as well as measurements of the final position are attached below.
|
|
Thursday, April 04, 2019, 14:49, Isaac Earle, Safe Module Parking, Development, , , SMP vacuum vessel support roller friction check
|
With the SMP vacuum vessel now installed inside the shield box, a test was performed to measure the torque required to rotate the vessel. At a moment arm distance of 2.0m a force of 89N was required to rotate the vessel (with no module installed) resulting in a torque of 178Nm. Based on this, the coefficient of rolling resistance (CRR) was calculated to be 0.007; This is fairly close to available data for similar applications such as cast iron wheels on steel rail (https://en.wikipedia.org/wiki/Rolling_resistance). The CRR used for design of the SMP drivetrain was 0.054 which was based on empirical data for a similar product. Because this is significantly higher than the friction of the as-built system the drive-train components are stronger than required and should have no problem rotating the vessel when loaded with a module.
Further details and calculations included in the attached PDF. |
|
Friday, April 05, 2019, 13:44, chad fisher, Spent Target Vault, Development, , , 2019 Pail drop tests
|
- Drop test performed January 8, 2019 with 25 lb target, UN pail and lug cover. Drop failed. Lug cover half removed. Pictures and video in docushare collection 24626.
- Second test January8, 2019 UN pail, "new" dish cover, old lock lever ring, 25 lb target. Single drop from 1.2m onto latch, no sealant. No leaks 24 hours later. Pictures in docushare collection 24626
- Drop test performed April 2, 2019 repeat of previous test using until that was loaded in north hot cell test. Target punctured can. Pictures in docushare collection 24626.
- Drop test performed April 5, 2019 repeat of previous test with the addition of a aluminum sleeve (0.05" thick) inside the pail between pail and target.
New UN rated pail with 9.55 kg target, 1.2 kg 16 gauge Al sleeve (10.75 OD x 14.75" tall), 3 liters of water with red food coloring no sealant on gasket.
First drop standard drop test from 1.2m onto latch
Second drop test 1.2m onto bottom of pail
Third drop 1.2m onto side of pail
Drops 4-6 1.2m onto lid
Pail was left inverted for an hour after the first three drops with no leaks after 1 hour.
No leaks after the remaining 3 drops .Bottom very damaged suggesting need for protective disc in bottom of pail.
Pictures can be found in docushare Collection-24627
- Drop tests performed May 2, 2019 with 9.7 kg target, 1.346 kg of mixed module and target components, sleeve and disc. First drop on latch from 1.2m, no leak, second drop straight on bottom from 1.2m, no leak, third drop on side from 1.2m leak. Drop test described in more detail in document drop test witness document on docushare. Pictures and video in docushare collection 24626.
|
|
Friday, April 12, 2019, 11:44, chad fisher, South Hot-Cell, Standard Operation, , , Pail transfer
|
Pail transfer was undertaken in the south hot cell. went very well except near the end the master tong cable of the right hand manipulator broke. Not entirely a surprise due to the amount of use it has seen lately. |
|
Wednesday, April 17, 2019, 12:03, chad fisher, South Hot-Cell, Repair, , , Manipulator repair
|
Broken handle cable of east manipulator has been replaced and manipulator is operational again. |
|
Monday, April 29, 2019, 07:56, chad fisher, South Hot-Cell, Development, , , Pail transfers
|
Two pail transfers took place April 25th.
Ta#47 transfered from pail 137 to pail 201. existing plastic bag from 137 showed many areas of typical age/rad damage related failure.
Ta#45 in pail 124 was transfered to pail 202. Pail 124 also contained the shutter and "roof mounted" img gauge from TM2 that were removed in 2015 in addition to a bunch of fasteners, heat shrink tubing (from lock lever rings from an previous methods of spent target packaging) etc. The original plastic bag in pail 124 had completely failed and shredded and flaky. The shutter and extraction electrode from Ta#47 were put in pail 202 with Ta#45...cabling of the shutter being completely intertwined with the target. |
|
Wednesday, May 08, 2019, 10:29, Travis Cave, South Hot-Cell, Standard Operation, , , Entrance module move
|
The entrance module has been moved from the west station to the south hot cell. |
|
Friday, May 10, 2019, 10:23, chad fisher, South Hot-Cell, Repair, , , West Entrance module wire scanner replacement
|
West entrance module - visible broken or disconnected wire visible on old/existing wire scanner. Wire scanner removed, new one installed. |
|
Monday, May 13, 2019, 09:55, Travis Cave, ITW, Standard Operation, , , Entrance module move
|
The West Entrance module has been moved from the south hot cell to the west target station. |
|
Monday, May 13, 2019, 11:22, David Wang, ITW, Repair, , , ITW entrance module has been connnected.
|
Entrance module has been connected back to ITW. Everything is normal. |
|
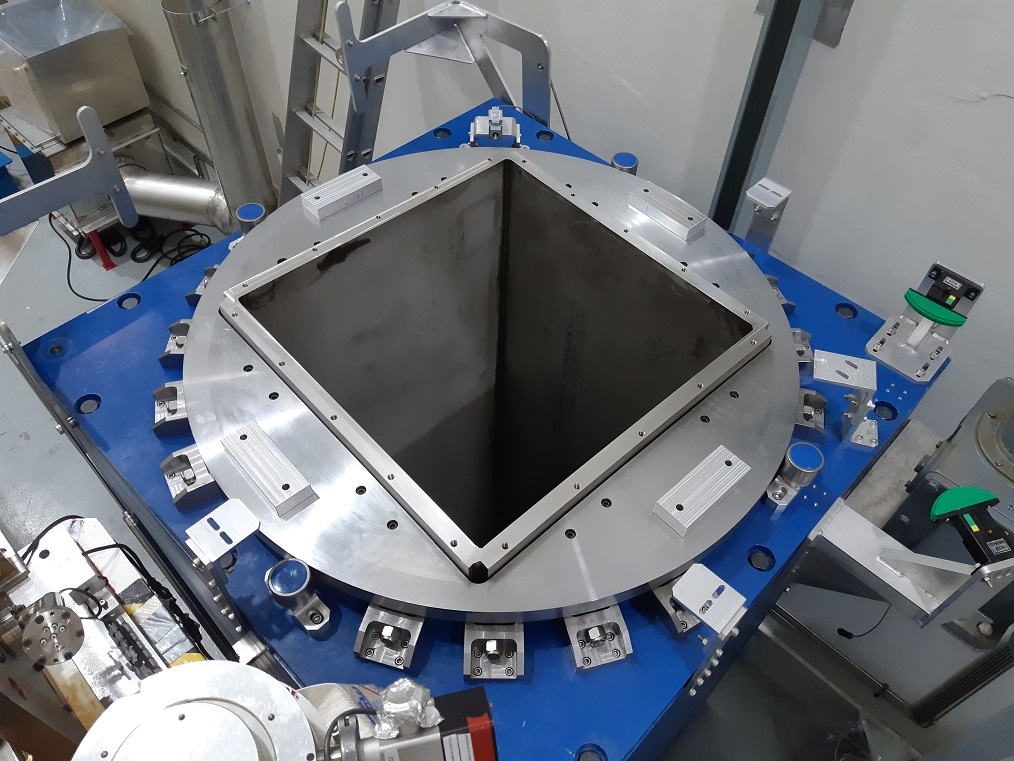
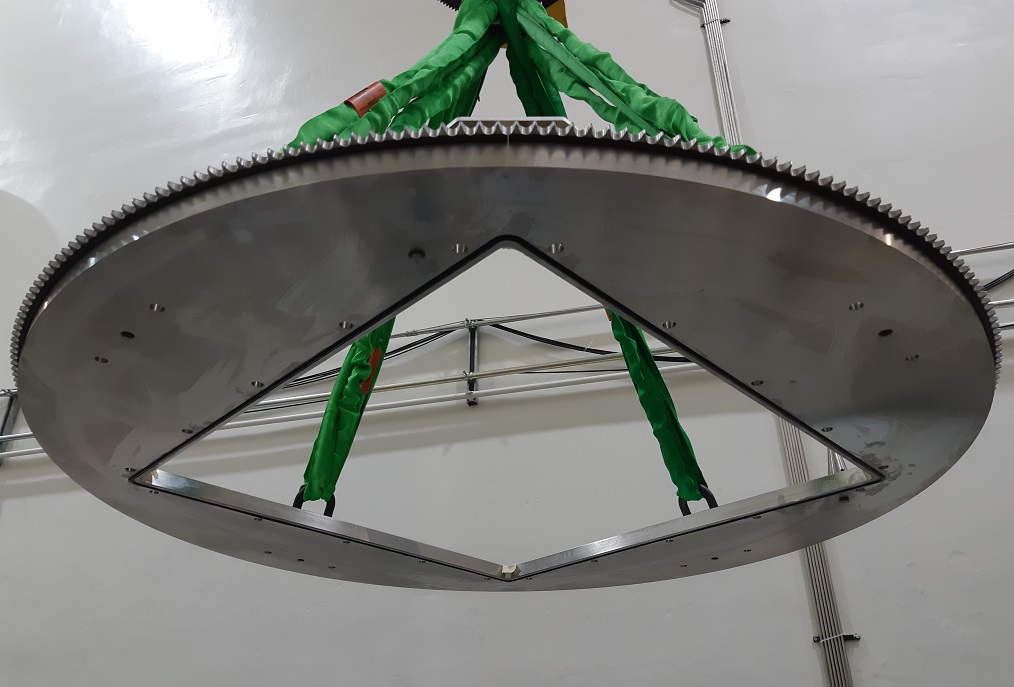
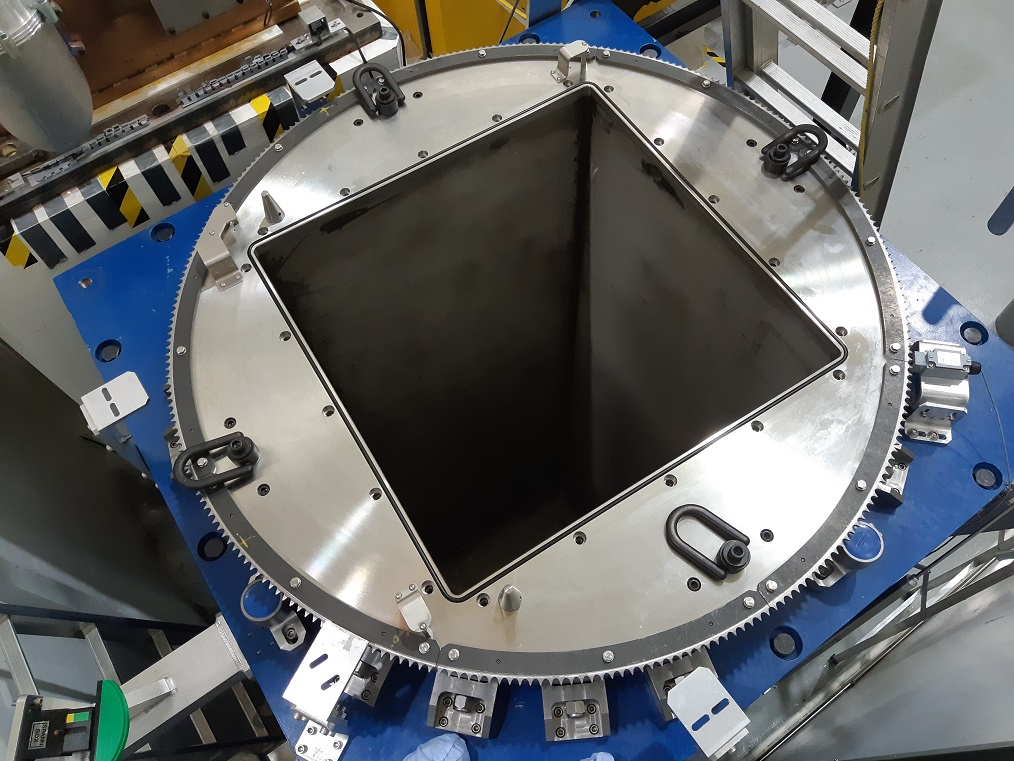
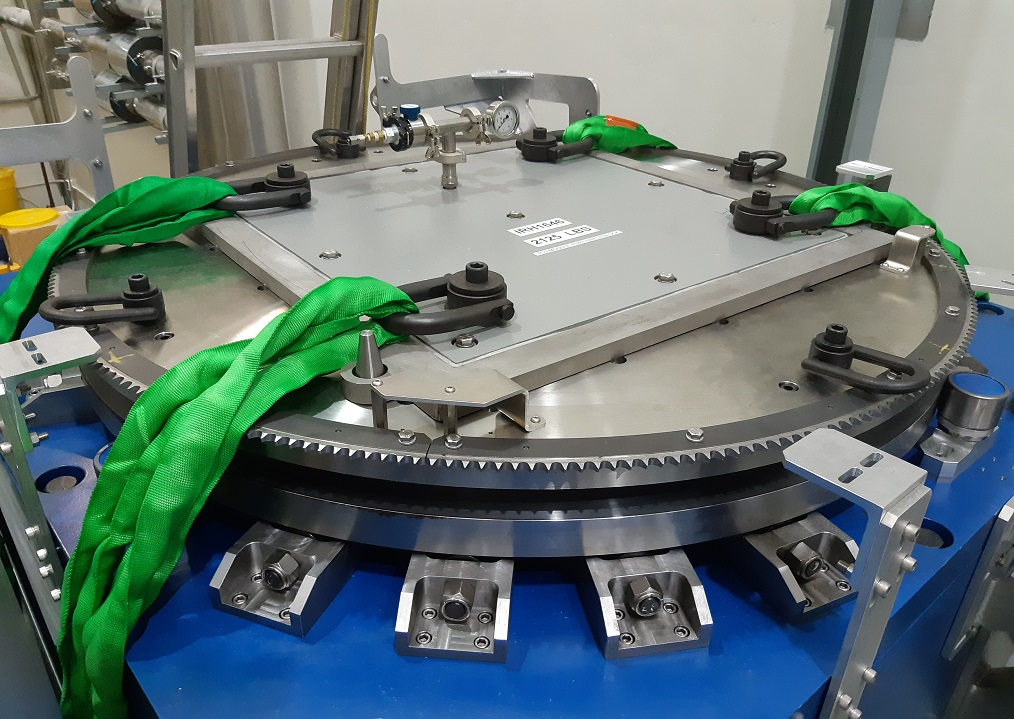
Wednesday, May 15, 2019, 16:06, Isaac Earle, Safe Module Parking, Development, , , SMP module support flange installed and leak checked
|
The SMP module support flange sub-assembly (IRH1755) was installed today according to drawing IRH1683. Dow Corning 111 sealing compound was used to keep the o-ring adhered to the lower groove during transportation and installation. The TCS shield plug (IRH1646) was then installed on the SMP module flange which has vacuum connections for leak checking. Vacuum was pulled on the SMP vessel using the Varian 979 leak detector. After approximately 3.5 hours of pumping the test port pressure was at 2.4E-2 Torr and leak rate was 7.9E-8atm*cc/s. Helium was configured with the regulator set at 10psi and flow rate of >10 bubbles per second in Windex and then applied slowly around the perimeter of the vacuum flange (IRH1686) and it's mating components on both the top and the bottom. There was no response on the leak detector indicating the seals on both sides of the module flange are leak tight.
|
|